SCIM (System for Cross-domain Identity Management) allows automated creation, updation, deactivation and reactivation of HappyFox agents based on assignments in Okta.
Available Plans: Enterprise Pro and Ultimate
Precondition: You must complete and enable the SAML-based Single Sign-On (SSO) setup for your HappyFox account via Okta before configuring SCIM provisioning.
Key Behavior Notes
- SCIM provisioning is a one-way sync from Okta to HappyFox.
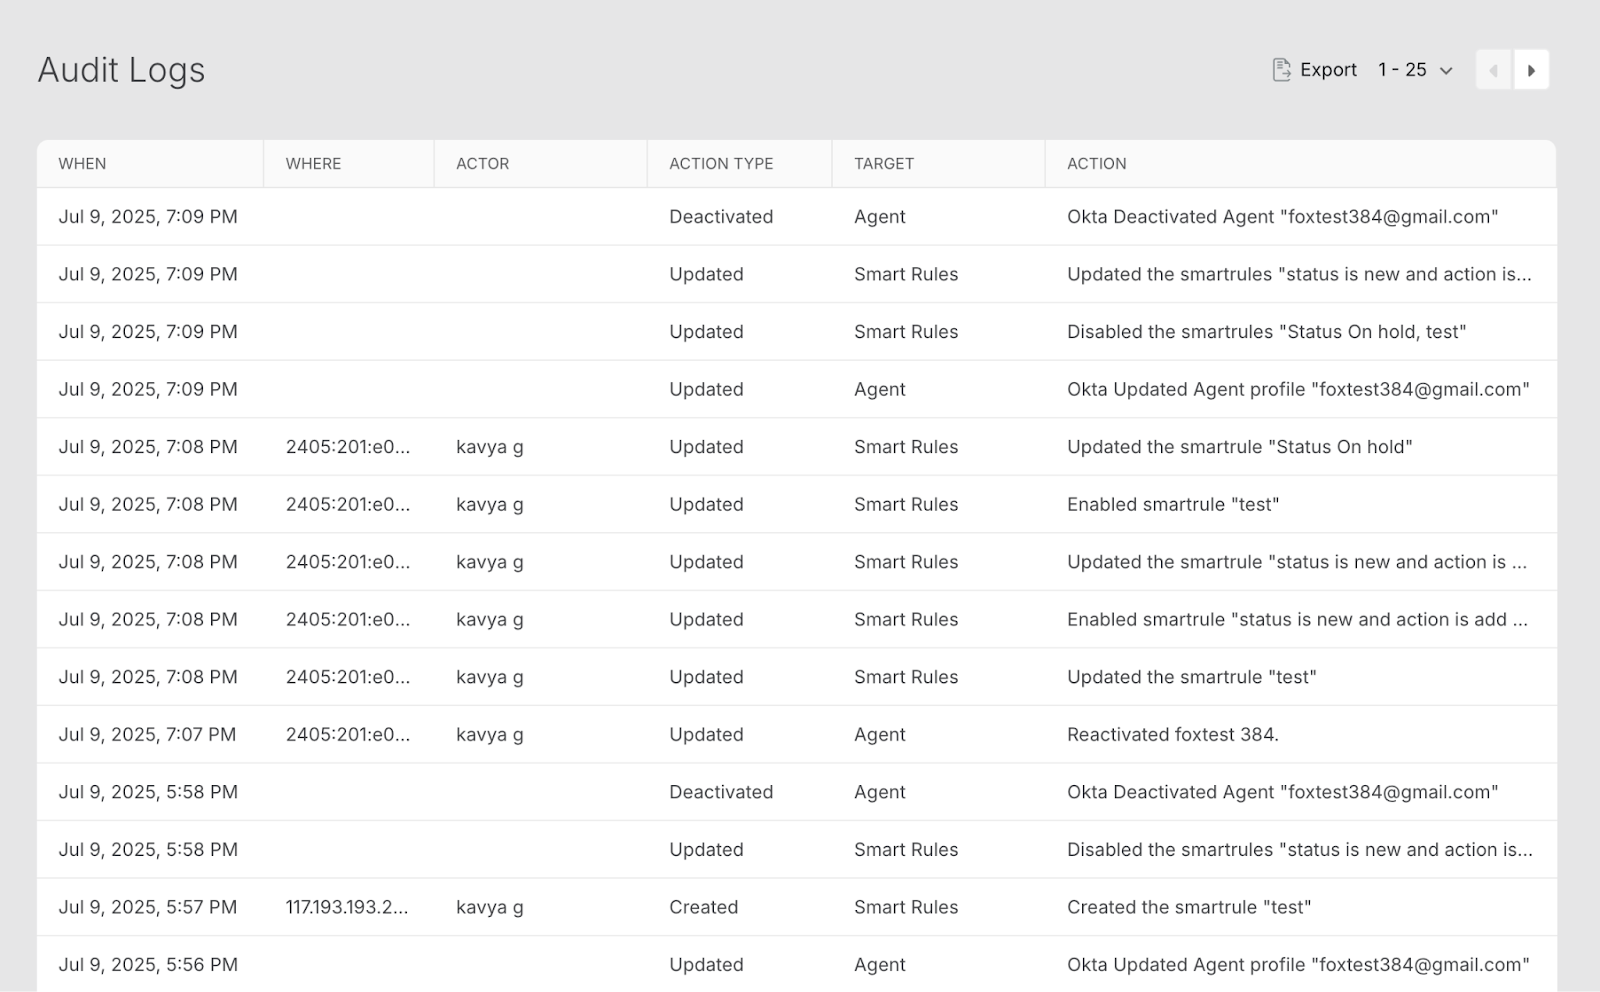
- All create, update, deactivate and reactivate agent operations are logged in your helpdesk’s advanced audit logs.
Retrieve SCIM Configuration Details from HappyFox
- Log in to the HappyFox Agent Portal.
- Navigate to Apps > SSO > Okta.
- Under the SCIM Provisioning section, copy the following:
- SCIM Base URL
- SCIM Access Token (Bearer Token)
- SCIM Base URL
- Enable SCIM Provisioning by clicking “ON” the toggle and then clicking on “Save”.
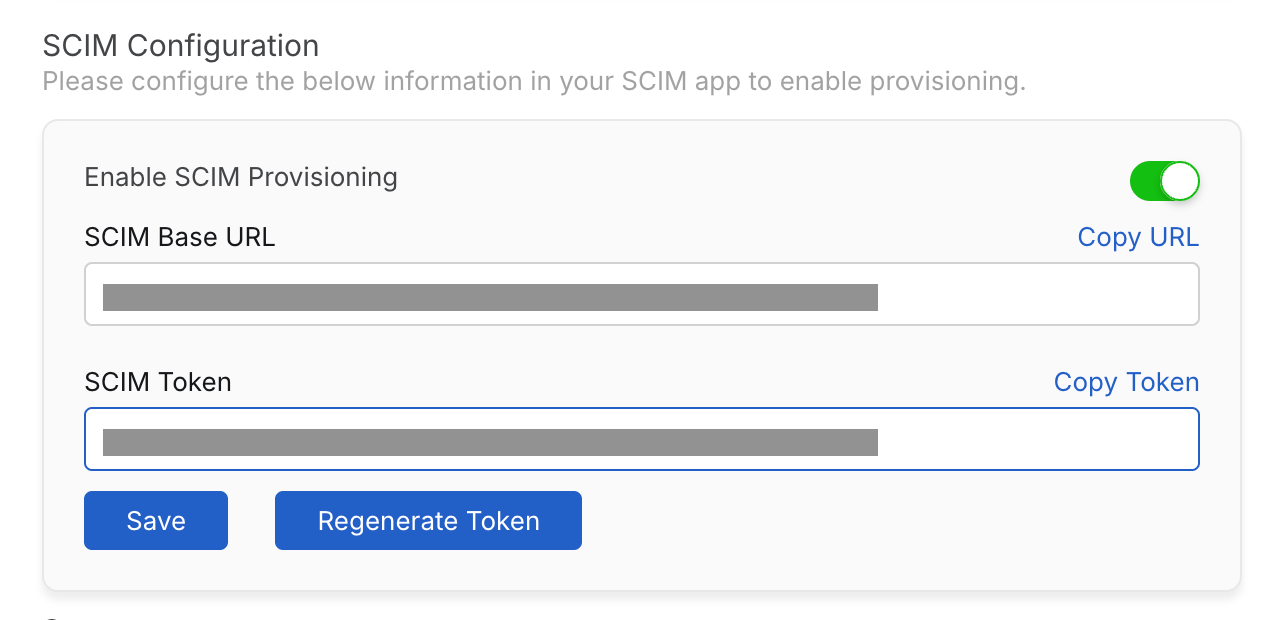
You will use these values when configuring the custom Okta app.
SCIM Setup in a Custom Okta Application
Step 1: Create SAML 2.0 Custom App
- Go to Okta Admin Console > Applications .
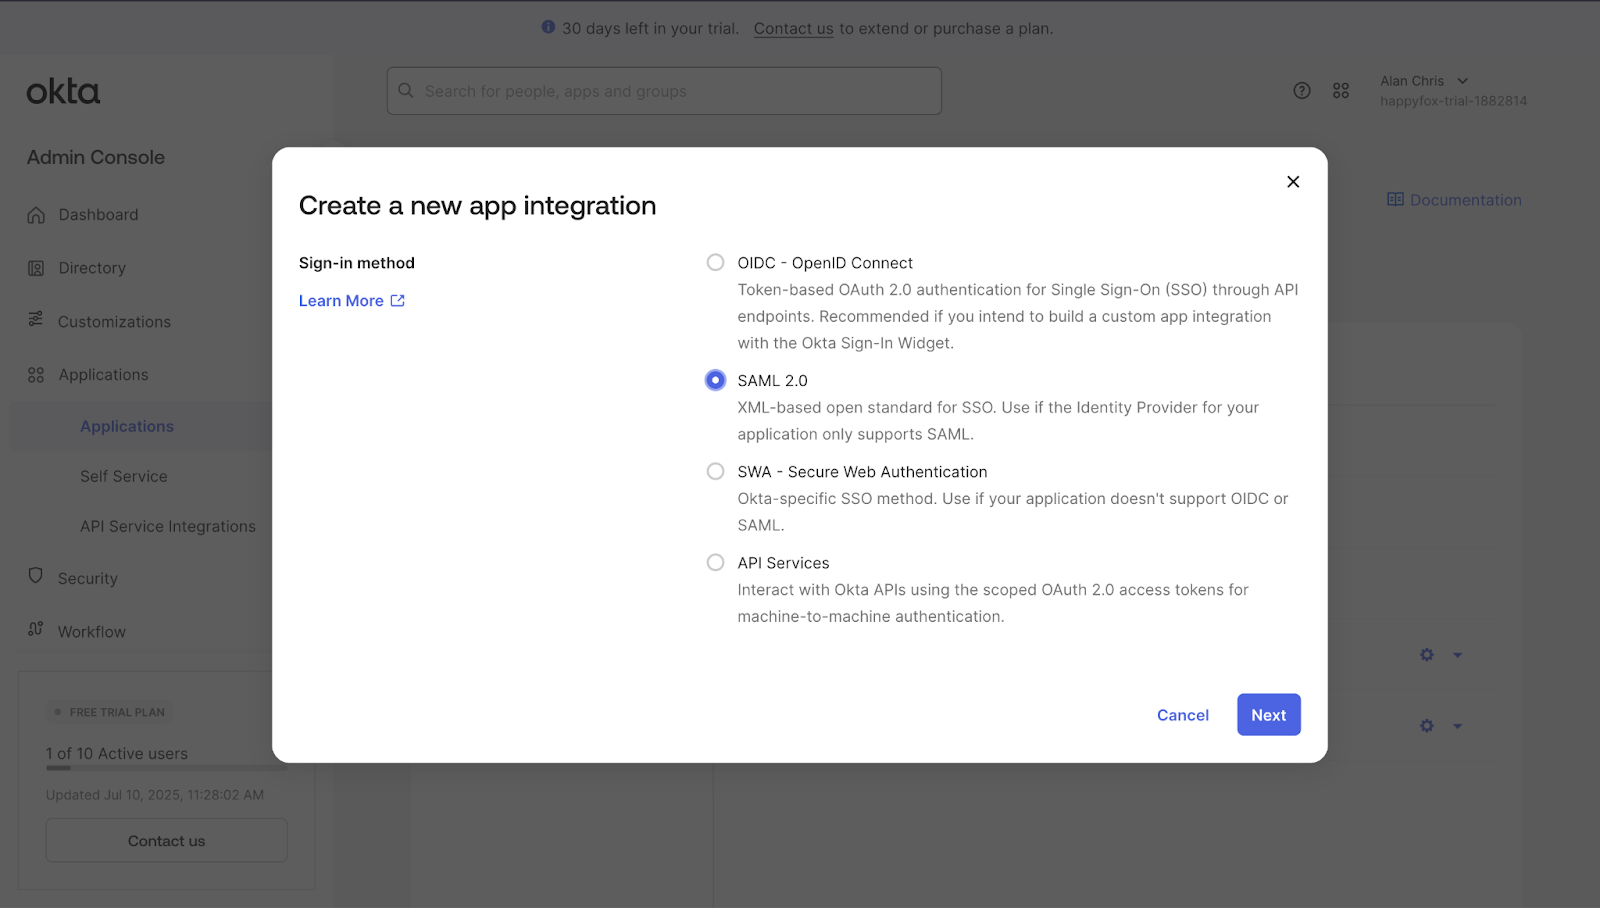
- Click Create App Integration.
- Choose:
- Sign-in method: SAML 2.0
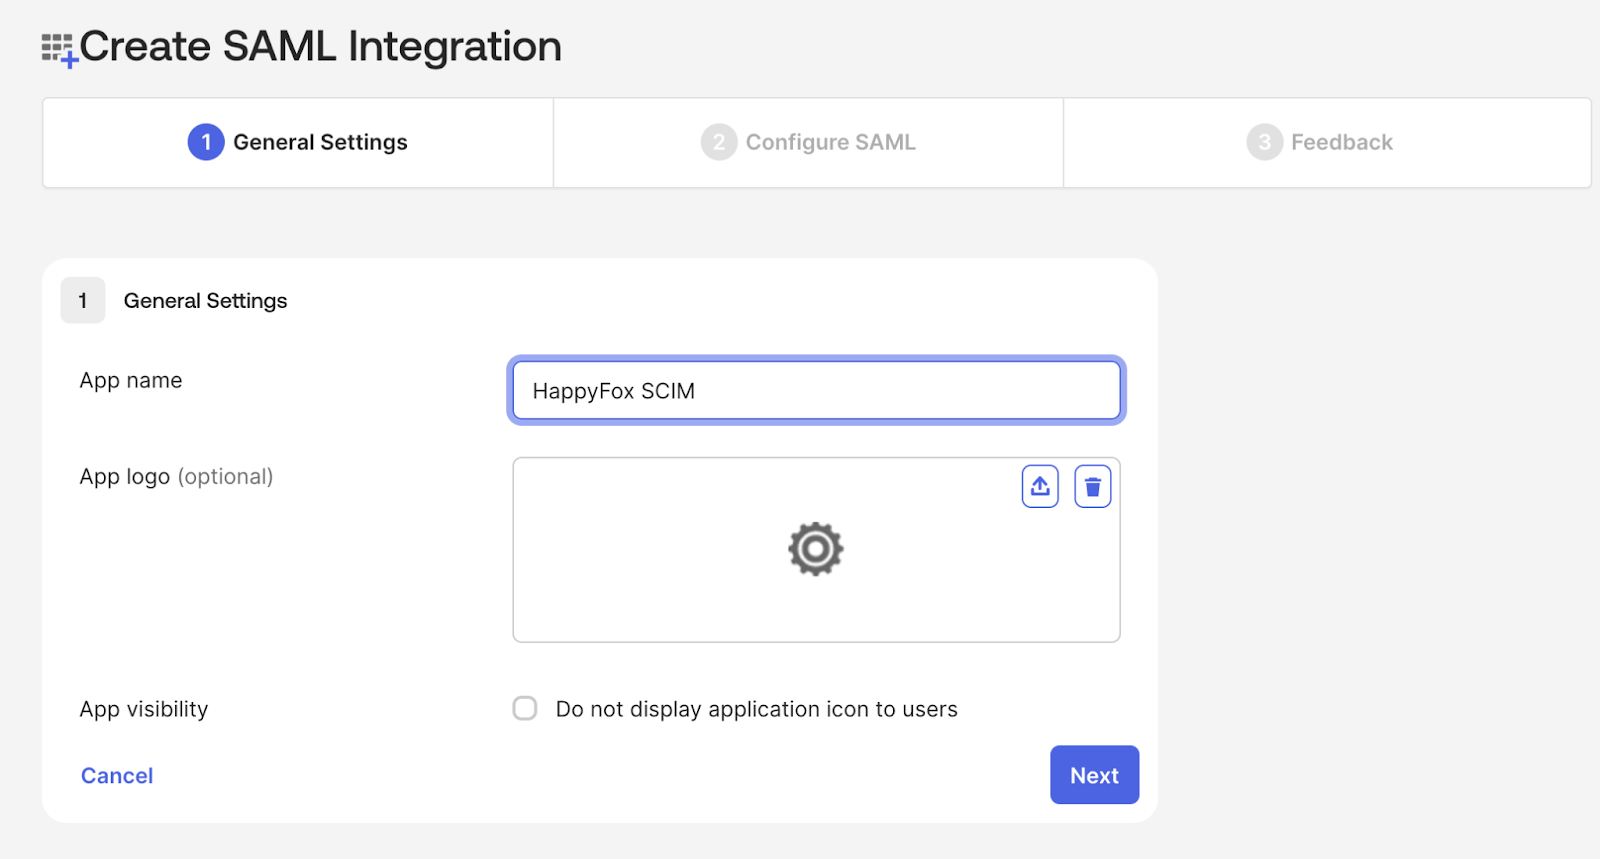
- Within General settings, name your custom app and click “Next” to proceed to the “Configure SAML” tab.
- Since you will have already pre-configured OKTA SAML with the Happyfox Market place app, please enter a placeholder value (e.g., https://acme.happyfox.com) in both the Single Sign-On URL and Audience URI (SP Entity ID) fields to proceed further.
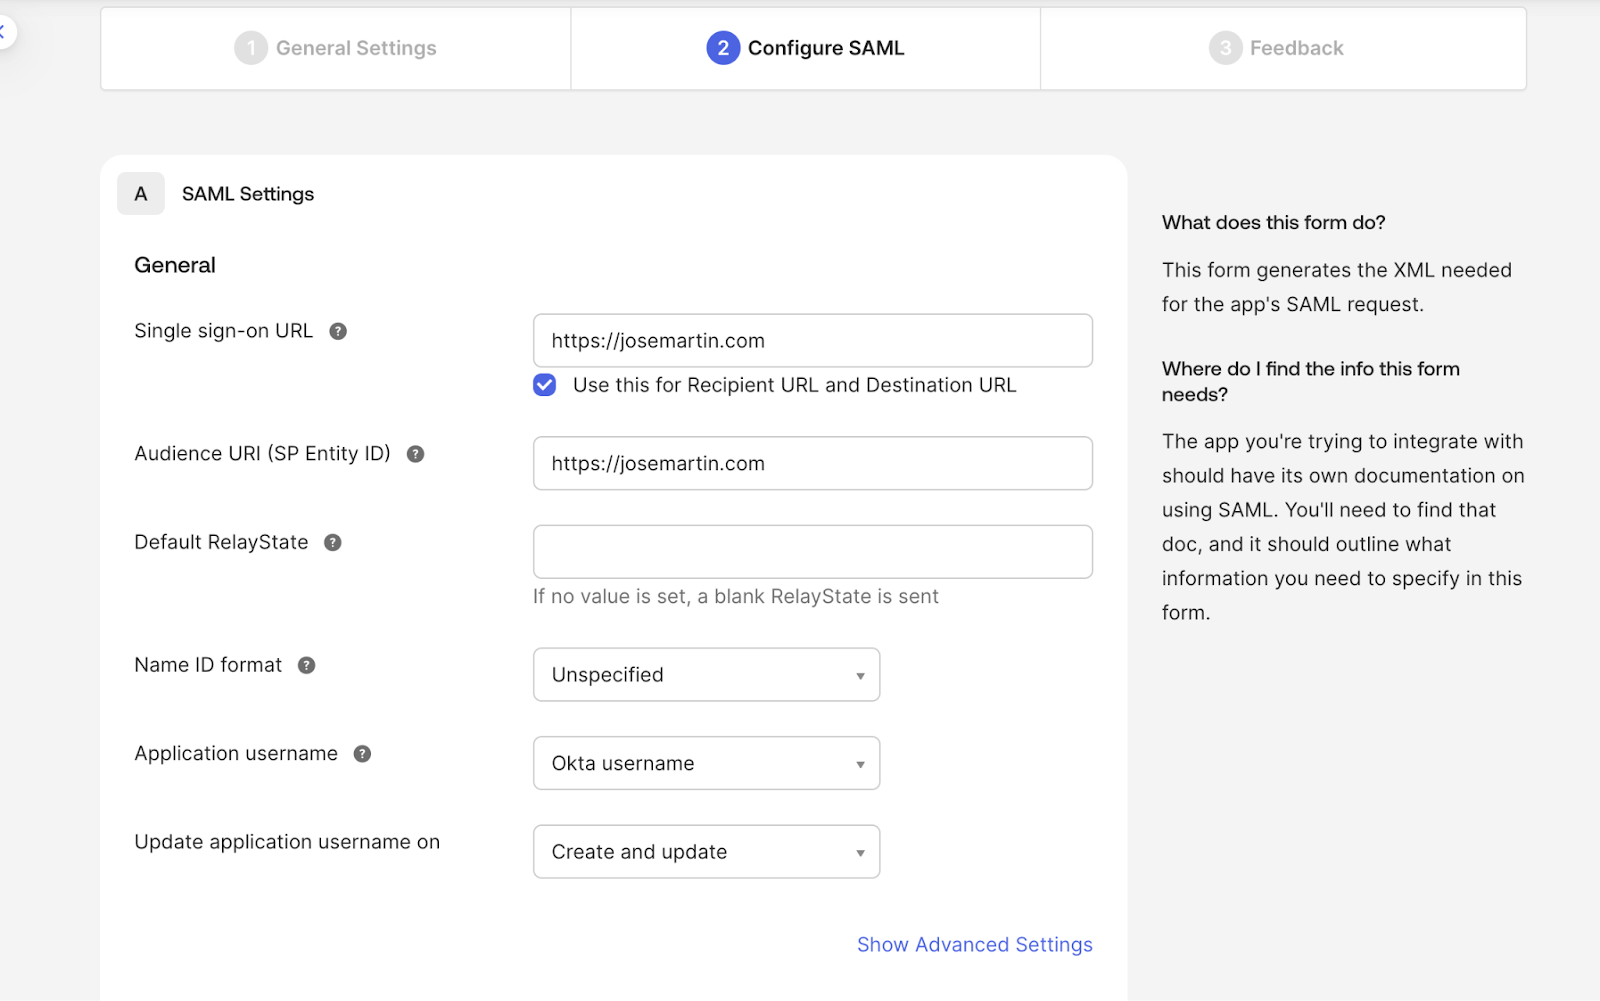
- Click “Finish” within the feedback tab without filling any fields.
Step 2: Enable SCIM in App Settings
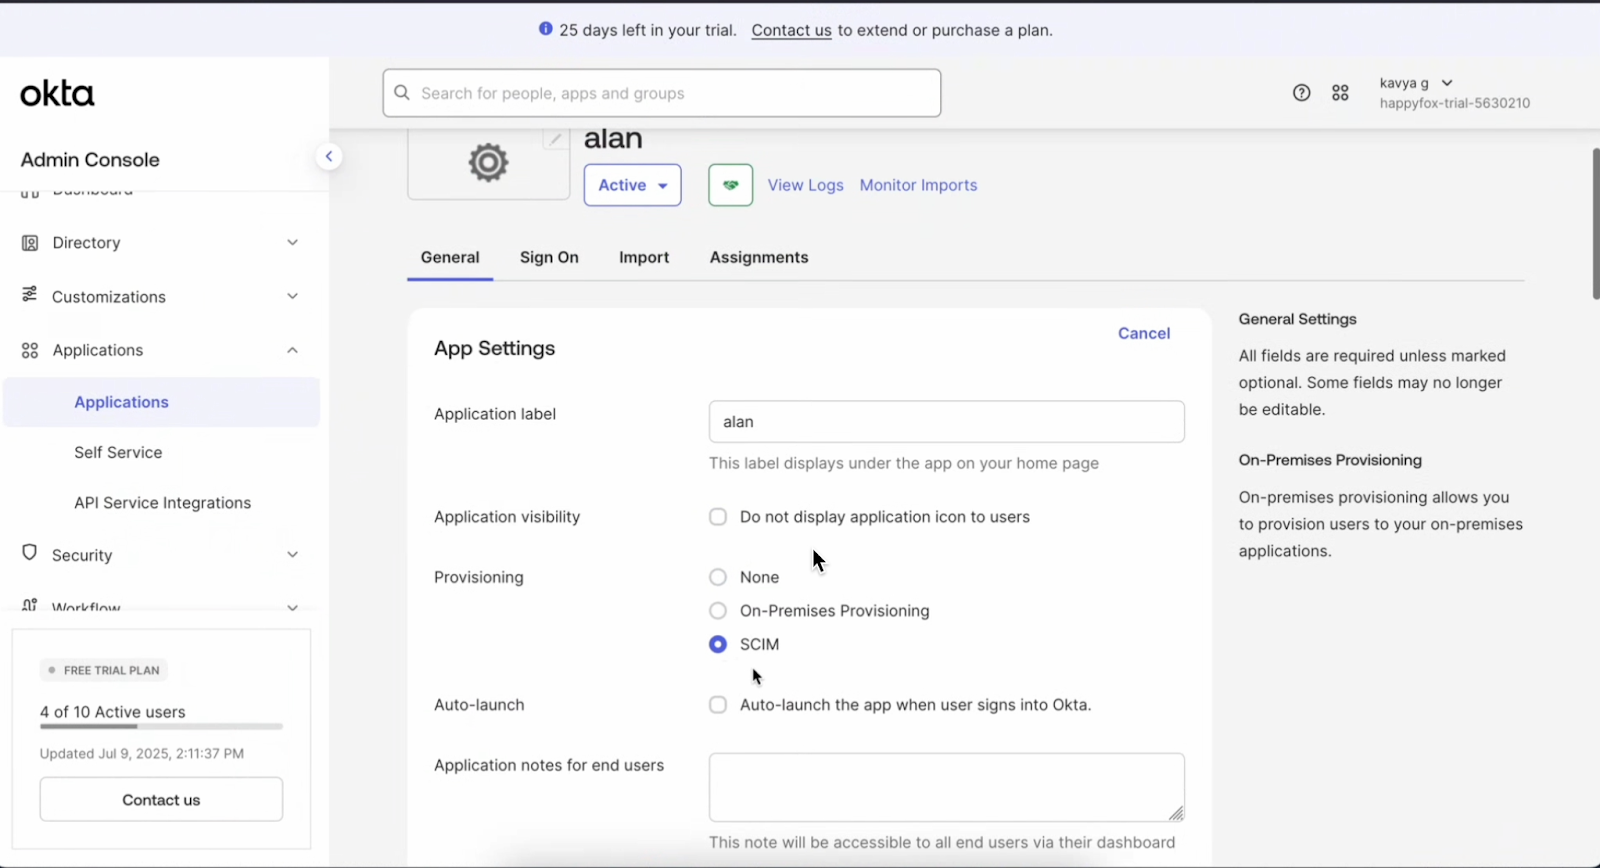
- In the Okta app, go to General > App Settings.
- Under Provisioning, select SCIM.
- Click Save.
Step 3: Configure SCIM Connector
- Go to the Provisioning tab.
- Set the following:
- SCIM Version: 2.0
- SCIM Connector Base URL: Paste the value from HappyFox
- Unique Identifier for Users: userName
- Authentication Mode: HTTP Header
- HTTP Header - Authorization: Bearer <paste your SCIM token from HappyFox HD>
- SCIM Version: 2.0
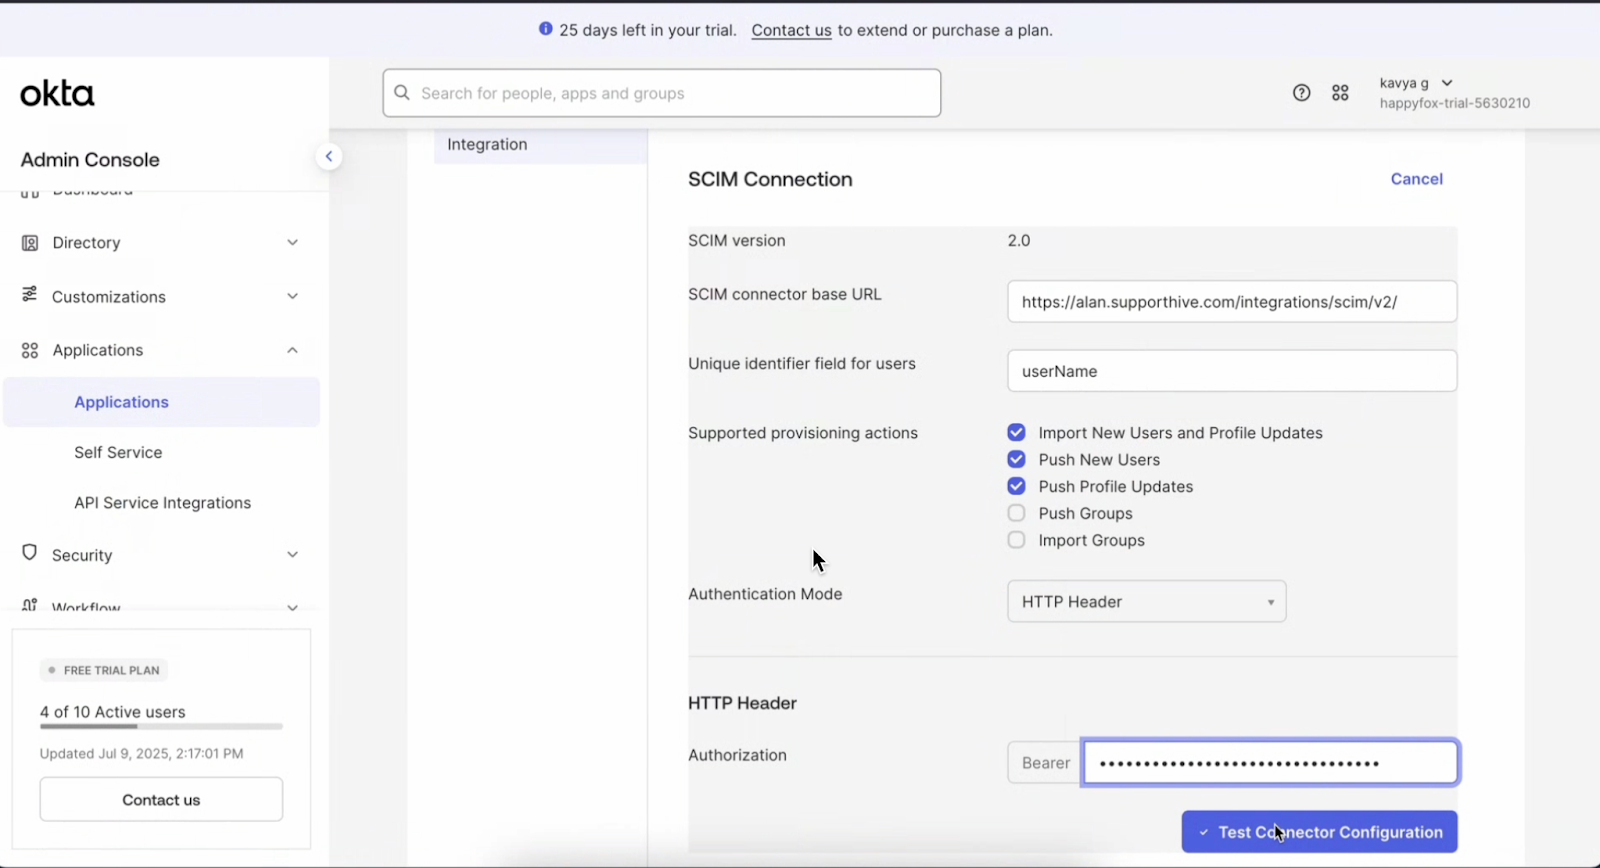
- Enable the following provisioning actions:
- Import New Users and Profile Updates
- Push New Users
- Push Profile Updates
- Import New Users and Profile Updates
- Click Test Connector Configuration.
If the test is successful, Okta will refresh the app to show the Provisioning to App section.
Note: If the test is unsuccessful, please ensure that SCIM configuration toggle is enabled and saved in the Helpdesk Okta App Manage page
Step 4: Enable SCIM Actions
- Go to Provisioning > To App.
- Click Edit.
- Enable:
- Create Users
- Update User Attributes
- Deactivate Users
- Create Users
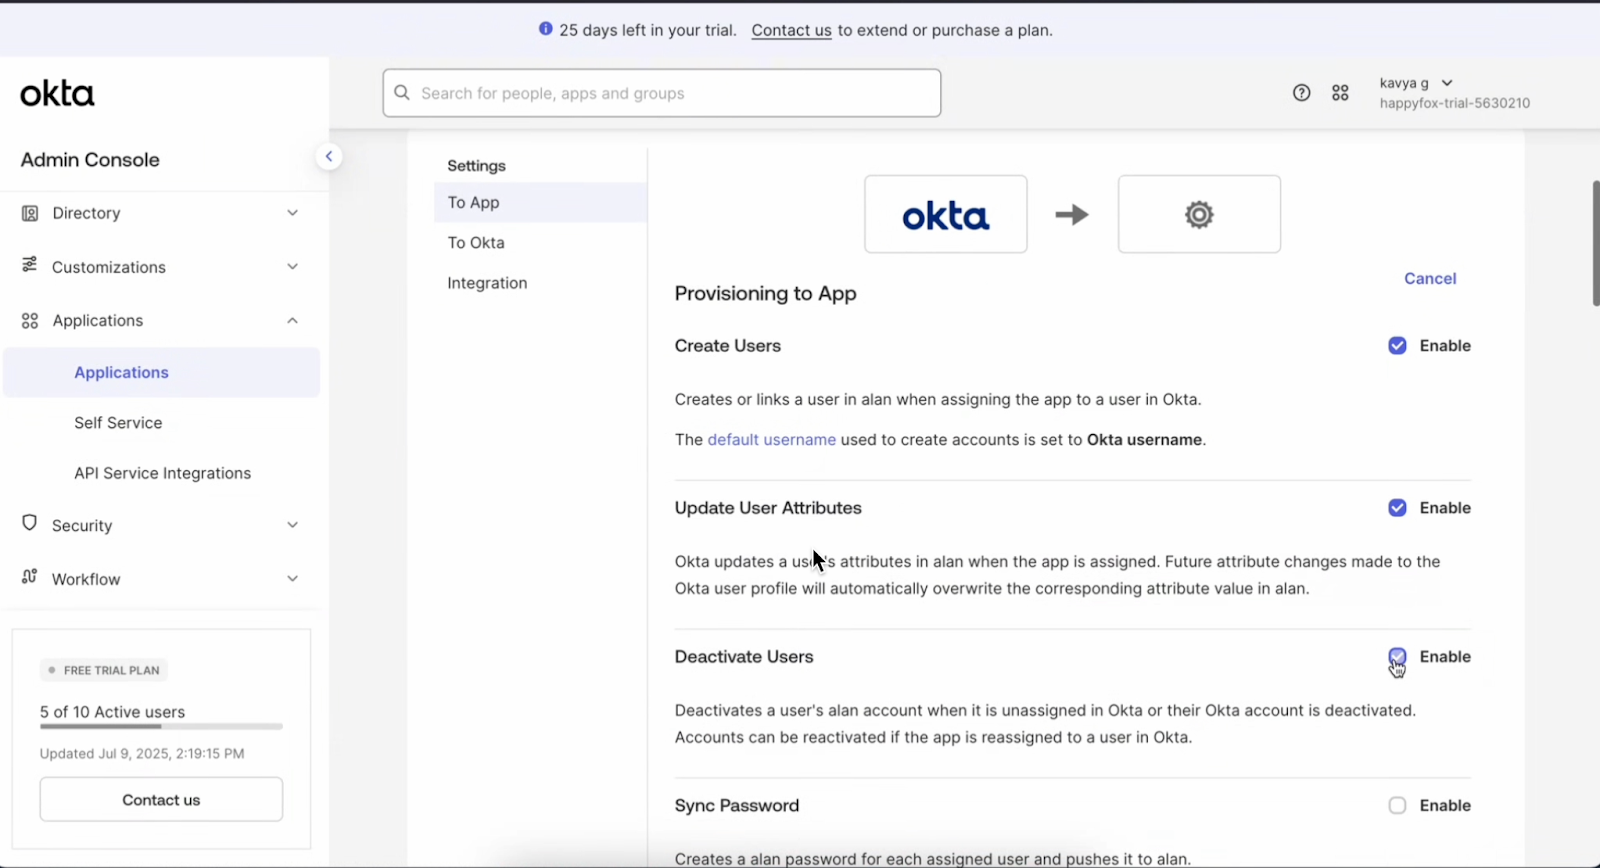
- Click Save.
Agent Creation Flow
- To create a new agent navigate to the “Assignment tab” in Okta, click on “Assign” and select “Assign to People.”
- Add the desired agents.
- These agents will be listed under Manage > Agent > Pending > SSO agent in your HappyFox Helpdesk.
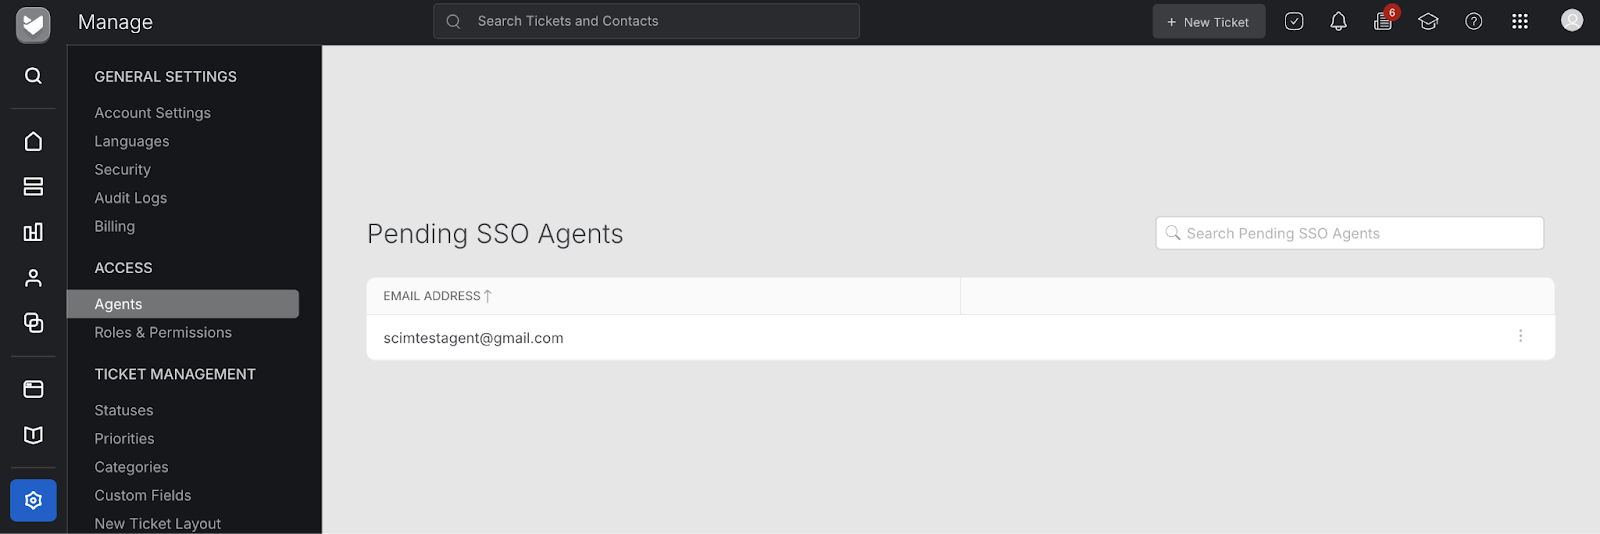
- To activate the agent, click on the three-dot menu beside the agent and select “Activate.”
Note: The numbers of Agents that can be activated via SCIM is subject to the number of purchased agent licences.
Agent Updation Flow
- First name and last name changes made in the Okta Directory or App Directory are reflected in HappyFox.
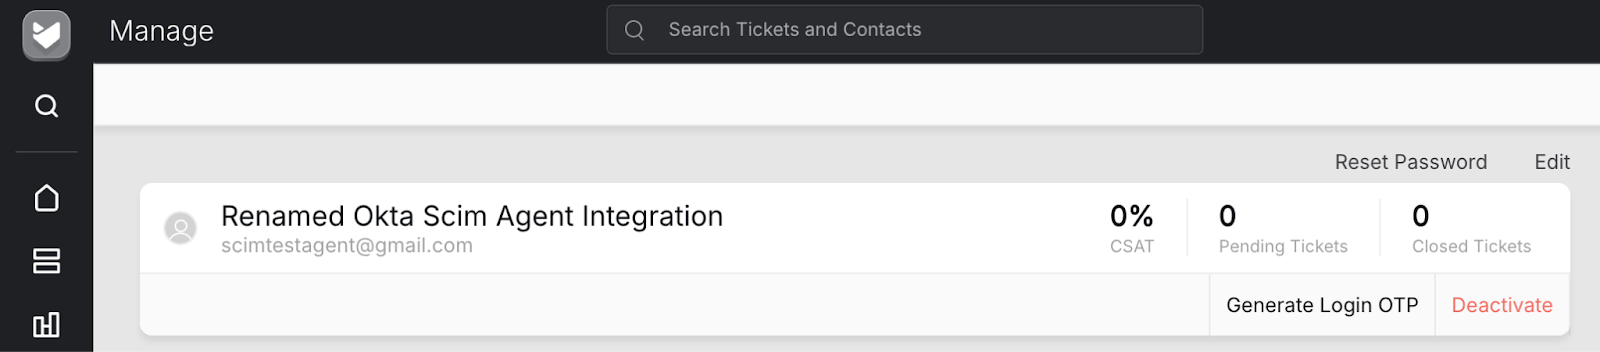
- We strongly recommend that you make email changes from the Okta Directory.
- Agents with updated emails will receive an email update notification to their previous email.
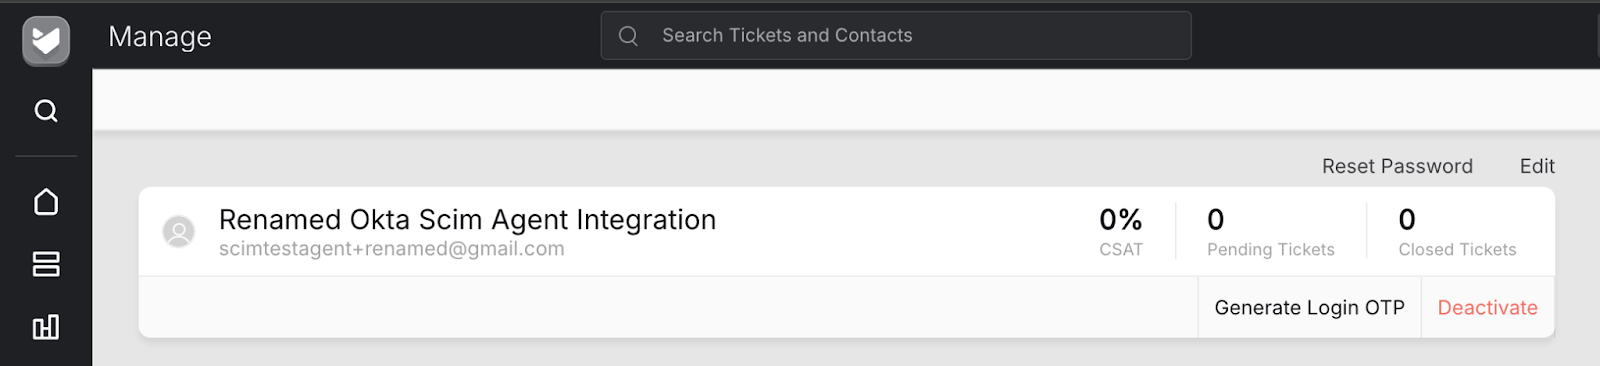
Note: If an Okta admin changes an agent's email from the assignment tab of the custom app, Okta treats it as a new user, deactivates the old account, and creates a new one with the updated email.
Agent Deactivation Flow
When a user is unassigned from the Okta custom app, the corresponding agent will be deactivated.
What happens when the agent is deactivated:
- The agent cannot login to HappyFox Helpdesk
- Modules (Canned actions, Reports, filters, Queues) created and specific only to a deactivated agent will be deleted.
- All Tickets, Ticket templates, Task templates, and Canned Actions assigned to a deactivated agent become ‘unassigned’.
- Smart rules like Set Subscriber where the agent is the singular subscriber and like Set Assignee will be disabled.
- In ‘Set Subscriber’ smart rules with multiple subscribers, the deactivated agent will simply be removed.
Agent Reactivation Flow
Agents deactivated via the Okta custom app by unassignment can be reactivated by reassigning them again.
Any changes done via deactivation will not be reverted on reactivation.
Note: Agents deactivated in HappyFox cannot be reactivated through Okta.
Audit Logs
All SCIM-driven actions (create, update, deactivate, reactivate) are captured in the HappyFox audit log, providing full traceability for admin operations.