Share a single Knowledge Base article across brands using the Shared Sections option during article creation or while editing. This lets you maintain one source of truth while making the article appear in your other brand knowledgebases.
Applicable Plans: ✔ Pro ✔ Enterprise Pro & ✔ All Unlimited agents plan
How to share an article
- Open the article settings of an article you wish to create or Edit.
- Locate the Shared Sections field.
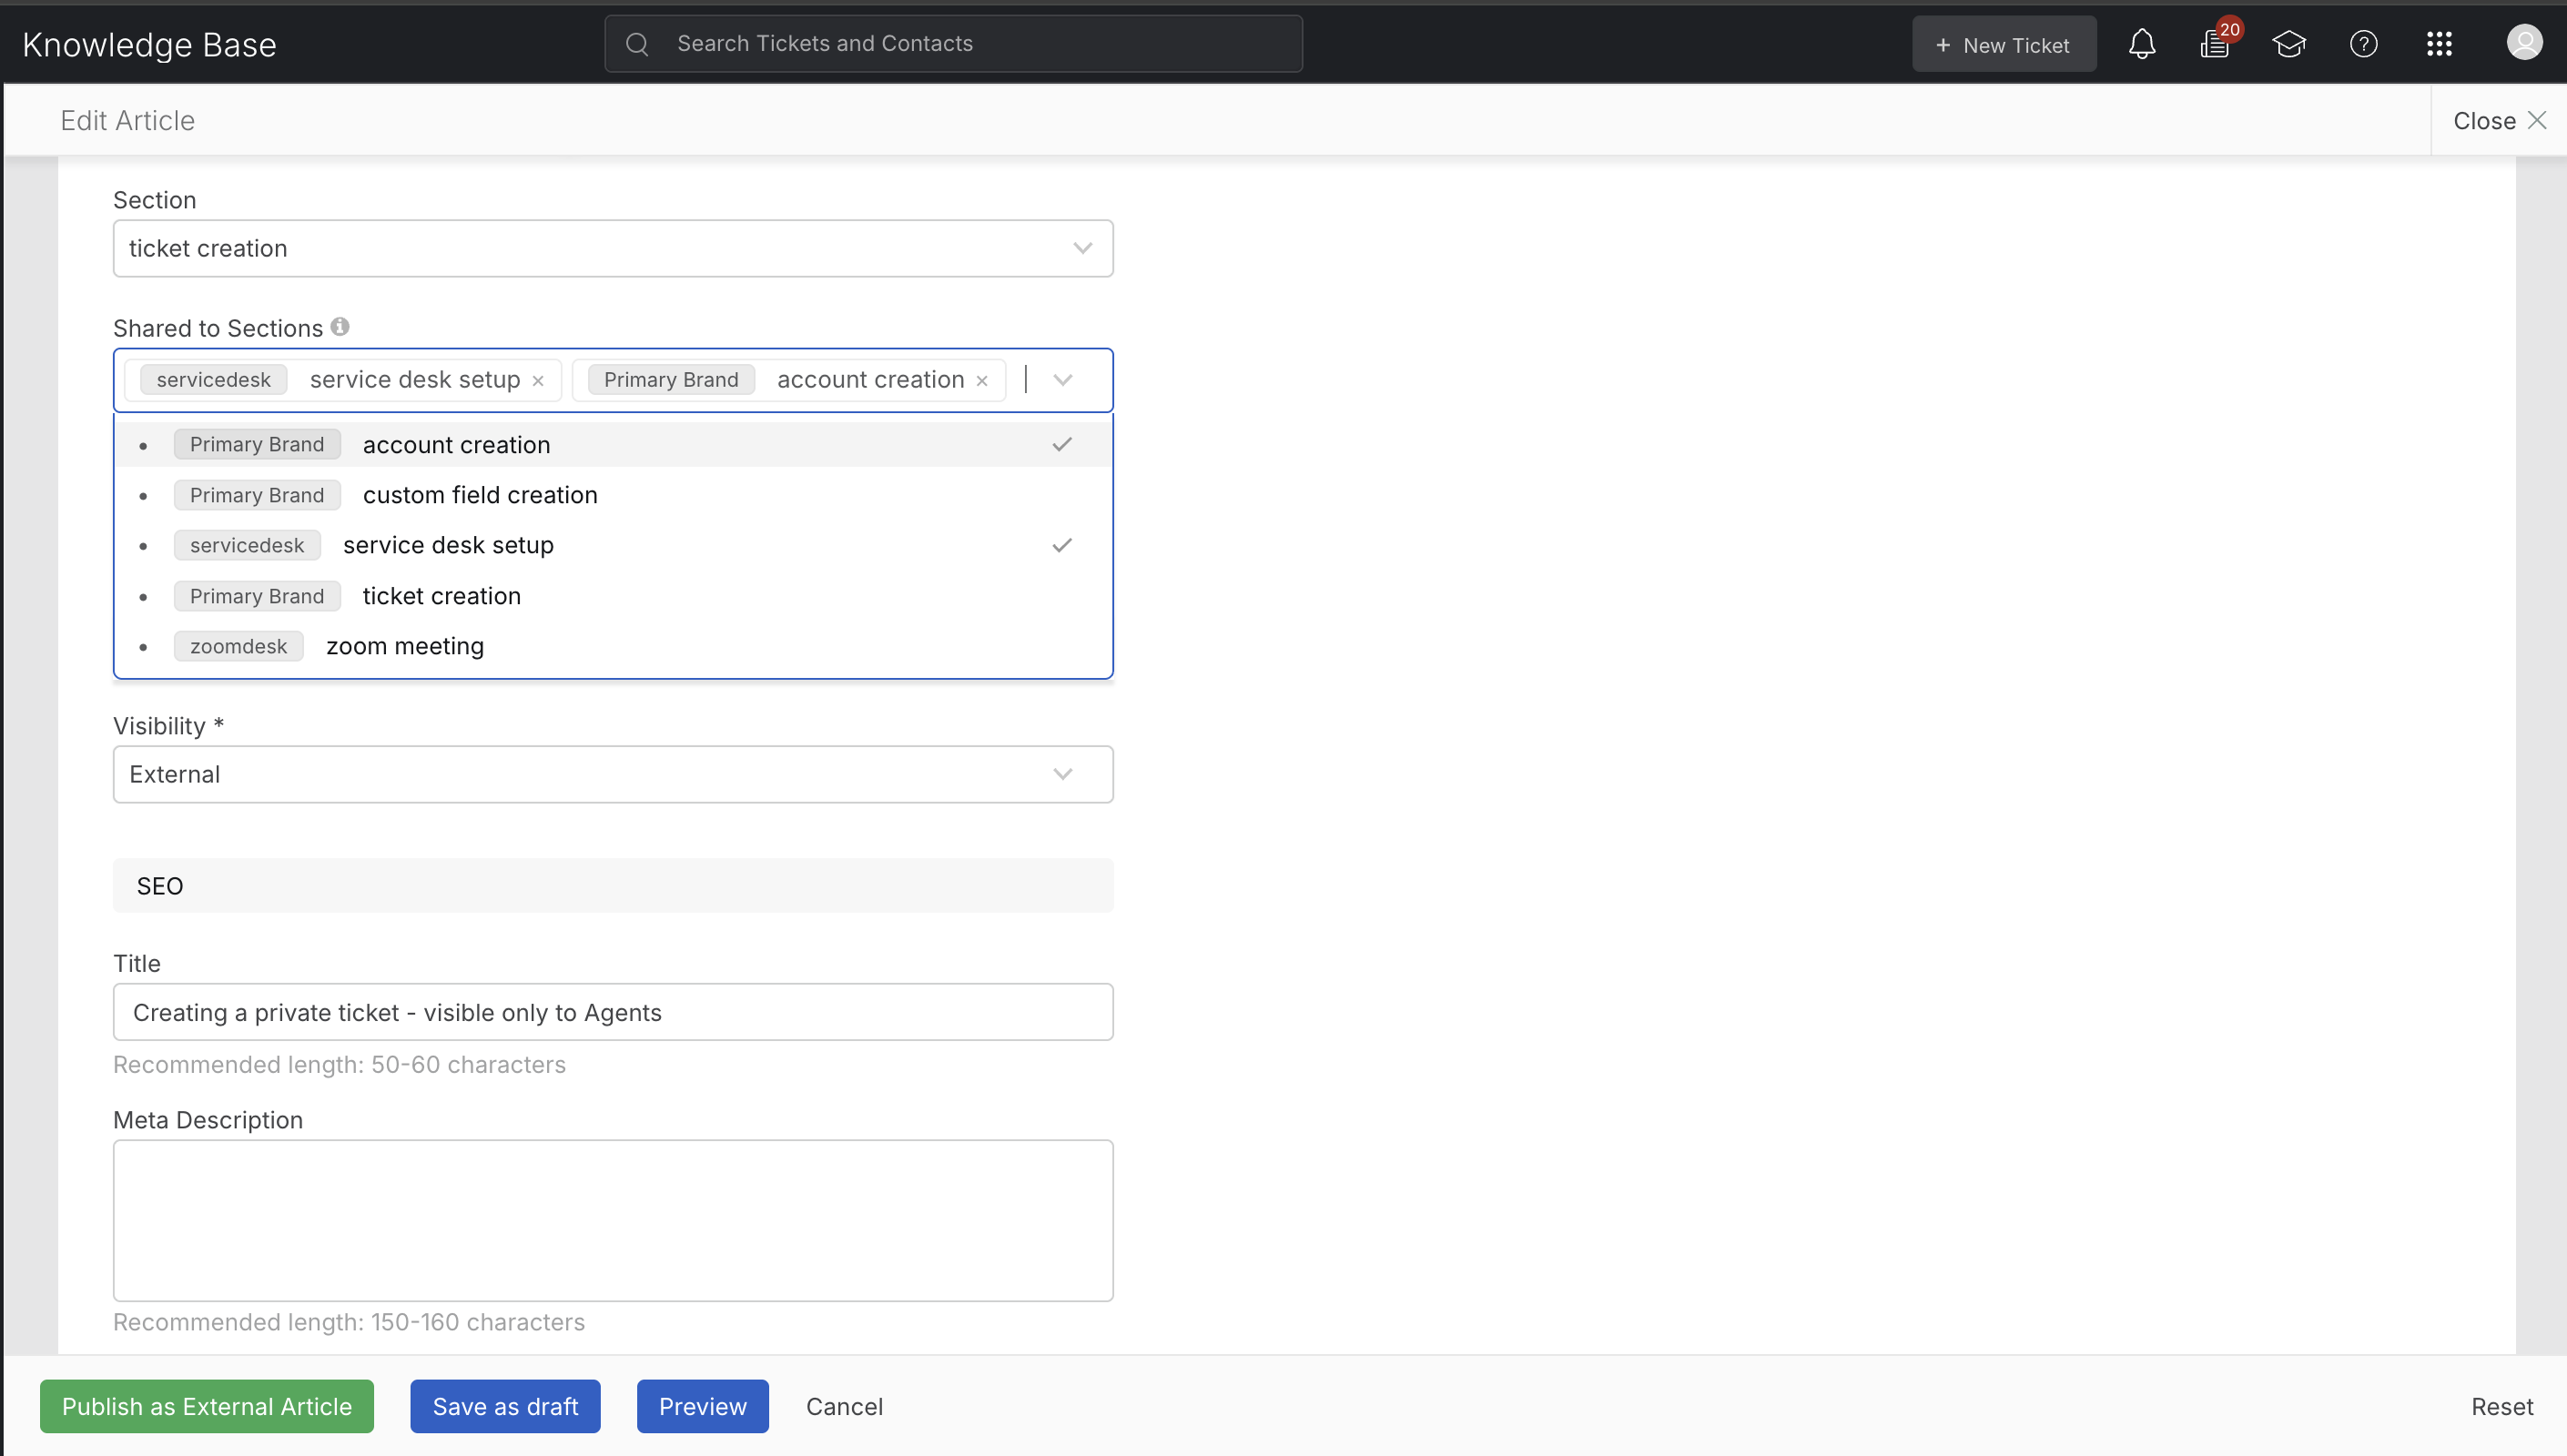
- Select one or more Sections to share the article with.
Note: Internal articles cannot be shared across brands as they are not visible unto contacts
- Click Save or Publish.
Behavior after saving:
- The article immediately appears in all selected Shared Sections as well as in its original Section.
- Any edits you make in the article (while editing from its original Section) are reflected across all Shared Sections.
How shared articles appear in the Support Center
- The same article appears in the article lists of every Shared Section.
- Breadcrumbs
- If a visitor navigates to the article from a Section page, the breadcrumb shows that Section.
- If the article is opened directly by URL, the breadcrumb uses the first linked Section for that brand.
- If a visitor navigates to the article from a Section page, the breadcrumb shows that Section.
- URL
- The article retains a single URL - it is not duplicated. The system routes by brand context where necessary.
- The article retains a single URL - it is not duplicated. The system routes by brand context where necessary.
- Search
- The article appears in search results for all associated Sections/brands.
- The article appears in search results for all associated Sections/brands.
Managing shared articles
Add or remove Shared Sections (Unshare)
- Open the article in Edit mode.
- In the Shared Sections multiselect, add or deselect Sections as needed.
- Save or publish.
- Deselecting a Section removes the article from that Section only; it remains in other Sections where shared.
- If a Shared Section is deleted, the article stops appearing in that Section (no message is shown).
- If the original Section is deleted, the article and its shared placements are removed.
Permissions
- Only agents who have permission to edit the article (i.e., edit rights in the article’s original Section) can add or remove Shared Sections, publish, unpublish, or delete the article.
Other Behavior
- Currently, shared articles are not read by HappyFox AI and Chatbot.
- During translation, only the article’s primary Section is prompted for translation. Each Shared Section must be translated manually for the article to appear in that Section in the translated language.
- If notifications are enabled for article creation or editing, one notification email is sent per associated Section (original Section and each Shared Section).
- When a Section is deleted or moved, articles native to that Section are moved to the new Section. Shared relationships are preserved. Articles shared to the deleted/moved Section are not moved and simply stop appearing in that Section.
Frequently Asked Questions
Q: What is the difference between “Section” and “Shared Sections”?
A: Section is the original location where the article is created and managed. Shared Sections are additional locations where the same article is shown; they’re selected via the Share to Sections multiselect.
Q: If I edit the article, do I need to update each Shared Section?
A: No. Edits made to the article in its original Section are automatically reflected in all Shared Sections.
Q: Is a separate URL created for each Shared Section?
A: No. The article has one URL that displays correctly across brands.
Q: What happens if I delete a Shared Section?
A: The article simply stops appearing in that Section.
Q: What happens if the original Section is deleted?
A: The article and all its shared placements are removed.