 18383
18383
HappyFox allows you to create or update assets using csv files containing asset fields and their corresponding values. This article covers the general guidelines on importing assets.
Available in Enterprise and above pricing plan.
First Time Import Checklist:
A managerial permission "Manage Import Assets" governs the visibility of "Asset Import" page. Contact your helpdesk admin to enable this.
Make sure you have your desired asset custom fields created beforehand. Learn more about Asset Custom Fields here.
Cross-verify the list of dropdown and multi-choice asset field values with the ones in the records you plan to import.
Make your import file ready:
HappyFox supports importing assets from .csv file format.
-
You can import only one csv at a time.
- The first row of the csv file should contain the asset fields. They can be in any order.
- The asset fields are case-sensitive - please ensure fields in the csv file are an exact match with the ones on HappyFox.
- Mandatory Fields:
- By default, "NAME" and "DISPLAY ID" are mandatory. Make sure your csv has this column.
- DISPLAY ID acts as the "primary key" for your assets. Ensure it is unique for each record.
- The subsequent rows should contain the value for the respective asset fields. To avoid errors while import, ensure all your required asset fields have their values defined in the csv file.
- Here's a sample csv file which is import ready. The first row is highlighted for reference.

Formatting guidelines:
- For Multi-Choice asset fields, ensure the field values are comma separated (If need be).
- For Date asset fields, ensure they are in one of these formats:
- YYYY-MM-DD
- DD/MM/YYYY
- DD [Jan-Dec] YYYY
Link assets to contacts during asset import
-
You can include a column called contacts similar to name and display ID.
-
The contacts column should have the email id as the value.
- You can link one or more contacts(comma separated email ids) to an asset.
- If this column is left empty then no contact will be associated.
- Here is an example of a sample CSV:

Note: If the asset already exists, only the linking happens. If the contact doesn't exist already, a fresh contact is created and linked.
Importing your Assets into a specific Asset type
Follow the steps below,
-
Go to Assets > Assets Import from module switcher.
-
Select the Asset type to which you want to import the assets. Click here to learn more on Asset types
-
Click Choose file to upload.
- From the file browser, select the csv file you would like to import.
- Click Begin Import to initiate the import process.


Import Results with Error Report:
The Import Status gets refreshed for every 100 records during the import process.
-
Once the import is completed, you get the detailed import status along with the error report. You also have the option to download a CSV file with error comments appended at the end of each row for reference.

- An email with the import details link in the description will be sent to your email id once the import is done.

Common Questions:
Q) What happens if I abort my asset import?
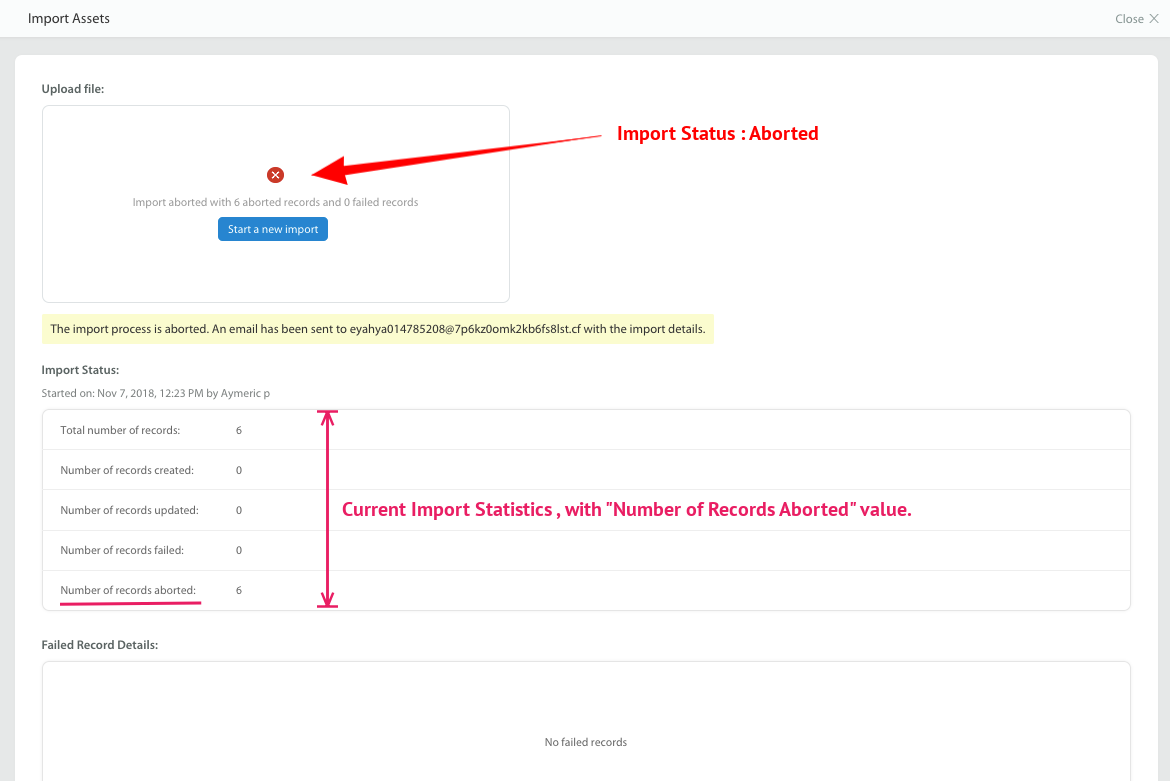
A: If you abort your ongoing import, all the records prior to the abort will get created/updated. The subsequent records post the abort will not get created or updated. An e-mail will be sent to your mail id with the link to the aborted import details.

A frequent user of HappyFox's Asset Management module 🤔? Try out our dedicated Asset Manager mobile app 🔥! Download on Play Store and App Store. Click here to know more on the asset manager app 📚.


