DMARC is the final DNS verification step for HappyFox Managed outgoing email. It tells receiving mail servers what to do if an email from your domain fails SPF or DKIM checks, protecting your domain from spoofing.
Applicable plans: All plans except Basic
What is DMARC?
DMARC (Domain-based Message Authentication, Reporting and Conformance) is a policy that tells receiving mail servers what to do if an email claiming to be from your domain fails SPF or DKIM checks. It protects your domain from spoofing and phishing. Learn more about DMARC
Unlike SPF and DKIM, HappyFox does not generate a DMARC record for you. It only checks whether your domain already has one. If you do not have one, you need to add it yourself.
Step 1: Check if your domain already has a DMARC record
A DMARC record is a TXT record stored at _dmarc.yourdomain.com. Use MXToolbox to check in seconds, no login required:
- Go to https://mxtoolbox.com/dmarc.aspx
- Enter your domain name (e.g.,
yourcompany.com, without the @ symbol or any prefix) - Click DMARC Lookup
Check your result: If a record is found, skip to Step 3. If no record is found, continue to Step 2.
Step 2: Add a DMARC record
- Log in to your DNS provider (the same one where you added the SPF and DKIM records).
- Create a new TXT record with these exact settings:
| Field | What to enter |
|---|---|
| Type | TXT |
| Name / Host | _dmarc |
| Value / Content | v=DMARC1; p=none; rua=mailto:[email protected] |
| TTL | 3600, or leave as Default if no TTL field is shown |
- Replace
[email protected]with a real email address where you want to receive DMARC failure reports. Your own work email is fine. - Save the record.
The record uses p=none (monitor-only mode): emails that fail checks are still delivered, and mail servers send aggregate reports to the rua address so you can spot any misconfiguration. This is the safe starting point for any domain new to DMARC.
Warning: Already have a DMARC record managed by your IT team? DNS only allows one DMARC record per domain. Do not create a second one. HappyFox only checks that a DMARC record exists. It does not require any specific policy value. Use the existing record as-is. Confirm with your IT team before making any changes to an existing DMARC record.
Once SPF, DKIM, and email delivery are all confirmed working, you can tighten the policy by changing p=none to p=quarantine (failing emails go to spam) or p=reject (failing emails blocked entirely). Only do this after verifying that everything works. Guide to DMARC policy levels
Step 3: Verify in HappyFox
DNS propagation can take up to 48 hours.
1. Go to Channels > Email > Email Addresses tab.
2. Under Configure Outgoing Email, select "Configure" for HappyFox Managed.
3. Open the DNS Verification section and expand Configure DMARC Policy.
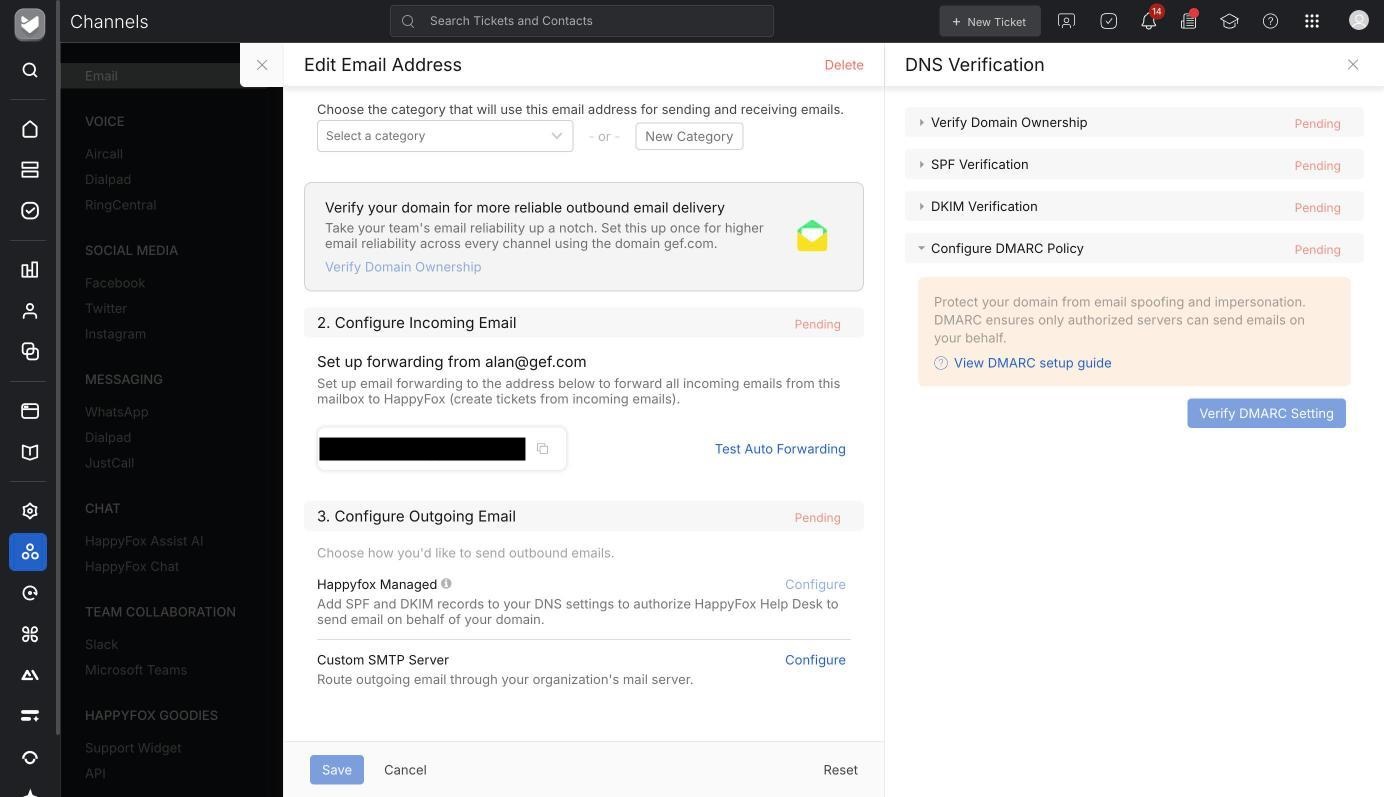
4. Click Verify DMARC Setting.
If it does not pass immediately, wait at least 30 minutes and try again.
DMARC verified? Setup is complete. All three DNS verification steps are complete. Your email channel is fully configured for HappyFox Managed outgoing email. Replies sent from HappyFox will appear to come from your own domain address.