Set up HappyFox Messaging to connect website visitors with agents in Help Desk.
Before you start
Have Messaging enabled, Manage Chatbot permission, and agents ready to respond. Prepare an incoming category and any additional categories for conversation moves. See category requirements and permissions.
Enable and install the widget
- Open Chatbot administration and select the widget.
- Under WEB MESSAGING, open Configuration.
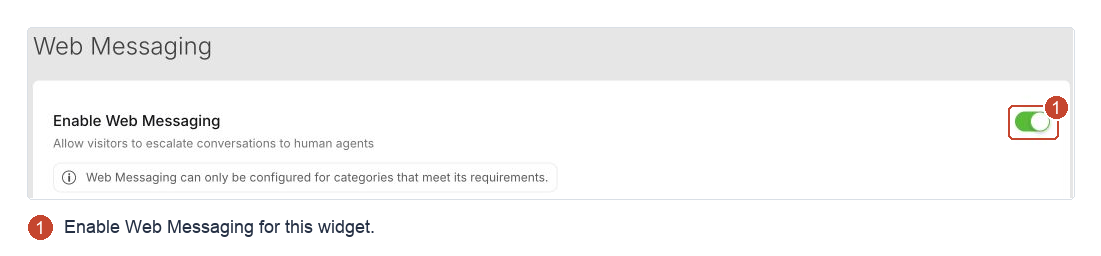
- Turn on Enable Web Messaging.
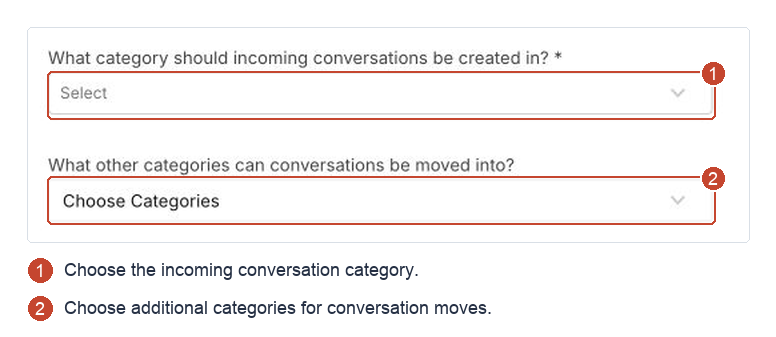
- In What category should incoming conversations be created in?, select the incoming category.
- In What other categories can conversations be moved into?, select any additional categories.
- Review Instant Escalation, Collect GDPR Consent, Hide Agent Names, Work Schedules, and Live Translations below, then select Save.
- Open Installation and keep Enable Chatbot on so the widget is visible.
- Copy the installation code and follow the instructions for your website.
A ChatBot subscription is optional. Keep Enable Chatbot on even when you only use Messaging; it controls widget visibility.
Let visitors request an agent directly
Turn on Instant Escalation and save. This adds Chat with an agent to the widget’s opening prompts, so visitors can request an agent without asking a chatbot question.
With this entry path, visitors select Chat with an agent on the welcome screen to open the required Name and Email fields. The form does not open automatically with the widget.

Collect consent
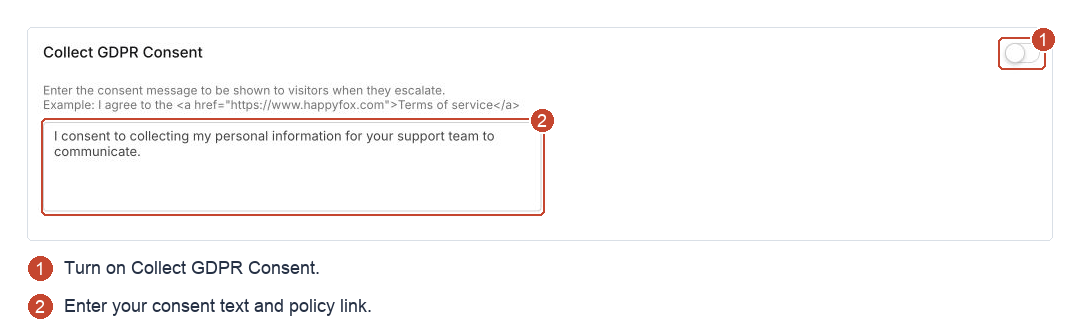
Turn on Collect GDPR Consent and enter your message. Despite the GDPR label, you can customize it for other consent requests. Visitors must provide consent before starting a conversation.
To include a privacy-policy link, replace the address and wording in this example:
I agree to the <a href="https://example.com/privacy">privacy policy</a>.
Save and check the message and link in the widget.
Hide agent names
Turn on Hide Agent Names to show Agent instead of individual names to contacts. Save and check a test conversation.

Set hours and translation
Use Work Schedules for support hours and Live Translations for multilingual conversations. Agents must also be Available.
Reuse Help Desk automation
Apply Help Desk Smart Rules and SLAs using Ticket Source → is → Web Messaging. Keep category changes within your Messaging categories.
Configure email notifications for the Messaging category. These are separate from agent workspace alerts.
Check the setup
- Confirm your agents appear in Manage Availability.
- Have an eligible agent sign in and become Available.
- During support hours, complete a test request in the installed widget using sample contact details.
- Confirm the agent receives the alert, accepts, and exchanges a reply.
Check that visitors can select Chat with an agent and enter their contact information without a chatbot exchange. If you also offer chatbot assistance, test that handoff too. See missing agent-option checks if needed.