
 25843
25843
Contact Groups helps you classify the contacts in your HappyFox account into groups to allow group members to view the tickets raised by their fellow group members. Contact Groups are ideally used when you correspond with more than one person from an organization.
IN THIS ARTICLE
Login to your help desk system, from module switcher and select Contact >> Contact Groups (from left panel).
The Contact Groups section lists all the contact groups that exist in your support system. To add a new contact group,
-
Click the “+” button next to “Contact Groups” title.

-
Fill the Name and description of the new group in the corresponding text boxes.
-
You can choose to auto add contacts from a particular domain to this contact group as they are created by adding the domain name in “Auto add contacts from these domains”. You can choose to add one more domain separated by a comma for a contact group.
-
Associate category lets you provide access to private category to contacts in that contact group. By this contacts in this contact group will be able to access tickets in the private category from their customer portal.
Warning⚠️ : "Auto-add contacts from these domains" applies only for newly created contacts. Existing contacts will not be automatically added to the group.
Note: Only private categories will be displayed here. To know more about private category refer this article

Note: Only contacts created after the “Auto-add contacts” setting is enabled, will be added to the group automatically
Once you are done creating a new group, you will be directed to the new group’s page where the Basic Information and the Group Members associated with the group are shown.
5. Default Visibility Settings lets you define visibility permissions that are automatically applied when a contact becomes a member of this group. Expand the Default Visibility Settings section to configure:
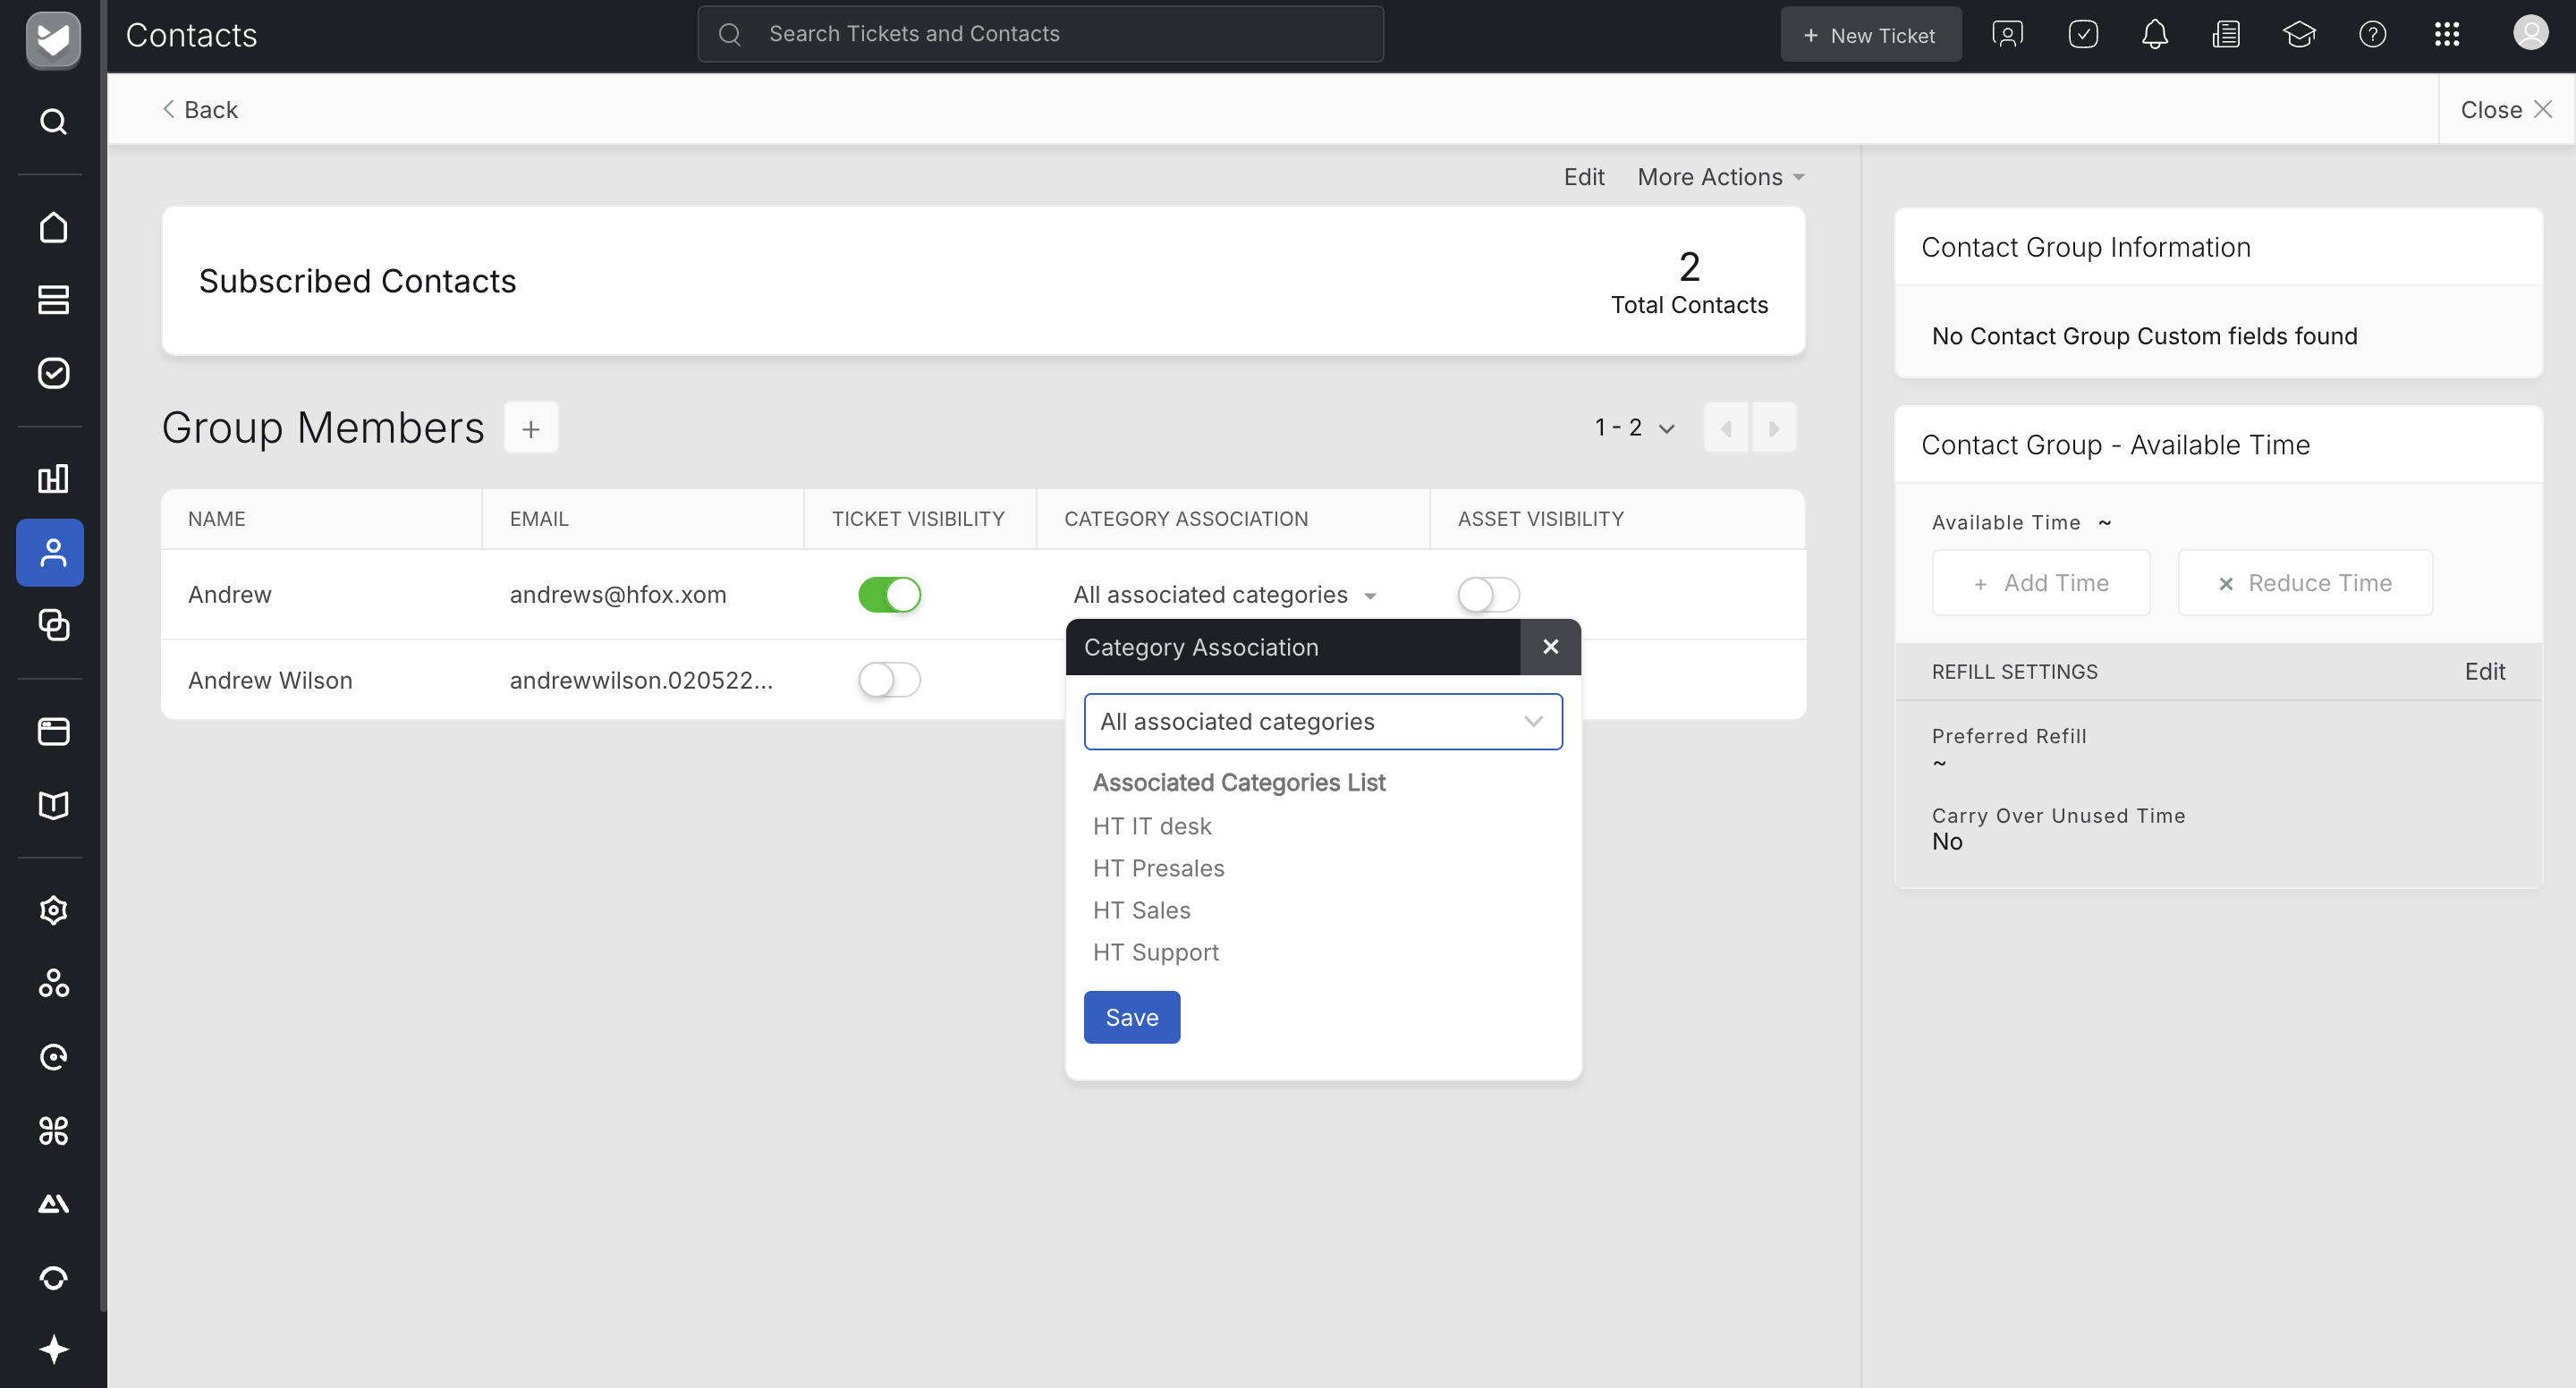
- Ticket Visibility - When enabled, new members can automatically view tickets of all group members in configured categories. You can choose between All associated categories or Selected categories.
refer this article to learn more on how ticket visibility works
- Asset Visibility - When enabled, new members can automatically access all assets linked to this group.
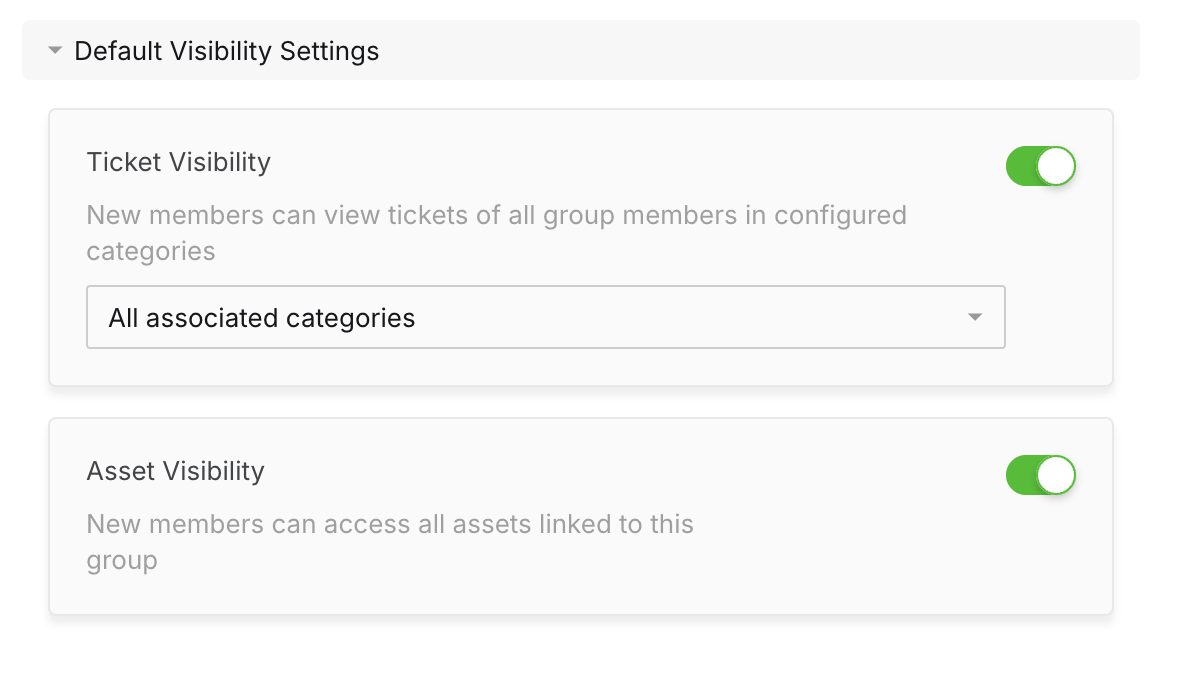
These defaults apply when contacts are added through any method: manually adding group members, domain auto-add, CSV import, or API (unless explicitly overridden via API methods).
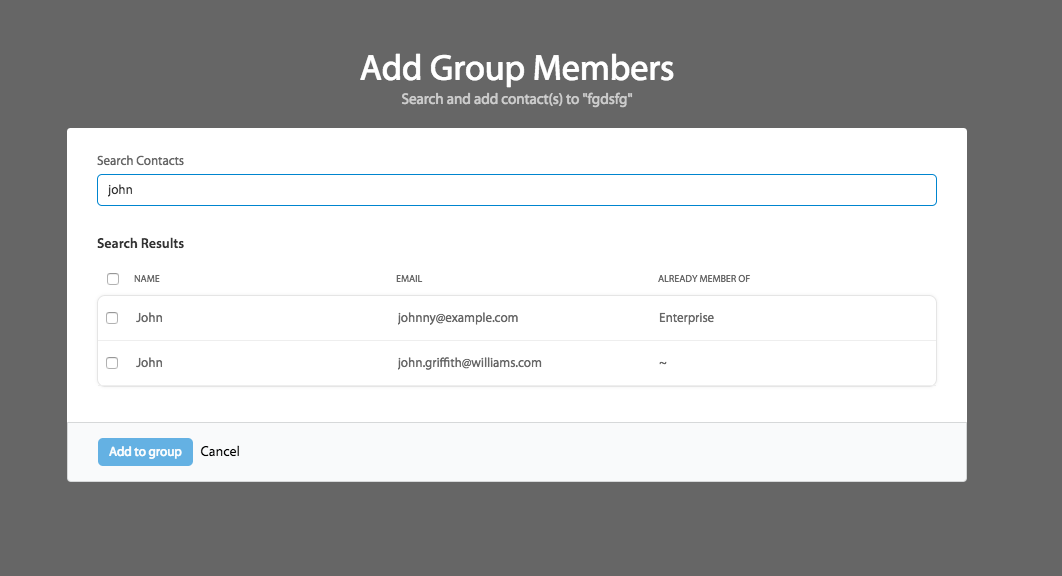
1. To add a new member to the group, click the “+” icon under the “Group Members” title or the “Add contact” button.

2. Search for the contact you wish to add to the group, using their name or email address. The search results show the contact matches, and the groups they are already a part of.

3. Select the contacts and click “Add to Group” button.
Once contacts are added to the group, they will appear in the Group Members section.
4. Agents can give a contact the "Ticket Visibility" permission to view tickets created by other contact group members of the same contact group. Click Here to learn more on how this permission works.
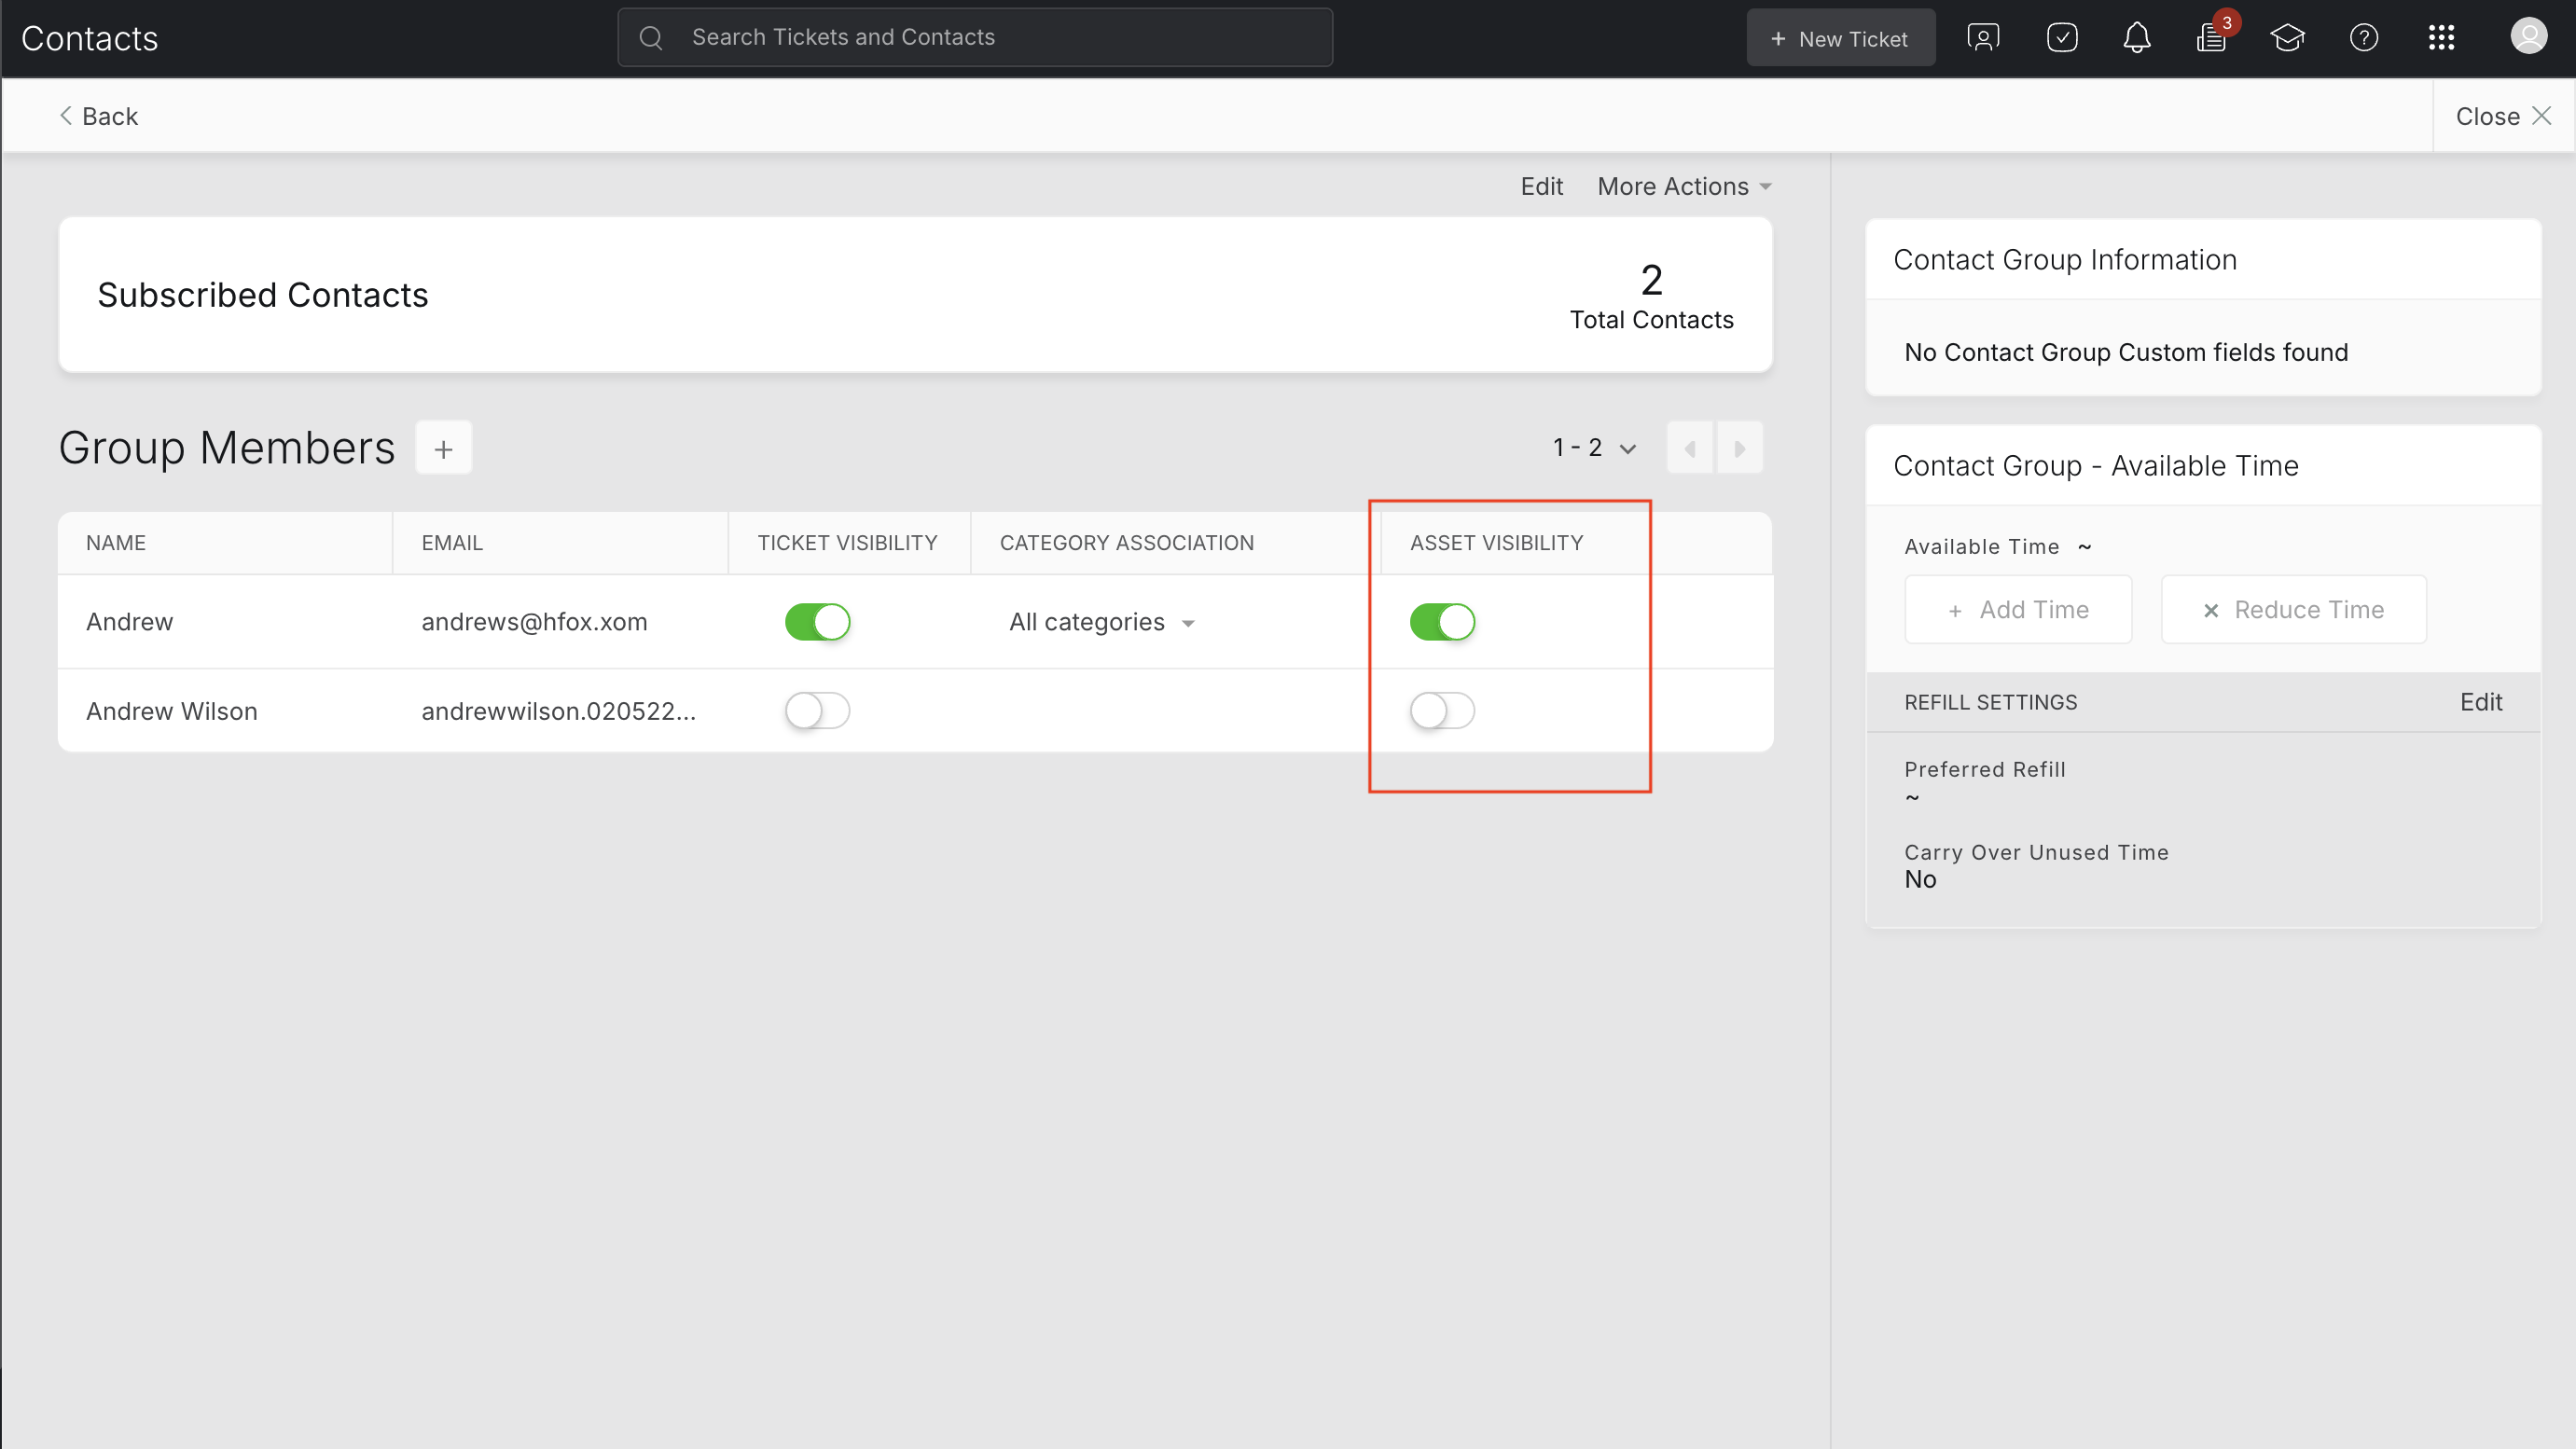
5.Contacts can be granted the Asset Visibility permission. When enabled, these contacts will be able to view and link all assets associated with their contact group. Contacts without this permission will only have visibility into the assets directly linked to them. Click Here to learn more on Linking Assets to Tickets.
Note: A contact who has access to Ticket Visibility in a contact group can see and reply to the tickets of other group members via the Customer Portal. A contact who doesn't have access to Ticket Visibility will only see tickets raised by them.
(i) Contact Group member
To remove a contact from a Contact Group, click the “Remove” button that appears when you hover over the contact.
(ii) Contact Group
To delete a group click on “More actions > Delete Group”, located the edit option,
To edit a saved group, Click the “Edit” button in the Basic Information section, and you will be prompted with a new window, where you can make the necessary changes.
Click the “Save Changes” button, to save the changes you have made.
Who can perform this action?
Any agent with “Add & Edit Contact Group” permission can manage a contact group.

