 16155
16155
Office365 - HappyFox - Set up your Forwarding rule
1. Login to your office365(www.office.com/signin) account using your admin account.
2. At the top of the page, choose Settings  > Mail.

3. Choose Forwarding.
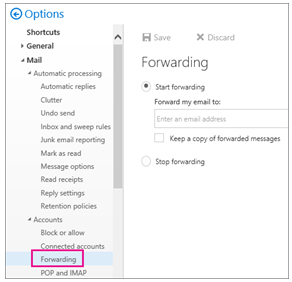
4. Type in your HappyFox unique email address ( [email protected] - see the screenshot for reference). This can be fetched from the new email channel creation window, as shown below.

5. Click on save once done.
You will also need to setup a Transport Rule to ensure the Forwarding Rule works.
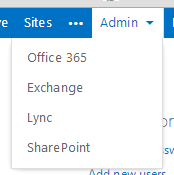
- Login to your Office 365 Admin portal and go to Exchange administration.
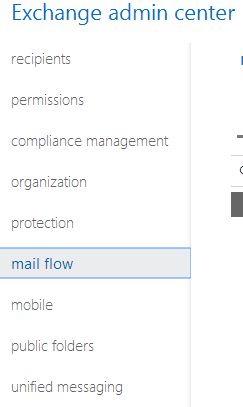
- Go into the “Mail Flow” section.
- Click the add button and select the option to create a new rule.
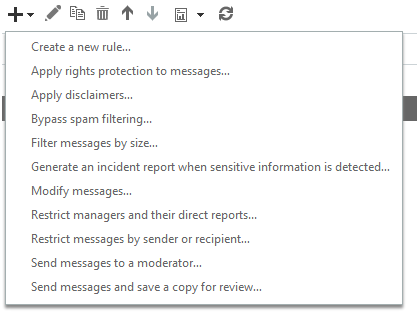
- The new transport rule window will be displayed.
- Give your transport rule an appropriate name
- Click the “more options” link at the bottom of the window.
- Under the “Apply this rule if…” option, select “A message header…” and then “Matches these text patterns”

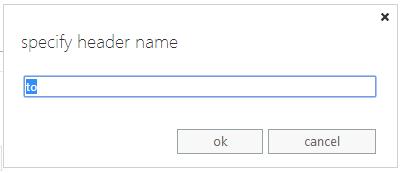
- Click on the “Enter text…” link and and enter the word “to” (without brackets) in the specify header name field and click OK.
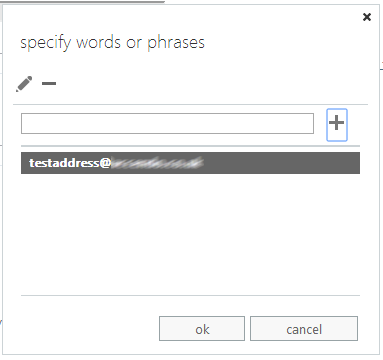
- Click on “Enter text patterns…” and enter the email address for the messages that you are trying to identify and click the plus symbol to add it, then click “ok”.
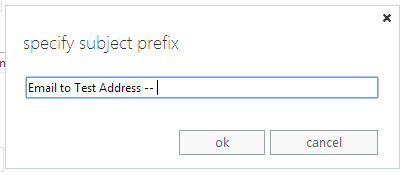
- From the “Do the following” menu option choose “Prepend the subject of the message with…”

- Enter the text that you would like prepend to the message subject line. e.g.
- Add any additional conditions that you would like to apply and then click “ok”.
- Save the transport rule.
Note : If you keep a copy of forwarded messages, check your Office 365 account regularly to make sure you haven't exceeded your mailbox size limit. If the size limit is exceeded new messages may not be forwarded.


