HappyFox Help Desk lets you add a signature to outgoing emails at two levels: an agent signature tied to the agent sending the reply, and a category signature tied to the ticket's category. Both are appended automatically to outgoing emails, so you don't need to type them into every reply.
Available on all plans.
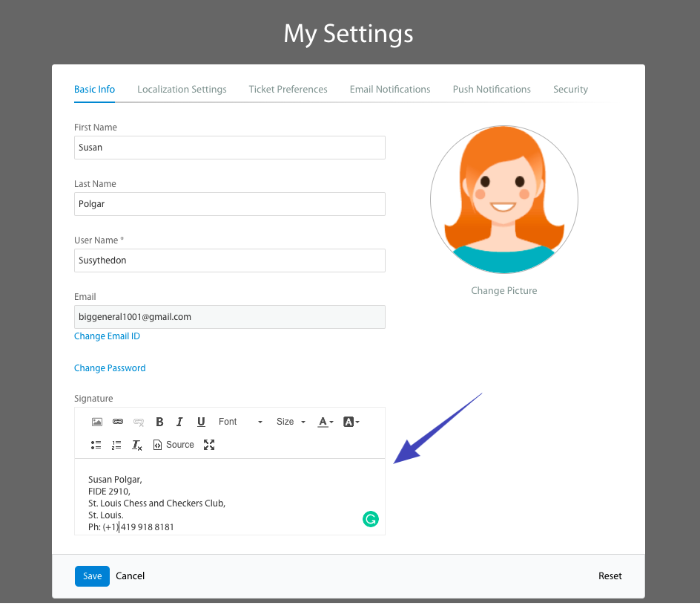
Set your agent signature
- Click your profile icon in the top right, then click My Settings.
- On the Basic Info tab, scroll to the Signature field.
- Enter your signature using the rich text editor. Use the image icon in the toolbar if you want to include a logo or image.
- Click Save.
Note Your agent signature won't show up inside the ticket update itself. It's appended automatically to the outgoing email through the {{staff_signature}} merge field in the email notification template.
Set a category signature
- Go to Manage > Categories.
- Click the category you want to add a signature to.
- Click Edit Advanced Settings, then select Category Signature.
- Enter the signature using the rich text editor. Use the image icon in the toolbar if you want to include a logo or image.
- Click Save.

Note Like the agent signature, the category signature doesn't show up in the ticket update. It's appended to the outgoing email through the {{category_signature}} merge field in the email notification template.
Which signature is used
Whether the agent signature, the category signature, or both appear on an outgoing email depends on which merge fields are included in the email notification template your account uses. If you don't see a signature you expect, check the notification template for the relevant email event.
Continue reading
Add an image to your agent signature › Add an image to your category signature › My Settings ›