Create life cycle reports

Sep 03, 2024
 10967
10967
What is a Life Cycle report?
Life cycle reports show the time distribution of tickets across various statuses in your account. The time duration that each ticket was present in a specific status is presented here.
Applicable Plans:
✖️ Basic ✖️ Team ✔️ Pro ✔️ Enterprise PRO
✔️ Growth ✔️ Scale ✔️ Scale Plus ✔️ Ultimate
✖️ Basic ✖️ Team ✔️ Pro ✔️ Enterprise PRO
✔️ Growth ✔️ Scale ✔️ Scale Plus ✔️ Ultimate
If required, life cycle reports also consider work schedule based time and exclude non-work hours and holidays from the time shown in the report. The report is only available as an Excel/CSV download.
To create or to make changes to life cycle reports, you need to have Managerial Permissions enabled under Manage >> Roles & Permission >> Reports >> Manage Reports.
How can I create a life cycle report?
- Go to module switcher ( Top left corner) and go to Reports >> Life Cycle Reports.
- Click on the Add a new Life Cycle report.

- Provide a name for the report.
- Choose a work schedule from the drop-down which shows the Work schedules available on your account. Once this is chosen, the start and end times of the work days will be considered for the report accordingly and the holidays added will also be considered while the report is built.
- You can choose to base this life-cycle report on 3 parameters - Status, Assignee or Category.
Status: Shows time spent on tickets moving across various statuses.
Assignee: Shows time spent on tickets across staff members assigned to the tickets.
Category: Shows time spent on tickets in each category that the ticket has been moved across.
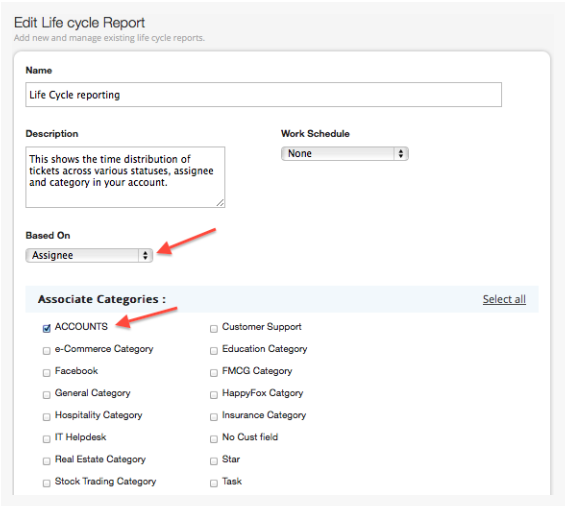
- The categories from which the tickets should be pulled. We recommend creating these reports for one category at a time such that the reports can be re-used every month.
- Save the report.
Download the life cycle report:
- Click on the report name or the view link beside the report name.

- Choose the Month and Year for which you wish to see the life cycle report. The data exported will be those tickets which are created in this month/year.
- Select Yes if you need the additional Ticket information like the last agent reply at, last user update at, etc to be included in the download.

- Once you click on Start, it gets queued for calculation and download. The progress is shown next to each download.
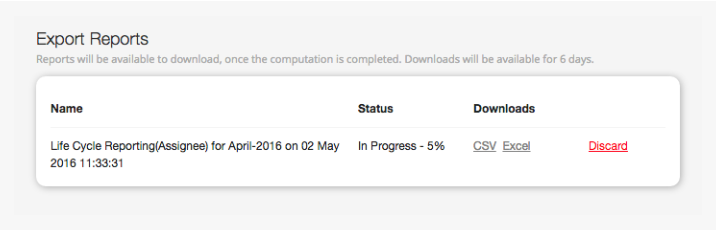
- Once the status is completed, the CSV and Excel downloads become available.
- Click on Download CSV/Download Excel to download the completed report.

Please note that based on the number of tickets in your account, the file download will take time.
- Once the report status is completed and ready for download, it is available for 6 days. You can discard the report at any time you want and the download instance is removed.

