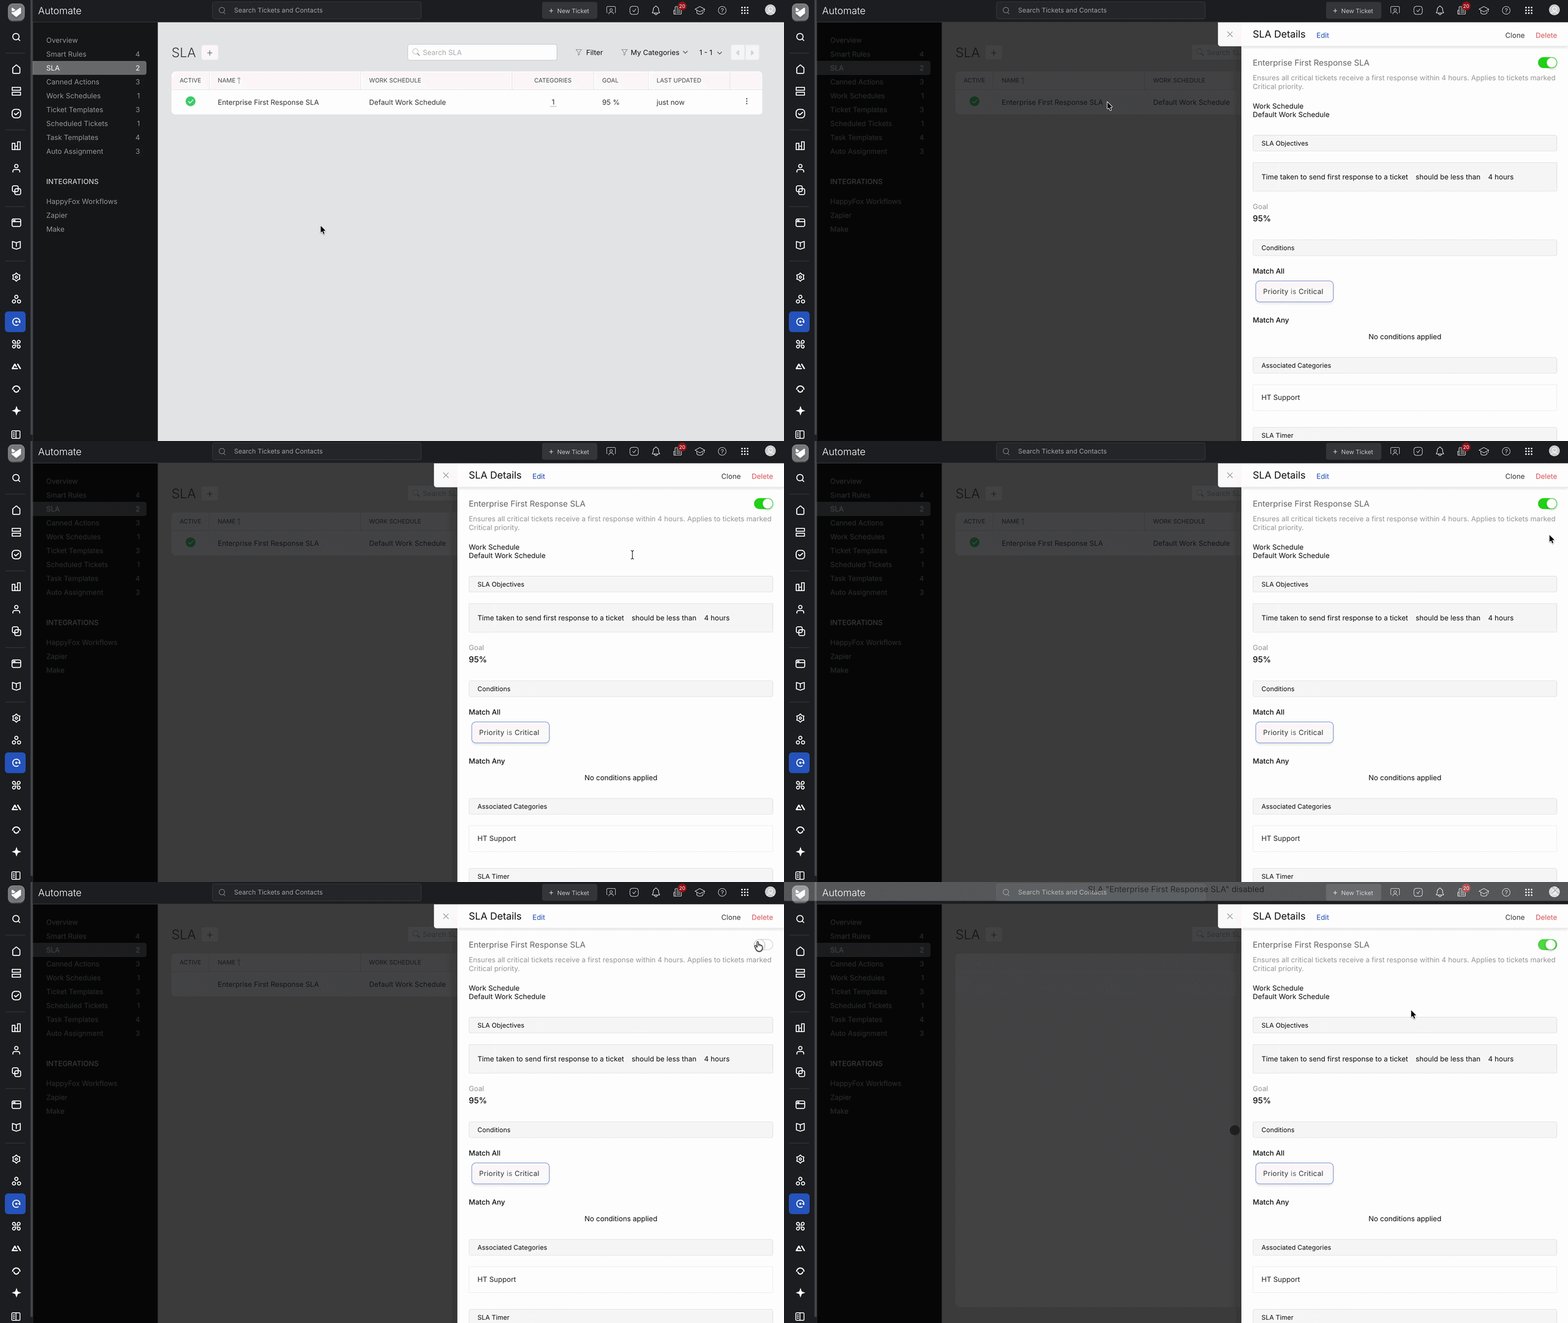
In HappyFox Help Desk, you can review an existing service level agreement (SLA), change its configuration, enable or disable it, create a copy, or delete it.
To create a new SLA, see Create an SLA. To understand how SLA settings affect ticket evaluation, see How do SLAs work in HappyFox?.
Before you start
Your role must have the Manage SLAs managerial permission under Automate. If SLA does not appear under Automate, contact your HappyFox administrator.
Open an SLA
- Go to Automate > SLA.
- Search for the SLA or locate it in the list.
- Select the SLA to open its details.
The details panel shows the SLA objective, goal, conditions, associated categories, work schedule, excluded statuses, breach notification configuration, and current enablement state.
Enable or disable an SLA
Use the toggle in the SLA details to enable or disable the SLA.
- Enable the SLA when you want it to evaluate applicable tickets.
- Disable the SLA when you want to retain its configuration without allowing it to evaluate tickets.
Edit an SLA
- Open the SLA.
- Select Edit.
- Review and update the objective, conditions, breach notification, work schedule, excluded statuses, associated categories, or other settings.
- Save the changes.
Changes to conditions, categories, schedules, exclusions, or timer settings can affect which tickets the SLA evaluates and how their target times are calculated.
Clone an SLA
- Open the SLA.
- Select Clone.
- Review the copied configuration and change its name, scope, or timing as needed.
- Finish creating the new SLA.
Cloning is useful when you need similar service targets for different categories, priorities, or work schedules.
Delete an SLA
- Open the SLA.
- Select Delete.
- Confirm the deletion.
The following animation shows the SLA details panel and its management controls: