Canned Actions are predefined reply templates that agents can insert into any ticket reply or private note with a single click. Each Canned Action can include a reply message, a set of ticket property changes (status, priority, assignee, and more), and file attachments. Applying one fills the reply editor automatically, so agents spend time on the ticket, not on typing the same response repeatedly.
Available on all plans.
Before you start
Creating, editing, cloning, and deleting Canned Actions requires the Manage Canned Actions permission. Agents without this permission cannot see the Canned Actions page in the Automate menu. Contact your administrator to have the permission enabled on your role.
Any agent can apply a Canned Action in a reply regardless of this permission. Setup is separate from usage.
Create a Canned Action
Go to Automate > Canned Actions, then click the + button at the top of the page. This opens the Create a Canned Action wizard, which has three steps.

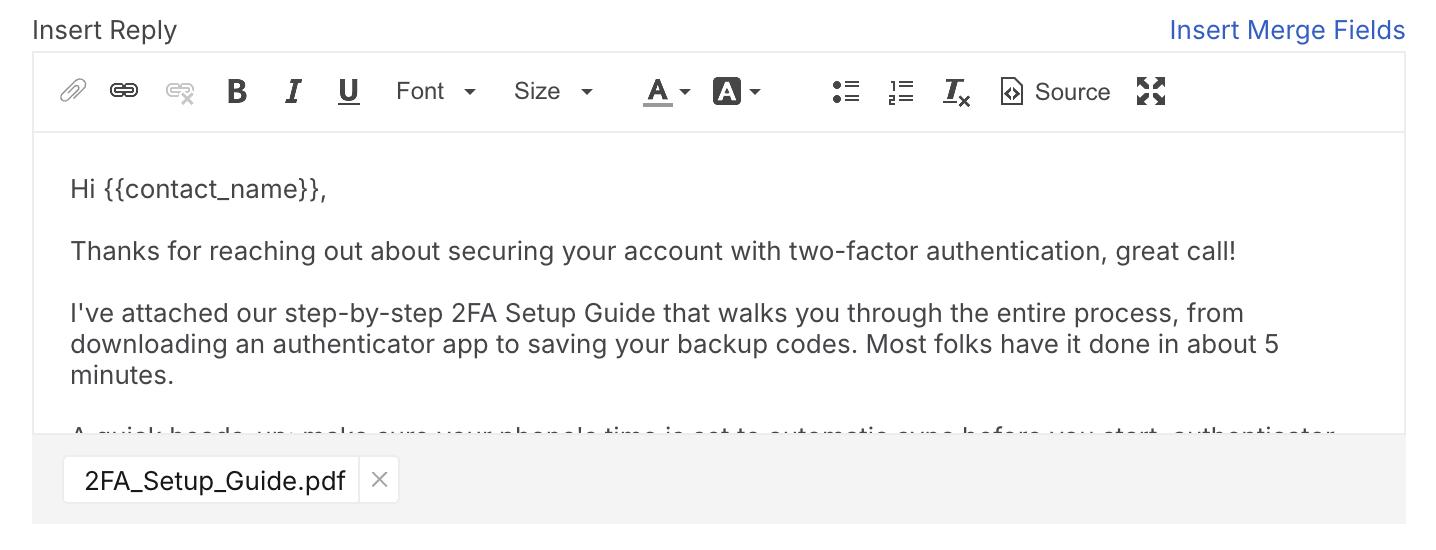
Step 1: Insert Message
The first step sets the reply content. Draft the message that agents will send when this Canned Action is applied. The message is optional. If you skip it, the Canned Action will only update ticket properties when applied.
Use the Insert Merge Fields button to add dynamic placeholders. Merge Fields are replaced with actual ticket or contact data at the time an agent applies the action (for example, the contact's name or the ticket ID). See Use Merge Fields below for details and restrictions.
To add attachments, use the attachment button in the editor toolbar. The combined size of the reply text and all attachments in a single Canned Action can be up to 25 MB.
Click Next to continue.
Step 2: Ticket Properties
The second step controls what changes when the Canned Action is applied to a ticket. All fields default to -- No Change --, meaning they will not be touched. Set only the fields that should change.
| Field | What it does |
|---|---|
| Status | Changes the ticket status on apply (for example, set to Resolved when sending a closing reply). |
| Priority | Changes the ticket priority. |
| Assignee | Reassigns the ticket to a specific agent on apply. |
| Update Contact | Updates the ticket contact record with a specified value. |
| Time Spent | Logs a fixed amount of time (in minutes and seconds) against the ticket. |
| Tags | Applies one or more tags to the ticket. |
Click Next to continue.
Step 3: About
The third step names the Canned Action and controls who can use it.
| Field | Notes |
|---|---|
| Name | Required. This is what agents see in the picker when replying to a ticket. Make it specific enough to distinguish between similar actions. |
| Description | Optional. A short note about when to use this action. |
| Associated Categories | Links this action to one or more ticket categories. Agents working on a ticket in a linked category will see this action in their top 10 list automatically. |
| Available To | All Agents makes the action available to everyone. Me keeps it private to your account only. |
Click Finish Creating Canned Action. The action is available immediately.

Use Merge Fields
Merge Fields are placeholders in the reply message that get replaced with live ticket or contact data the moment an agent applies the action. For example, {{contact_name}} becomes the requester's actual name in the reply text.
To insert a Merge Field, click Insert Merge Fields in the editor (Step 1 of the wizard) and select the field you want. Merge Fields can be placed anywhere in the message body.

Warning Merge Fields do not work when a Canned Action is applied via Bulk Actions. The placeholders will not be replaced and will appear as raw text in the reply. Only use Canned Actions with Merge Fields on individual tickets.
Manage existing Canned Actions
Go to Automate > Canned Actions to see all Canned Actions in your account. The list shows the name, who it is available to, how many times it has been used, which categories it is linked to, and when it was last updated.
Click any row to open the Canned Action Details panel on the right. From there you can:
- Edit to open the wizard and change any part of the action.
- Clone to create a copy you can modify. Useful when two categories need similar but not identical replies.
- Delete to permanently remove the action. This cannot be undone.

To export all Canned Actions, click Export Canned Actions at the top of the list. This downloads a CSV or Excel file with all action names, descriptions, and category assignments.
Use the Filter and My Categories controls to narrow the list if your account has a large number of Canned Actions.

Note When an agent opens the Canned Action picker in a ticket reply, HappyFox automatically shows the top 10 most-used Canned Actions for that ticket's category. Agents can search for others using the Search more Canned Actions field.
Troubleshooting
| Symptom | Fix |
|---|---|
| Canned Actions is missing from the Automate menu | The Manage Canned Actions permission is not enabled for your role. Contact your administrator to enable it. |
| Merge Fields appear as plain text in the sent reply | The action was applied via Bulk Actions. Merge Fields only resolve on individual tickets. Apply the Canned Action directly in the ticket reply editor instead. |
For HappyFox Classic documentation on Canned Actions, refer to the attached PDF below.
HappyFox Classic: Use Canned Actions for frequent replies (PDF)
Continue reading
Use Canned Actions in ticket replies › Add images to your Canned Actions ›