
 522
522
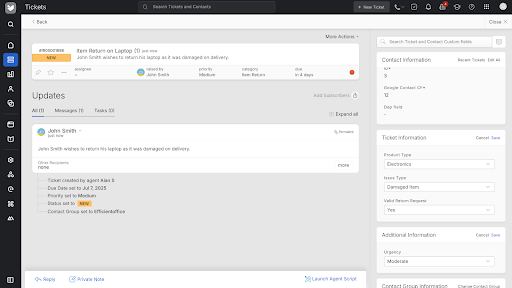
To improve usability in the ticket interface, you can now group custom fields into two sections within the right-side panel:
Ticket Information and Additional Information.
This makes it easier for agents to quickly find the most relevant fields - especially in categories that have a large number of custom fields.
What’s Changed
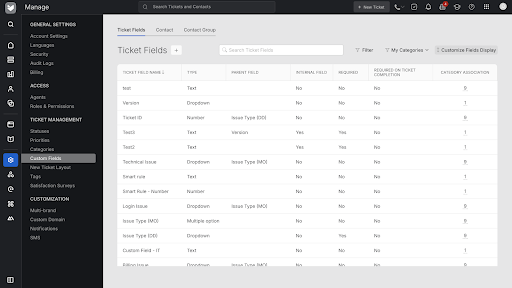
Earlier, all custom fields appeared in a single section in the ticket view.
This became hard to navigate when 10 or more fields were configured.
With this update:
- Custom fields can now be split into two clearly labeled sections in the right panel of a ticket:
- Ticket Information – for fields that are frequently used or high priority
- Additional Information – for everything else
- Admins (or agents with Manage Custom Fields permission) can decide which fields go into which section.
Who Can Create Custom Fields?
Agents with the Manage Ticket Custom Fields permission can create and manage ticket custom fields.
How to Use the Feature
Steps to Configure:
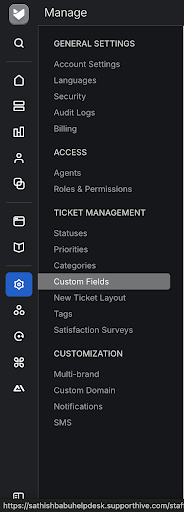
- Navigate to Main Menu > Manage > Custom Field
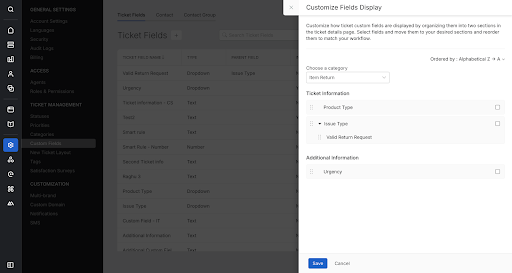
- Click on Customize Fields Display in the top-right corner. This opens a side pane from the right, where the rest of the configuration is done.

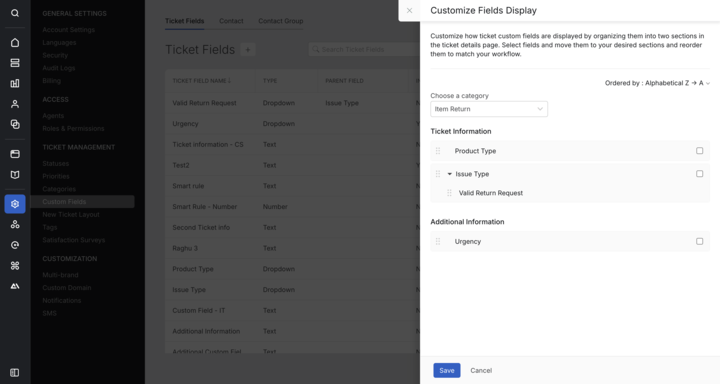
Choose a Category
- In the side pane, select the ticket category whose field layout you want to customize.
Organize Fields
- Reordering Within a Container:
- Drag and drop fields to rearrange their order within either "Ticket Information" or "Additional Information."
- Moving Fields Between Containers:
- Select the checkbox to the left of the field(s) you wish to move.
- Click the Move button to shift the selected fields to the other container.
- You can select and move multiple fields at once.
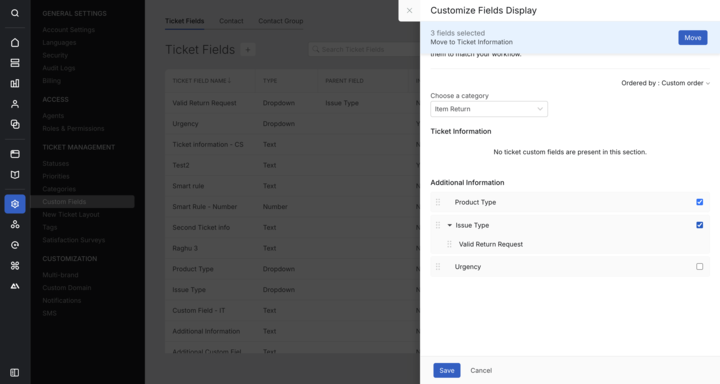
- When a field with dependencies (child fields) is moved, all associated child fields are moved along with it automatically.
Save Changes
- Once the layout has been finalized, click Save in the side pane to apply the changes.
- Custom Field Layout in Ticket View Before the Reorganization
Custom Field Layout in Ticket View Before the Above Change
Example Scenario:
A support team uses 25 custom fields, but only 6 are accessed frequently (e.g., Priority, Impact, Issue Type). Using this feature:
- These 6 fields can be placed in Ticket Information.
- The remaining 19 can be moved to Additional Information.
- This ensures agents see the most critical inputs first, without needing to scroll through all available fields.

