
 2279
2279
Workday is a cloud-based enterprise software platform specializing in human capital management (HCM), financial management, and analytics. Integrating Workday with HappyFox Helpdesk enables contact synchronization, allowing you to automatically sync worker details from your Workday account with HappyFox Helpdesk.
Workday Contact Sync integration lets you automatically:
-
Sync worker details from Workday account to HappyFox as contacts
-
Map additional fields from Workday to HappyFox as custom contact fields.
Note:
-
The sync is performed automatically every day at 12:00 AM (based on your HappyFox account timezone).
-
Contact synchronization is triggered every time the configuration is saved in the Helpdesk account.
Applicable Plans: ✔ Pro ✔ Enterprise Pro ✔ All Unlimited agents plan
Integration setup Prerequisites:
-
Your HappyFox agent role must have the Manage Apps permission.
Workday Contact Sync integration lets you automatically:
- Sync worker details from Workday account to HappyFox Helpdesk as contacts
- Map additional fields from Workday to HappyFox as custom contact fields.
Note:
- The sync is performed automatically every day at 12:00 AM (based on your HappyFox account timezone).
- Contact synchronization is triggered every time the configuration is saved in the Helpdesk account.
Applicable Plans: ✔ Pro ✔ Enterprise Pro ✔ All Unlimited agents plan
Integration setup Prerequisites:
HappyFox Helpdesk Prerequisites:
- Your HappyFox agent role must have the Manage Apps permission.
Workday Prerequisites:
Complete the following steps in Workday before configuring the Workday Contact Sync integration in HappyFox.
Create Integration System User (ISU)
- In Workday, search for Create Integration System User.
- Create a new integration system user.
- Set Session Timeout Minutes to “0”.
- (Optional) Enable Do Not Allow UI Sessions.
- To prevent password expiry:
- Search for Maintain Password Rules.
- Add the ISU to System Users exempt from password expiration.
- Search for Maintain Password Rules.

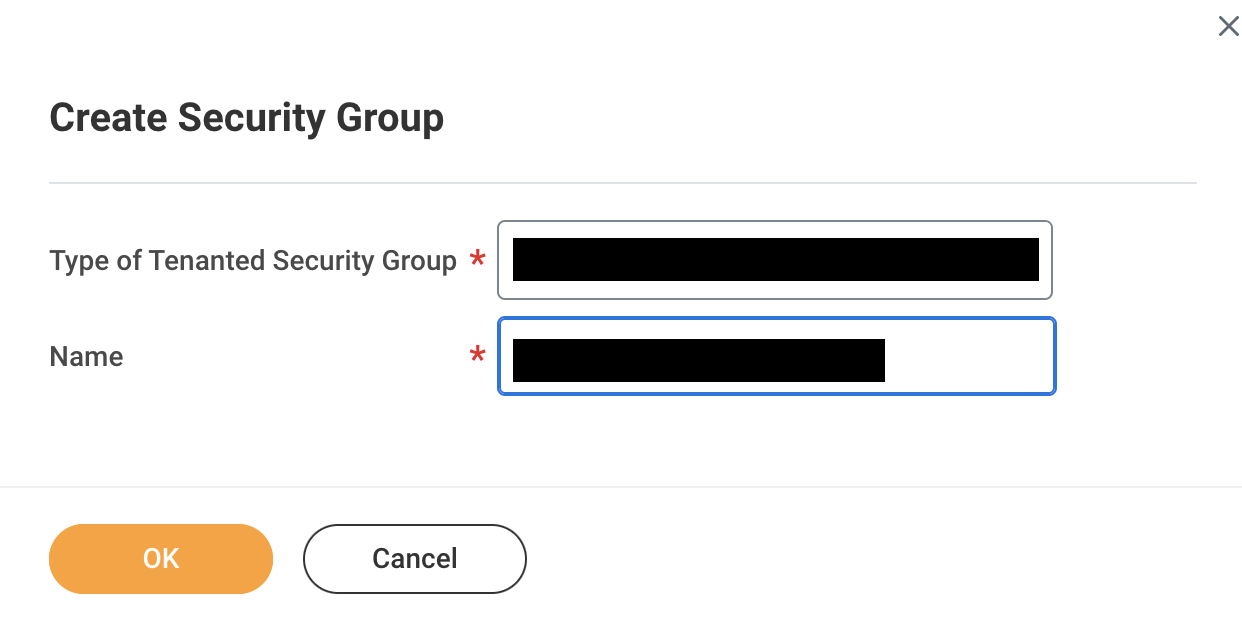
Create Security Group
- Search for Create Security Group.
- Create an Integration System Security Group:
- Choose Unconstrained or Constrained as required.
- Choose Unconstrained or Constrained as required.
- Add the Integration System User as a member.
- If using a constrained group, set the organization scope.
Grant Domain Permissions
- Search for Maintain Permissions for Security Group.
- Select the security group created above.
- Grant GET permissions for the following domain security policies:
- Integration Build
- Integration Process
- Integration Debug
- Integration Event
- Worker Data: Current Staffing Information
- Worker Data: Current Job Profile Information
- Integration Build

Activate Security Policy Changes
- Search for Activate Pending Security Policy Changes.
- Enter a comment.
- Confirm and activate the changes.
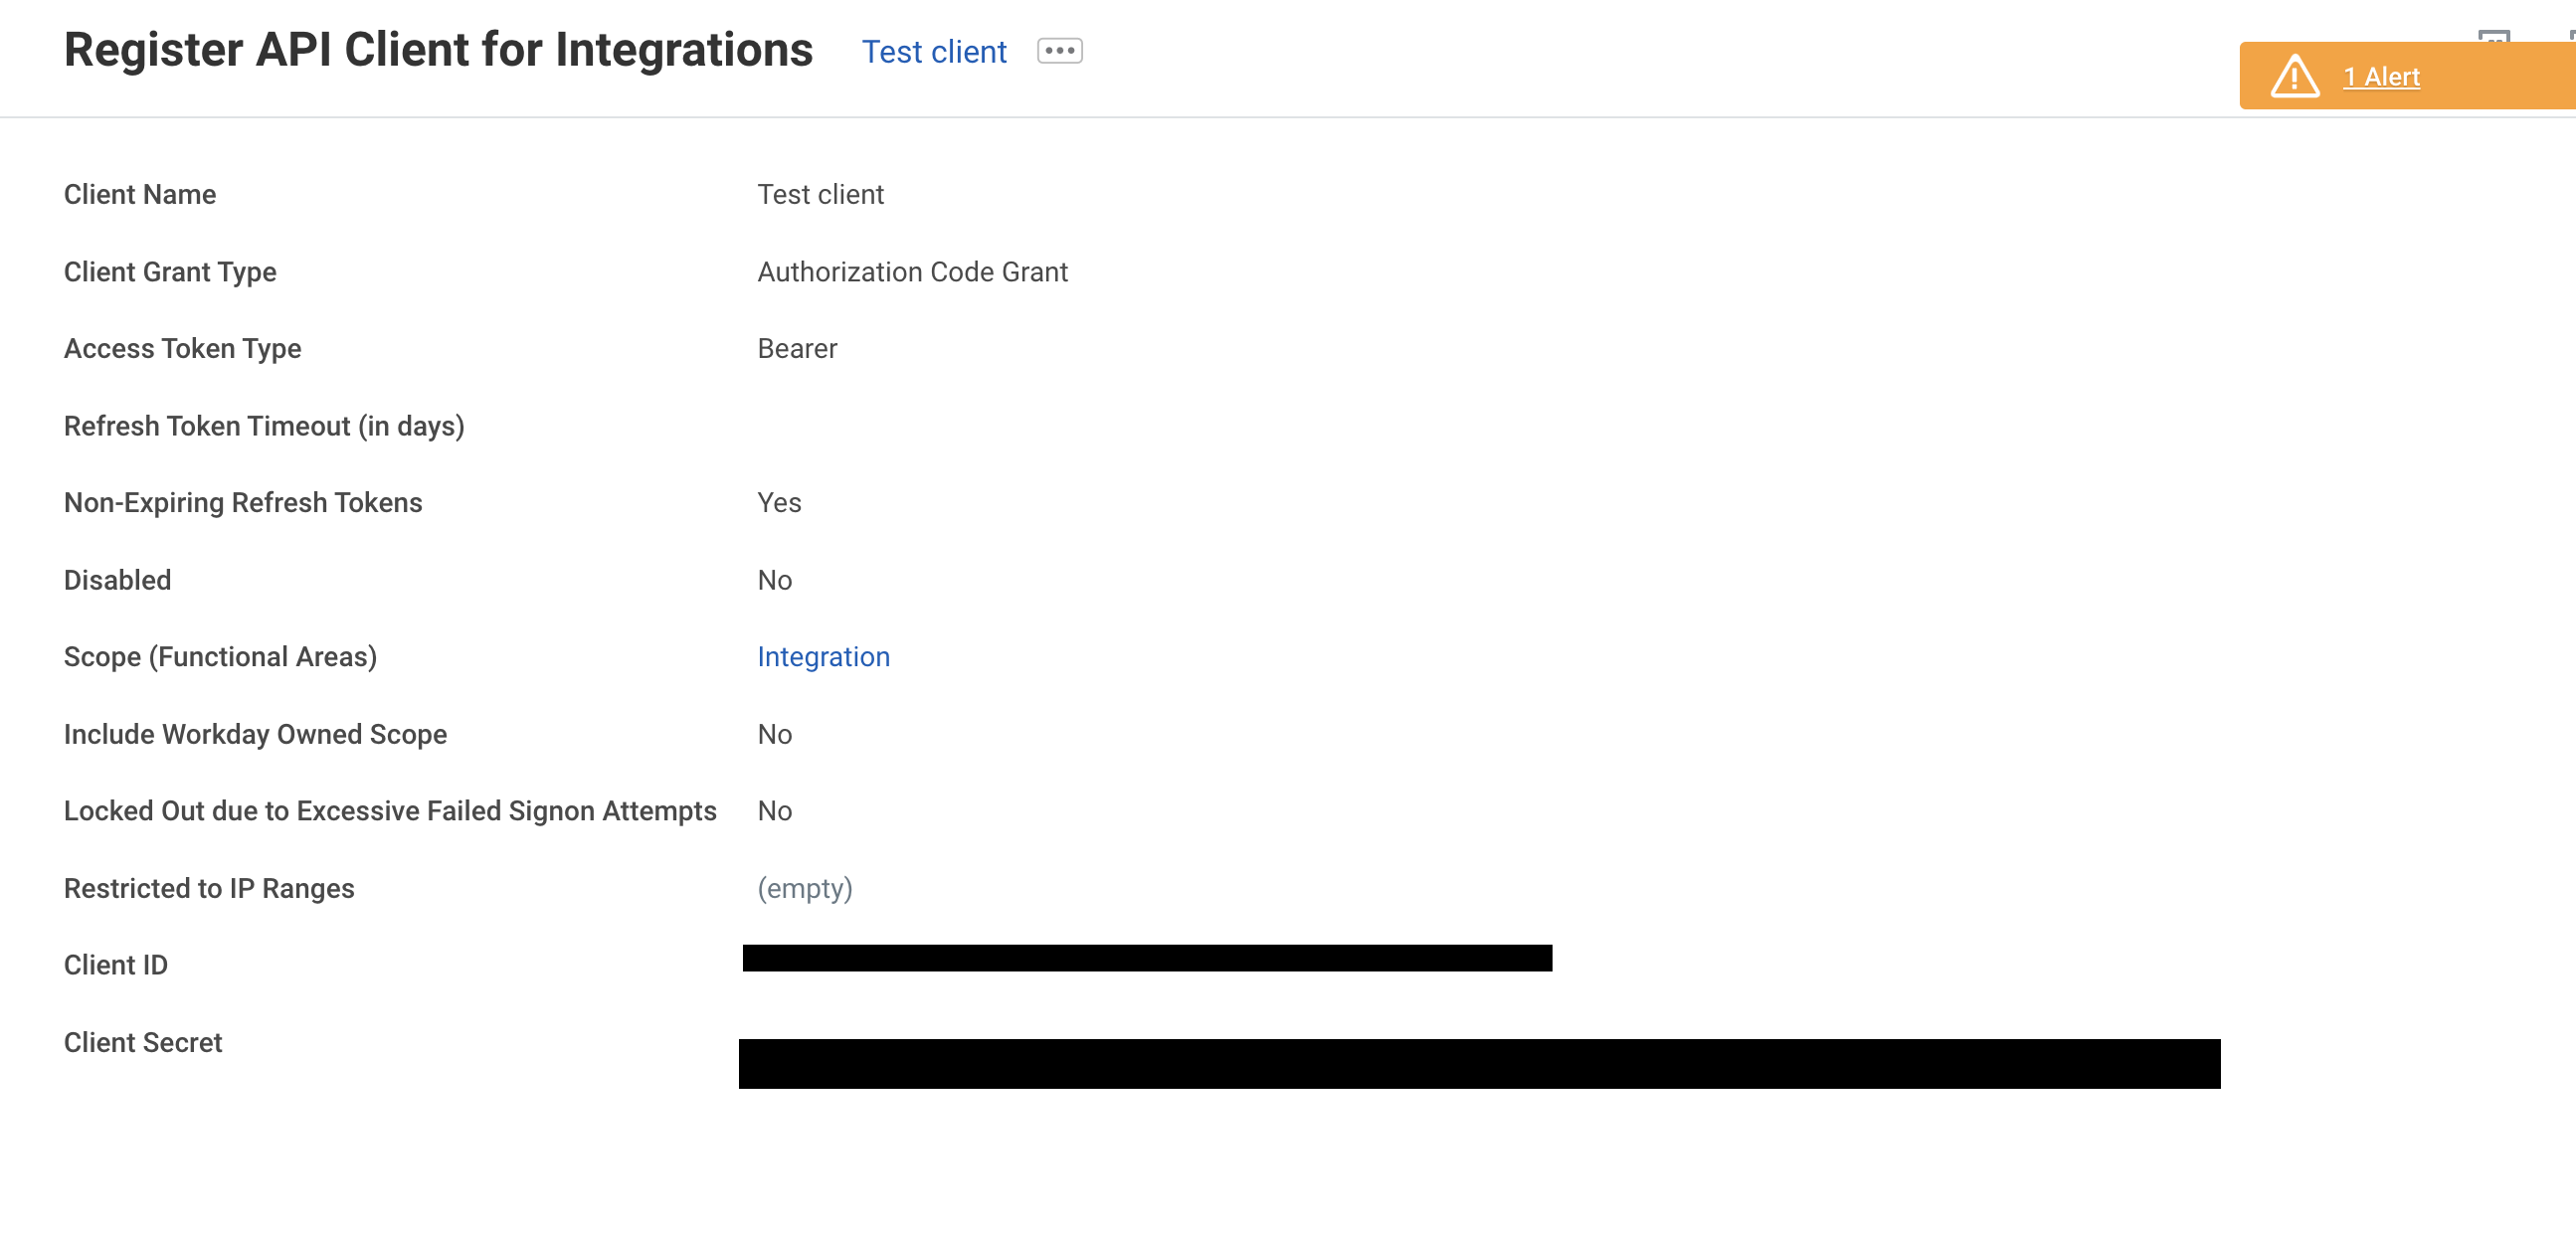
Register API Client
Register API Client
- Search for Register API Client for Integrations.
- Create an API client.
- Enable Non-Expiring Refresh Tokens.
- Ensure the Integration scope is included.
- Save the Client ID and Client Secret.
Generate Refresh Token
- Search for View API Clients.
- Select the API client.
- Click … > API Client > Manage Refresh Tokens for Integrations.
- Generate a new refresh token.
- Copy and save the refresh token.
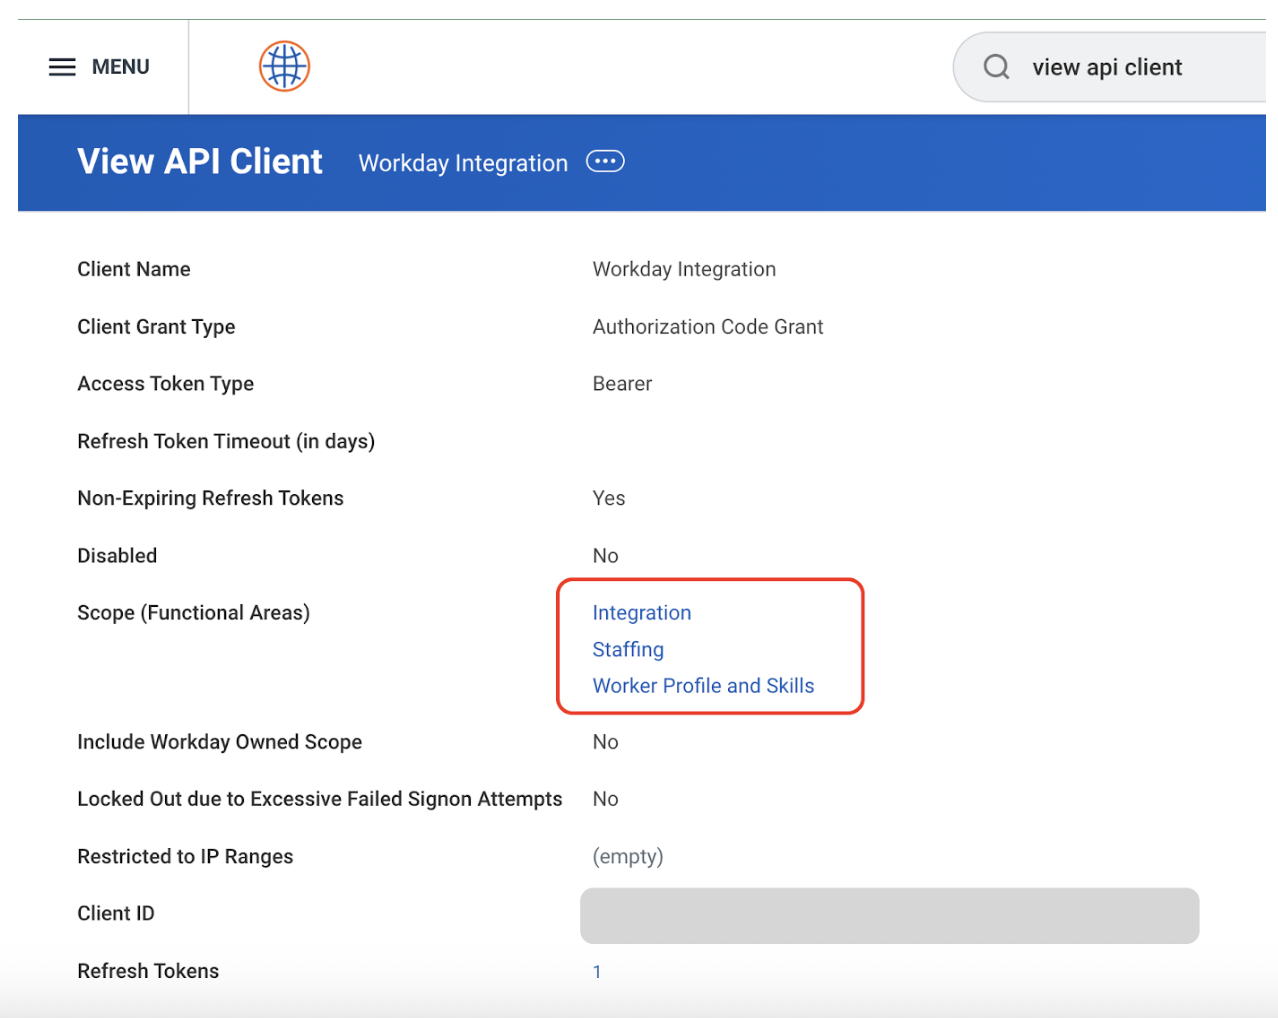
Get Token Endpoint
- In View API Clients, copy the Token Endpoint URL.
Credentials Required for HappyFox Setup
Keep the following ready while configuring the Workday integration in HappyFox:
- Tenant ID
- Token Endpoint
- WSDL url
- Client ID
- Client Secret
- Refresh Token (if using custom objects)
Steps to Configure Workday Contact Sync:
-
Go to Apps > Contact Management and select Workday > Install.
-
To authorize HappyFox to access and sync worker information, you will need to provide your Tenant ID, Token Endpoint, WSDL url, Client ID, Client Secret and Refresh Token.
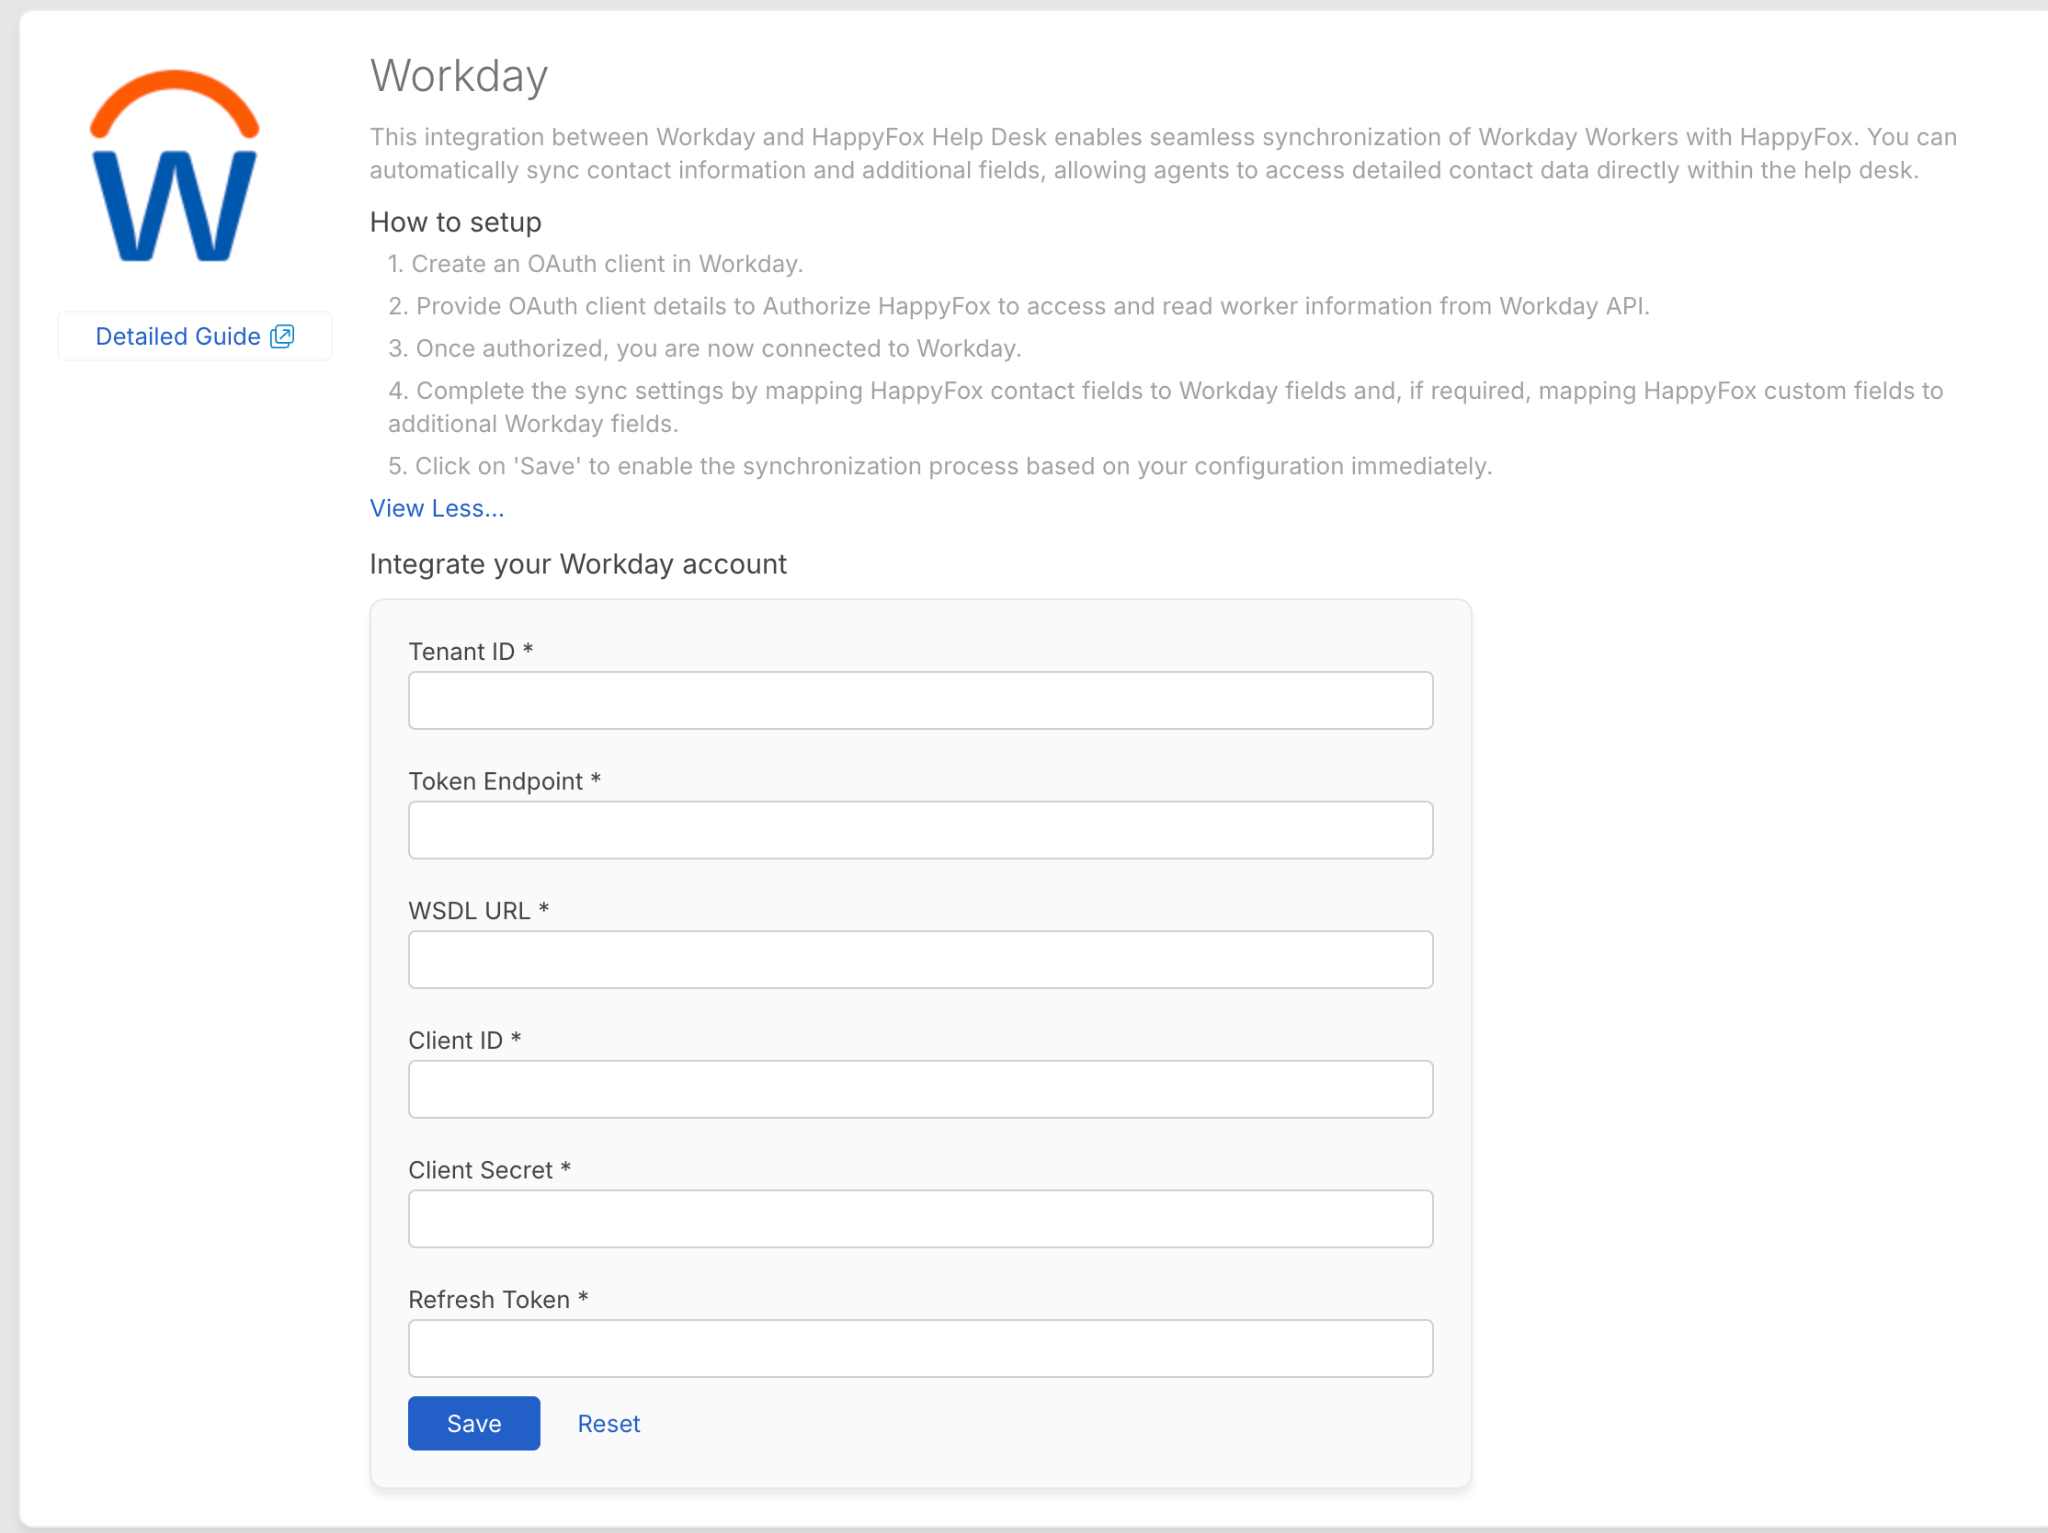
-
These are the authentication credentials provided by Workday.
-
Click Save to log in with your Workday account, grant the necessary permissions for synchronization.
-
After syncing Workday with Helpdesk, Map Workday contact fields (e.g., name, work email and work phone) to HappyFox contact fields.
-
Map Workday fields to HappyFox contact custom fields (If required).
-
Enable or disable overwriting of existing custom field values during sync. When enabled, HappyFox custom fields will be updated with values from Workday if there is a difference.
-
Enable or disable Send account information email to contacts imported synchronization.
-
Click Save.
After each sync, you can view:
-
Timestamp: Date and time of the sync.
-
Record Counts: Number of successfully synced and failed records.
-
Error Log: A downloadable CSV file listing errors for failed syncs.
CSV Log Details:
-
Email: The unique email of the contact.
-
Type:
-
Existing: Updated an existing HappyFox contact.
-
New: Added a new HappyFox contact.
-
-
Sync Status: Success or Failure.
-
Result: Contact synced successfully
-
Error Details: Reason for failure (e.g., datatype mismatch, empty required fields).
Note: Only the latest sync log is available for download.
Accessing Synced Contacts:
-
Synced Workday contacts can be accessed from the Contacts module in HappyFox. Clicking the Workday icon next to a contact will redirect you to the contact's detail page in Workday.
Frequently Asked Questions:
-
Does the sync work both ways?
No, this is a one-way sync. Changes made in Workday are reflected in HappyFox, but not vice versa.
-
What happens if some of my workers do not have a company issued work email, will they sync as contacts?
In case a worker in Workday does not have a work email, the integration will fallback to consider the worker's primary personal email to create a HappyFox contact.
-
Will deleting contacts in Workday remove them from HappyFox?
No, deleted contacts in Workday are not removed in HappyFox.
-
Are updates to Workday fields reflected in HappyFox?
Yes, if the overwrite toggle is enabled, changes in Workday fields are updated in HappyFox during the next sync.
-
How can I delete or disable the sync account?
To delete or disable the sync account, click on the menu next to Last Sync At and select Delete or Disable.
-
How can I access the configuration form to change the sync settings?
Click on the settings gear icon next to "Synced Account" to access the configuration form and update the sync settings.
-
How do I disable the Workday integration?
To disable the integration, click "Disable this app" on the Workday Integration page. If disabled, the synced contacts will not be removed from the Helpdesk account.

