This article walks you through building your first workflow in HappyFox Workflows — from selecting a trigger and testing it against a sample ticket, to configuring an action and enabling the workflow.
Prerequisites
- The app you want to build your workflow around must already be integrated with HappyFox Workflows. See Integrating HappyFox Help Desk with HappyFox Workflows if you haven't set this up yet.
- You must have administrator access to that app's account to complete its integration.
Step 1: Create the workflow and choose a trigger
- Click Create Workflow
- Enter a name for the workflow in the Workflow Name field.
- Optionally, toggle Enable email notification for failed workflows to receive an alert if this workflow fails. See Error Notification Emails for Failed Workflows for more on how these alerts work.
- Click Create Workflow to confirm.
- Select a Trigger — the app and event that starts the workflow — from the dropdown menu. For example, select HappyFox Helpdesk and choose an event such as Ticket Created. You can also select Workflows > Catch Webhook Info to trigger a workflow from an external system using a webhook.
The trigger source dropdown, listing Workflows, HappyFox Helpdesk, as available trigger apps.
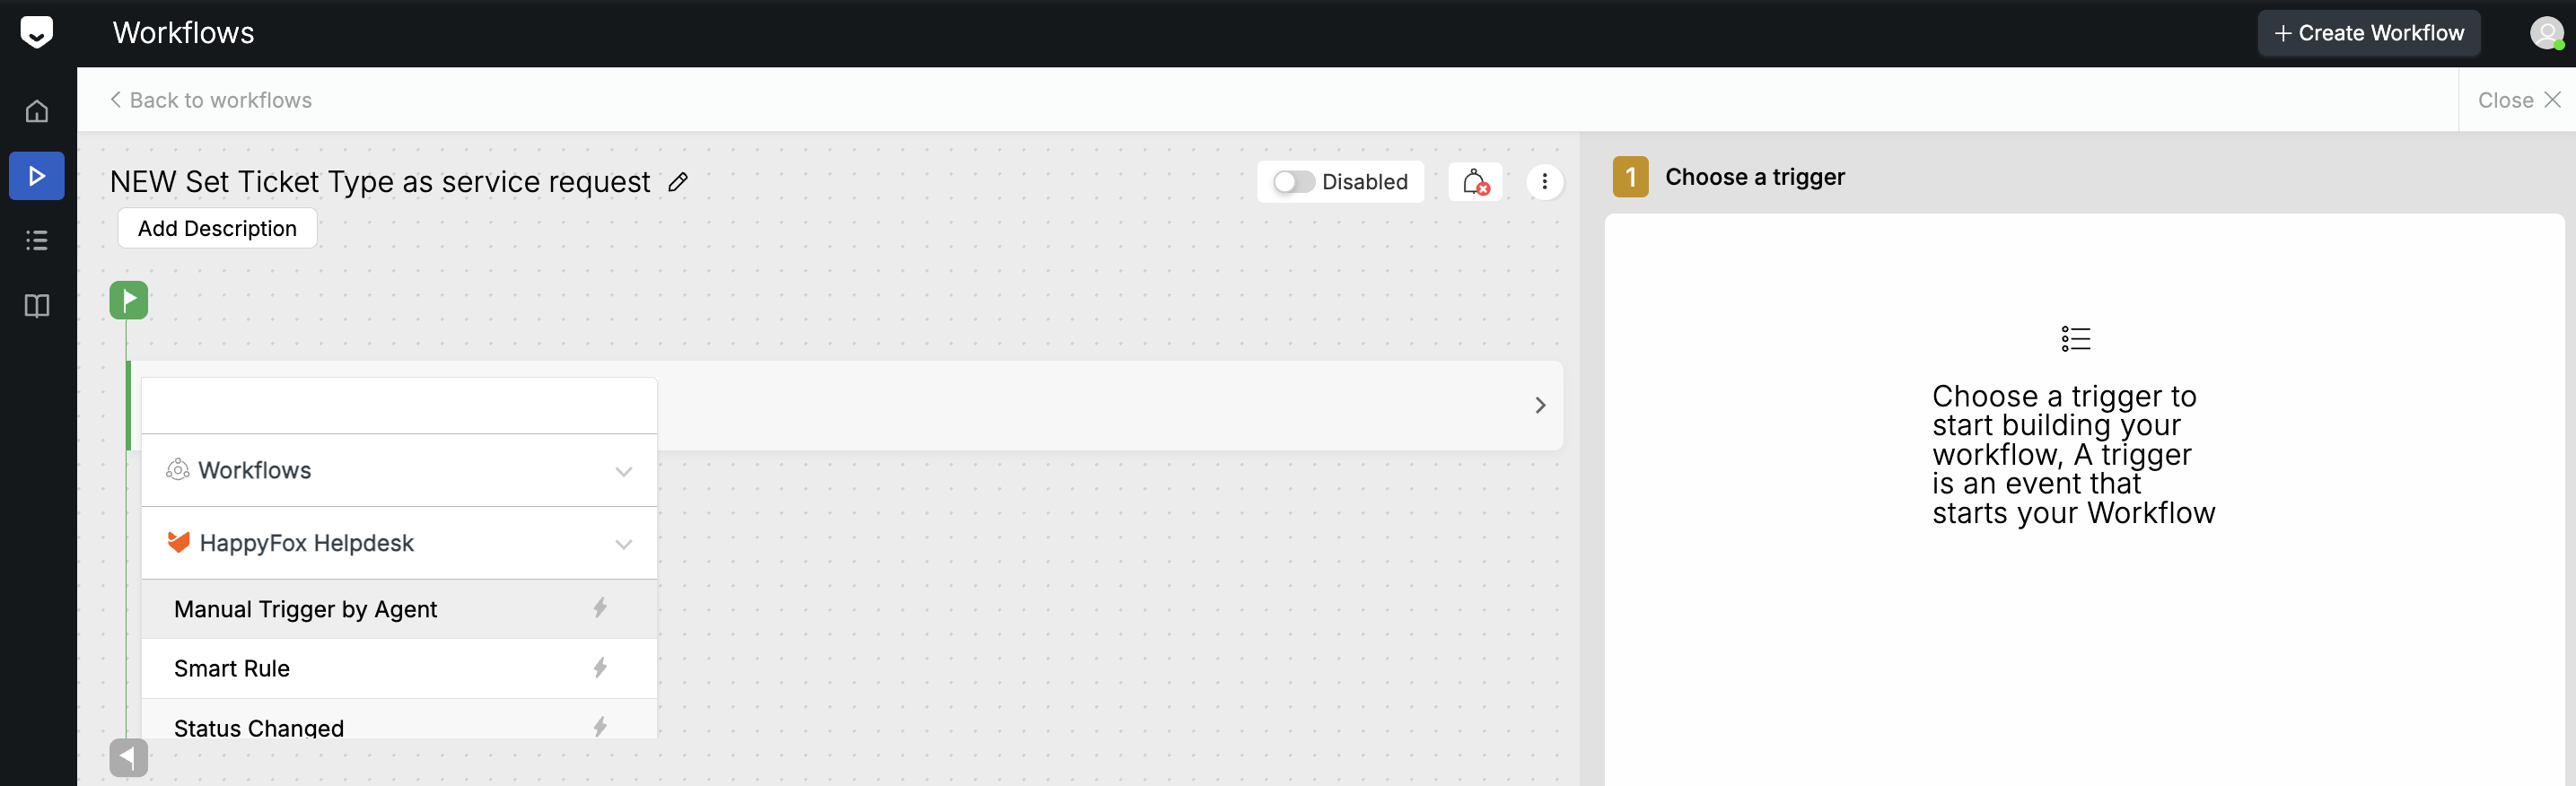
Note: Workflows is not a third-party app — it groups native trigger events, including Catch Webhook Info, Form Submission Requested, and Form Submitted.
Step 2: Test the trigger with a sample Trigger DAta
- Create a ticket in HappyFox Help Desk that matches the trigger you selected. For example, if you chose Ticket Created, create a new ticket to use as your test case.
- Return to HappyFox Workflows and click Refresh to fetch the new ticket as your test trigger.
- Select the ticket you created.
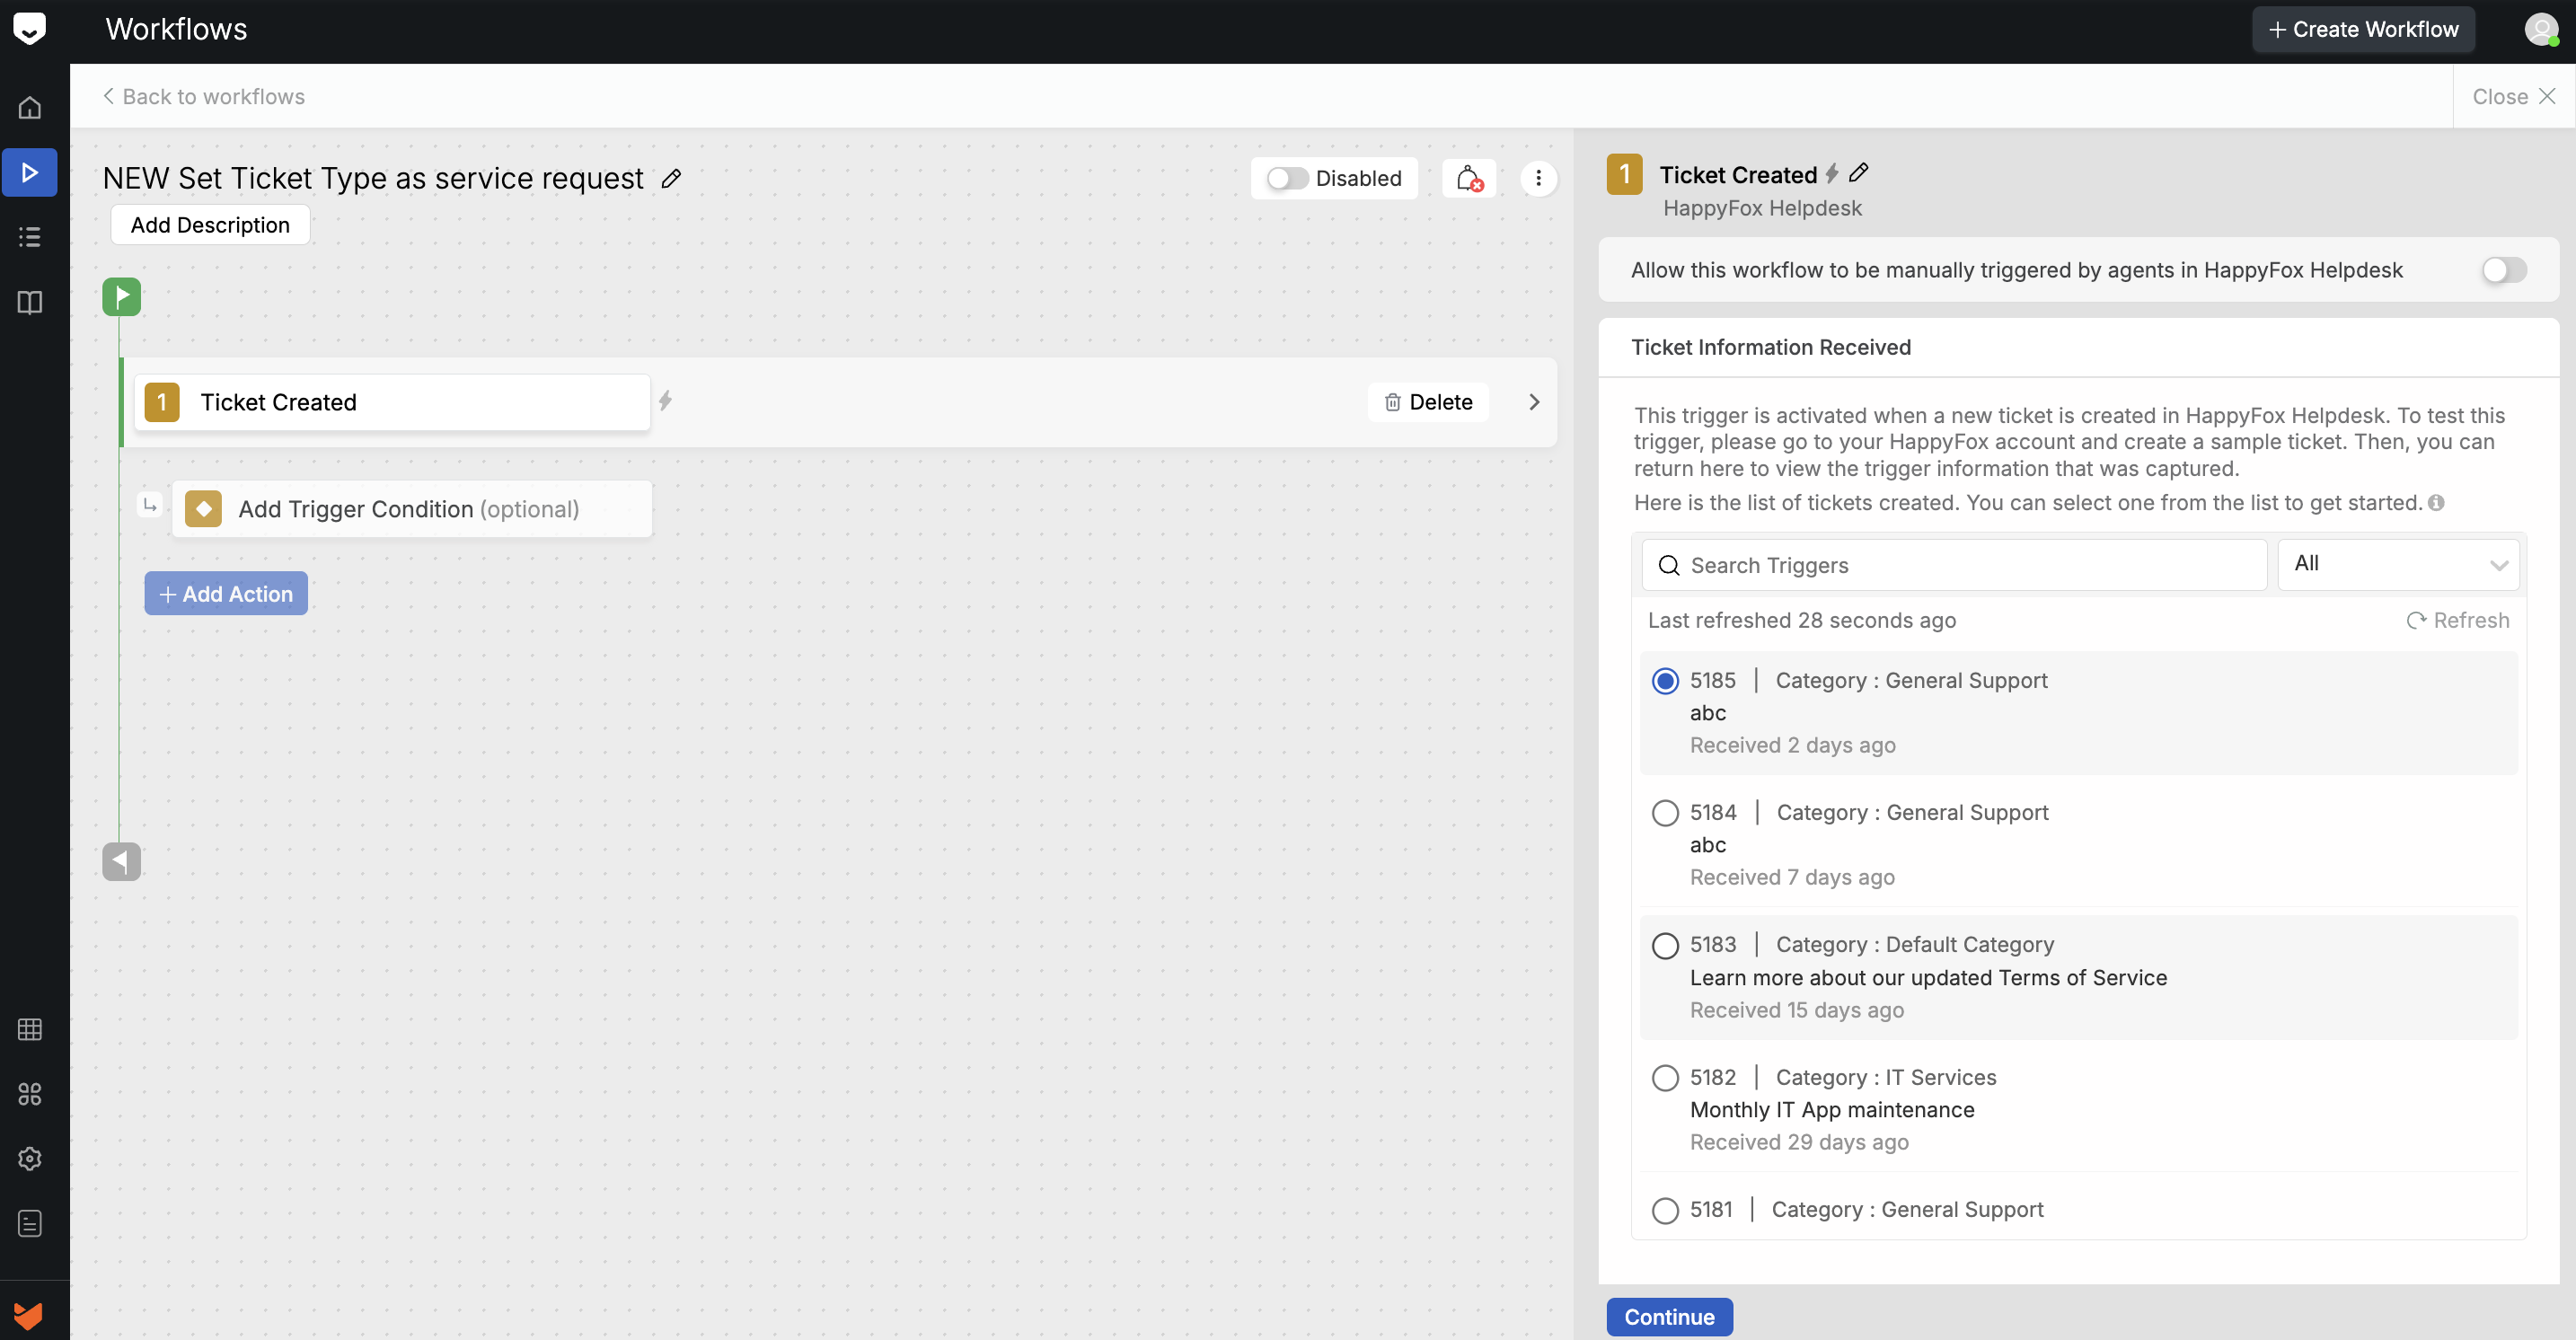
- Click Continue
- Optionally, add conditions to the trigger — for example, Match by Category — so the workflow only runs when a ticket matches those conditions.
Note: Once you enable the workflow, it runs only when a ticket matches all the trigger conditions you configure.
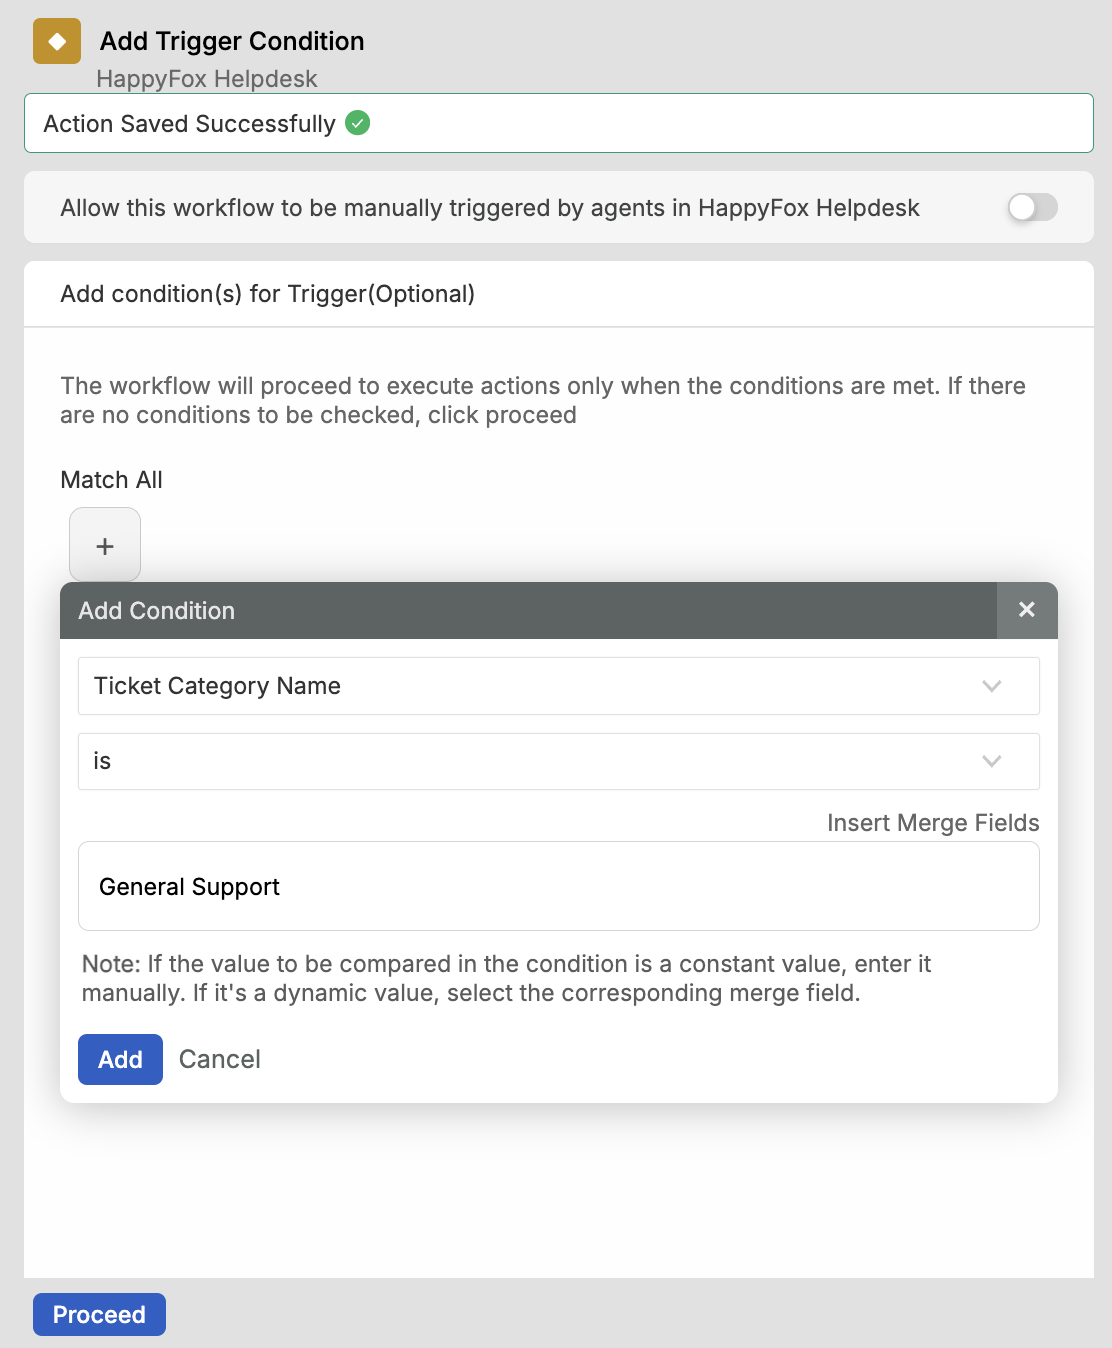
- Click Save and Test.
- If the test ticket matches your trigger conditions, click Proceed.
Note: If the test ticket doesn't match your trigger conditions, HappyFox Workflows shows an error. Click Proceed to continue configuring the workflow anyway, or click Back to select a different test ticket.
Step 3: Configure and enable the action
- Select an action — for example, Add Reply — from the actions list.
- Select the Ticket ID field to reference the ticket that triggered the workflow.
- Enter your message in the Message text box.
- Click Save and Test to test the action.
- Enable the workflow using the toggle.
Once enabled, this workflow runs automatically every time a matching ticket is created, adding the reply you configured.
Your first workflow is now built and ready to enable. Next, learn how to set up a smart rule to trigger a workflow for more advanced triggering conditions.