
 4623
4623
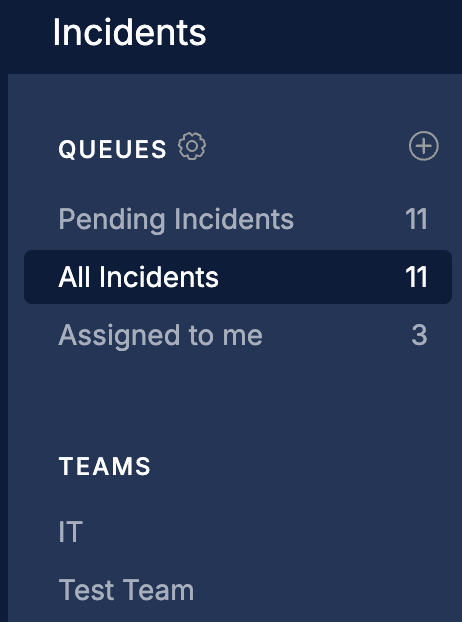
Queues is an easy way to organize and create custom views based on various filtering conditions for the agents. Queues will be displayed in the left pane in the listing page. Support agent(s) can create multiple queues based on their needs and requirements by configuring various conditions.
Default Queues
Your Service Desk account will have the following default queues to start off with,
1. Pending Tickets
-
This depends on the behavior of the status associated with the incident.
-
All the incidents whose status is in pending behavior will be listed here.
2. All Tickets
-
All the incidents created irrespective of the status will be listed here.
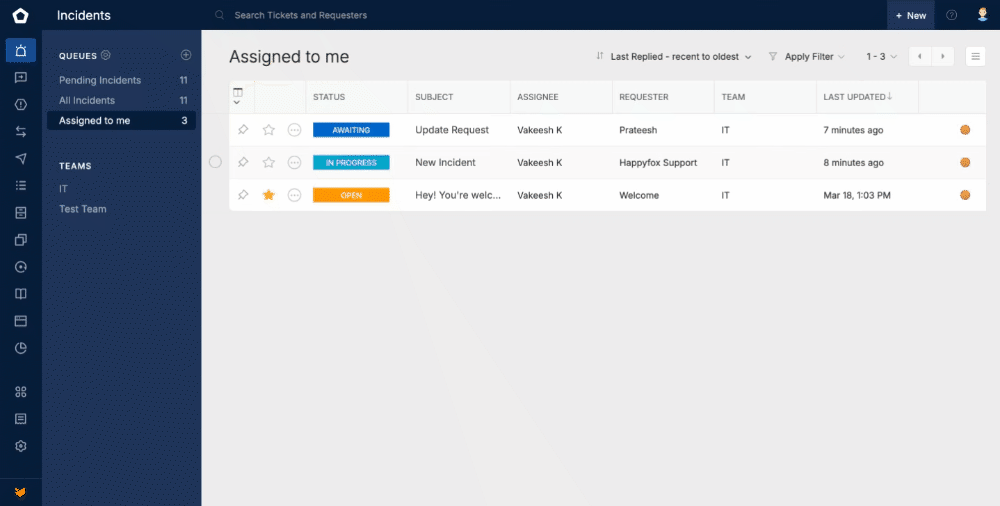
3. Assigned to me
-
All the incidents assigned to the logged in agent will be listed here.
Note:
The list of incidents displayed to the agent will also depend on the following
-
Team to which the agent is part of.
-
Assignment Group to which the agent is part of
Required Permissions
Agents will need the below two permissions to create and manage queues in the Incidents Listing Page
-
Manage Personal Queues
-
Manage both Personal and Shared Queues
How to create a Custom Queue?
Custom queues can be created in two ways.
-
By clicking on the +button next to the Queue Title (in the left panel)
-
You can specify conditions and apply a filter and then save it as a queue.
Follow the steps explained below to create a custom queue
-
Click on the + button next to the Queue Title in the Left panel.
-
This will open a Create Queue modal window
-
Add the required filter conditions in Match All or Match Any section to filter the incidents based on the specified conditions
-
Click on Next button
-
Provide a Queue Name and Description
-
Access To: Here select who should be able to access this queue.
-
Me: This will set the queue to be visible only to you
-
Team Agents: You can select the teams to whose agents the queue should be visible
-
Custom: You can select the agents to whom the queue should be visible.
-
Permission will be required to share the queues to other agents and teams. Refer to the last section for more details
-
Edit, Clone and Delete Queue
-
Click on the Queue Title in the listing page this will open the queue edit screen where you can update the filter conditions, change name, access of the respective queue.
-
You can also choose to Clone or Delete the queue in the edit mode.
Enable/Disable Queues and Reordering in the Left Pane
-
You can click on the setting icon next to the Queue Title in the left panel.
-
This will open up a popover listing all the Queues.
-
Here you can enable or disable the queues visibility in the left panel based on your need.
-
You can also reorder the queues by using the reorder icons on the front.

