
 1646
1646
HappyFox now lets both contacts and agents attach assets when creating a ticket.
This is especially useful when tickets are raised for specific hardware or software—such as laptops, servers, or licenses—because it provides immediate context (owner, location, warranty, configuration, etc). Linking the relevant asset:
- Reduces back-and-forth between requester and agent.
- Improves the accuracy of diagnosis and resolution.
Applicable Plans
✖️ Basic ✖️ Team ✔️ Pro ✔️ Enterprise PRO
✔️ Growth ✔️ Scale ✔️ Scale Plus ✔️ Ultimate
This feature is available only if Asset Management is already enabled.
Asset Type Settings
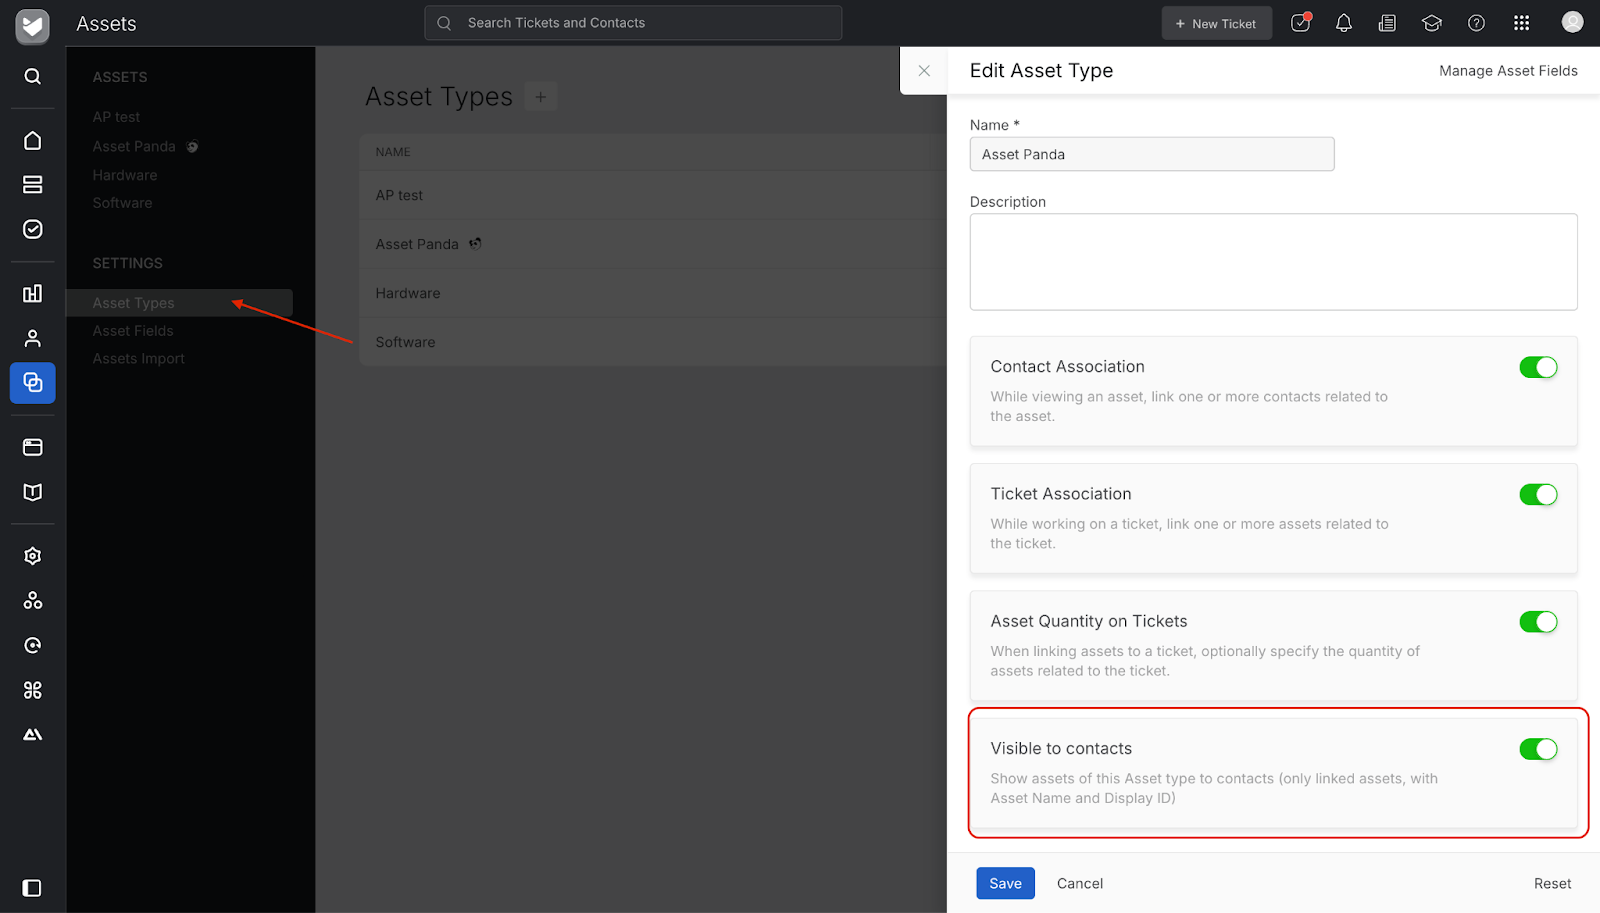
A new setting, Visible to Contacts, has been introduced under each Asset Type.
This determines whether assets of this asset type will appear to contacts in the contact portal.
The toggle can be turned on only if Ticket Association is already enabled for that asset type.
Note: If you disable this setting after it has been enabled, any assets that were previously visible to contacts will immediately become hidden.
Linking Assets for Contacts and Contact Groups
Assets can be linked either to individual contacts or to contact groups.
Individual Contacts
Contacts to whom specific assets are linked, can link the assets directly when creating a ticket.
Contact Groups
A Contact Group can have several assets linked to it. In organizations where multiple assets are owned collectively, assets can be linked to a Contact Group.
Admins/Managers can designate one or more contacts within the group who are authorized to view all assets linked to that contact group. These selected contacts can then raise tickets on behalf of others in the same group.
If a contact also has assets linked directly to them apart from the contact group linked assets, they will see both their personal assets and contact group-linked assets in the selection list while creating a ticket.
Example:
In an IT service setup, a company’s IT manager can be allowed to view all assets belonging to their organization’s contact group, enabling them to raise tickets for any issue reported by employees under that group.
How to Link Assets to a Contact Group
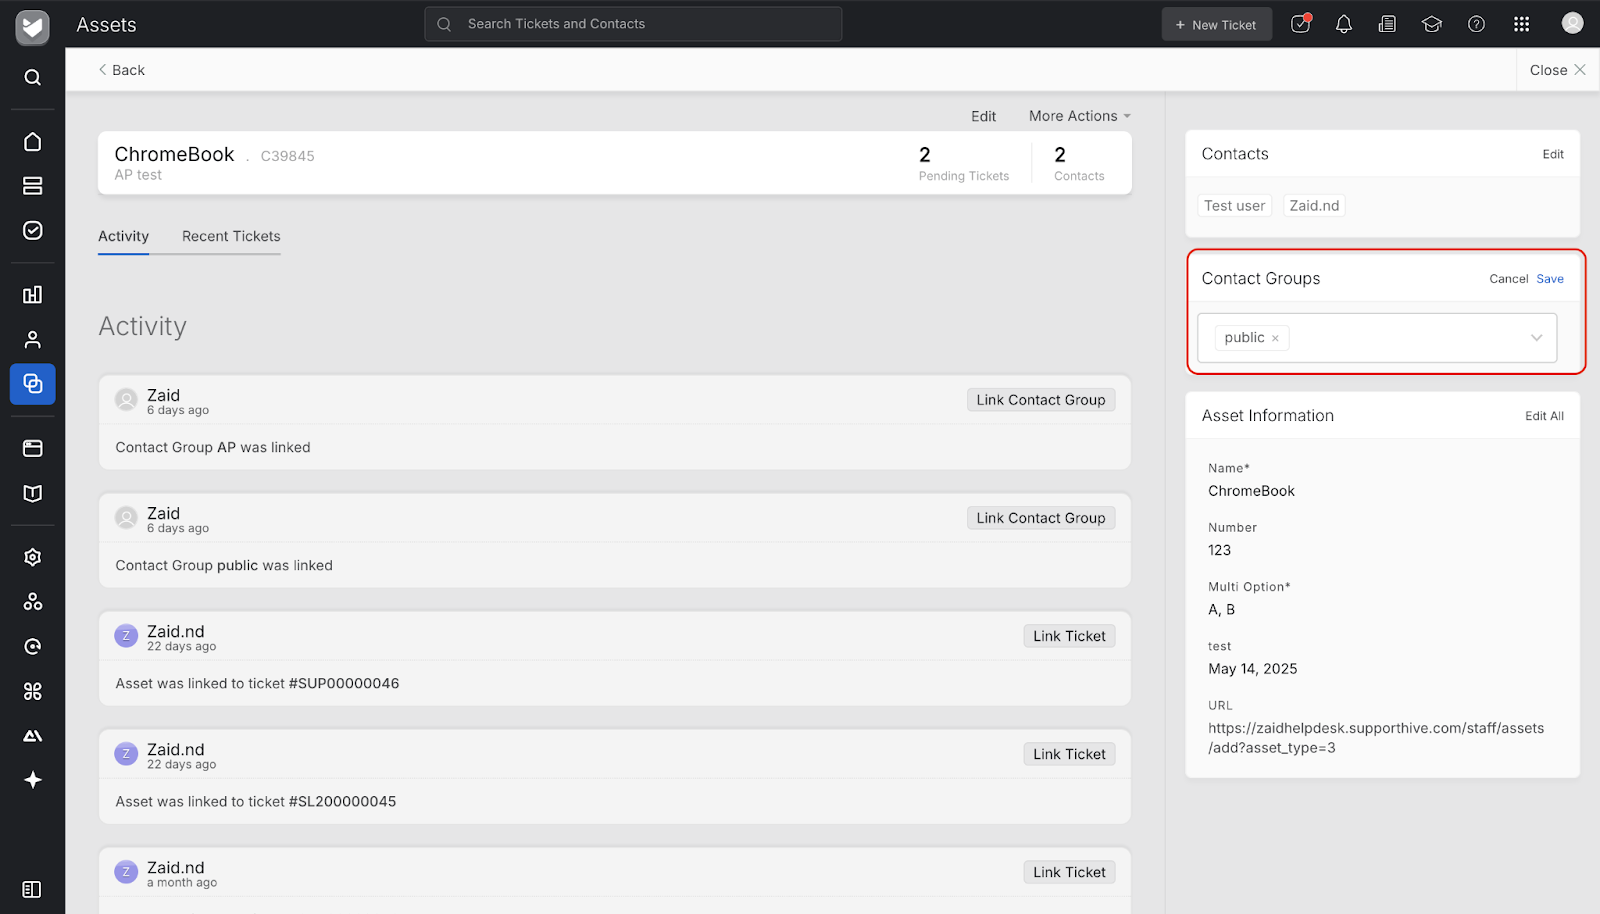
While creating or editing an asset, you’ll now find a new field — Contact Groups — under the asset details section.
Use this field to associate one or more contact groups with the asset. Once linked, the asset becomes accessible to all contacts within those groups who have viewing permissions enabled.
How to Enable Contacts to View and Link All Group Assets
- Navigate to Contact Group and select the desired Contact Group.
- In the contact group view, you’ll see a new column labeled View All Assets next to each contact.
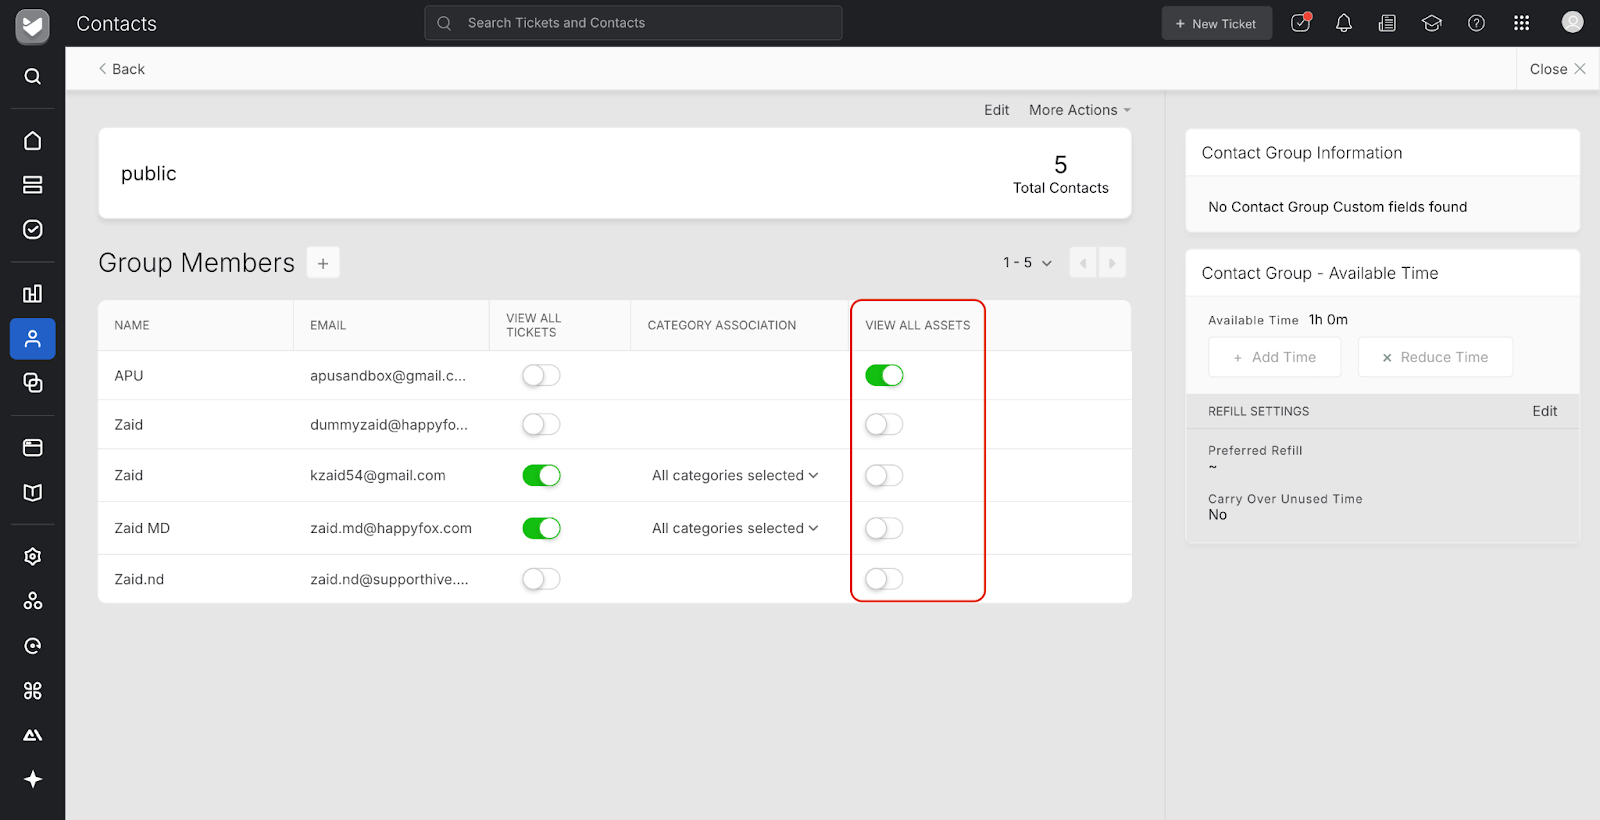
- Toggle View All Assets for specific contacts who should be able to see and link all assets associated with that contact group.
These contacts will then be able to view both their own and their group’s assets while creating or updating tickets.
Prerequisites for “View All Assets” Contacts
For contacts to view all assets linked to their Contact Group, the following settings must be enabled:
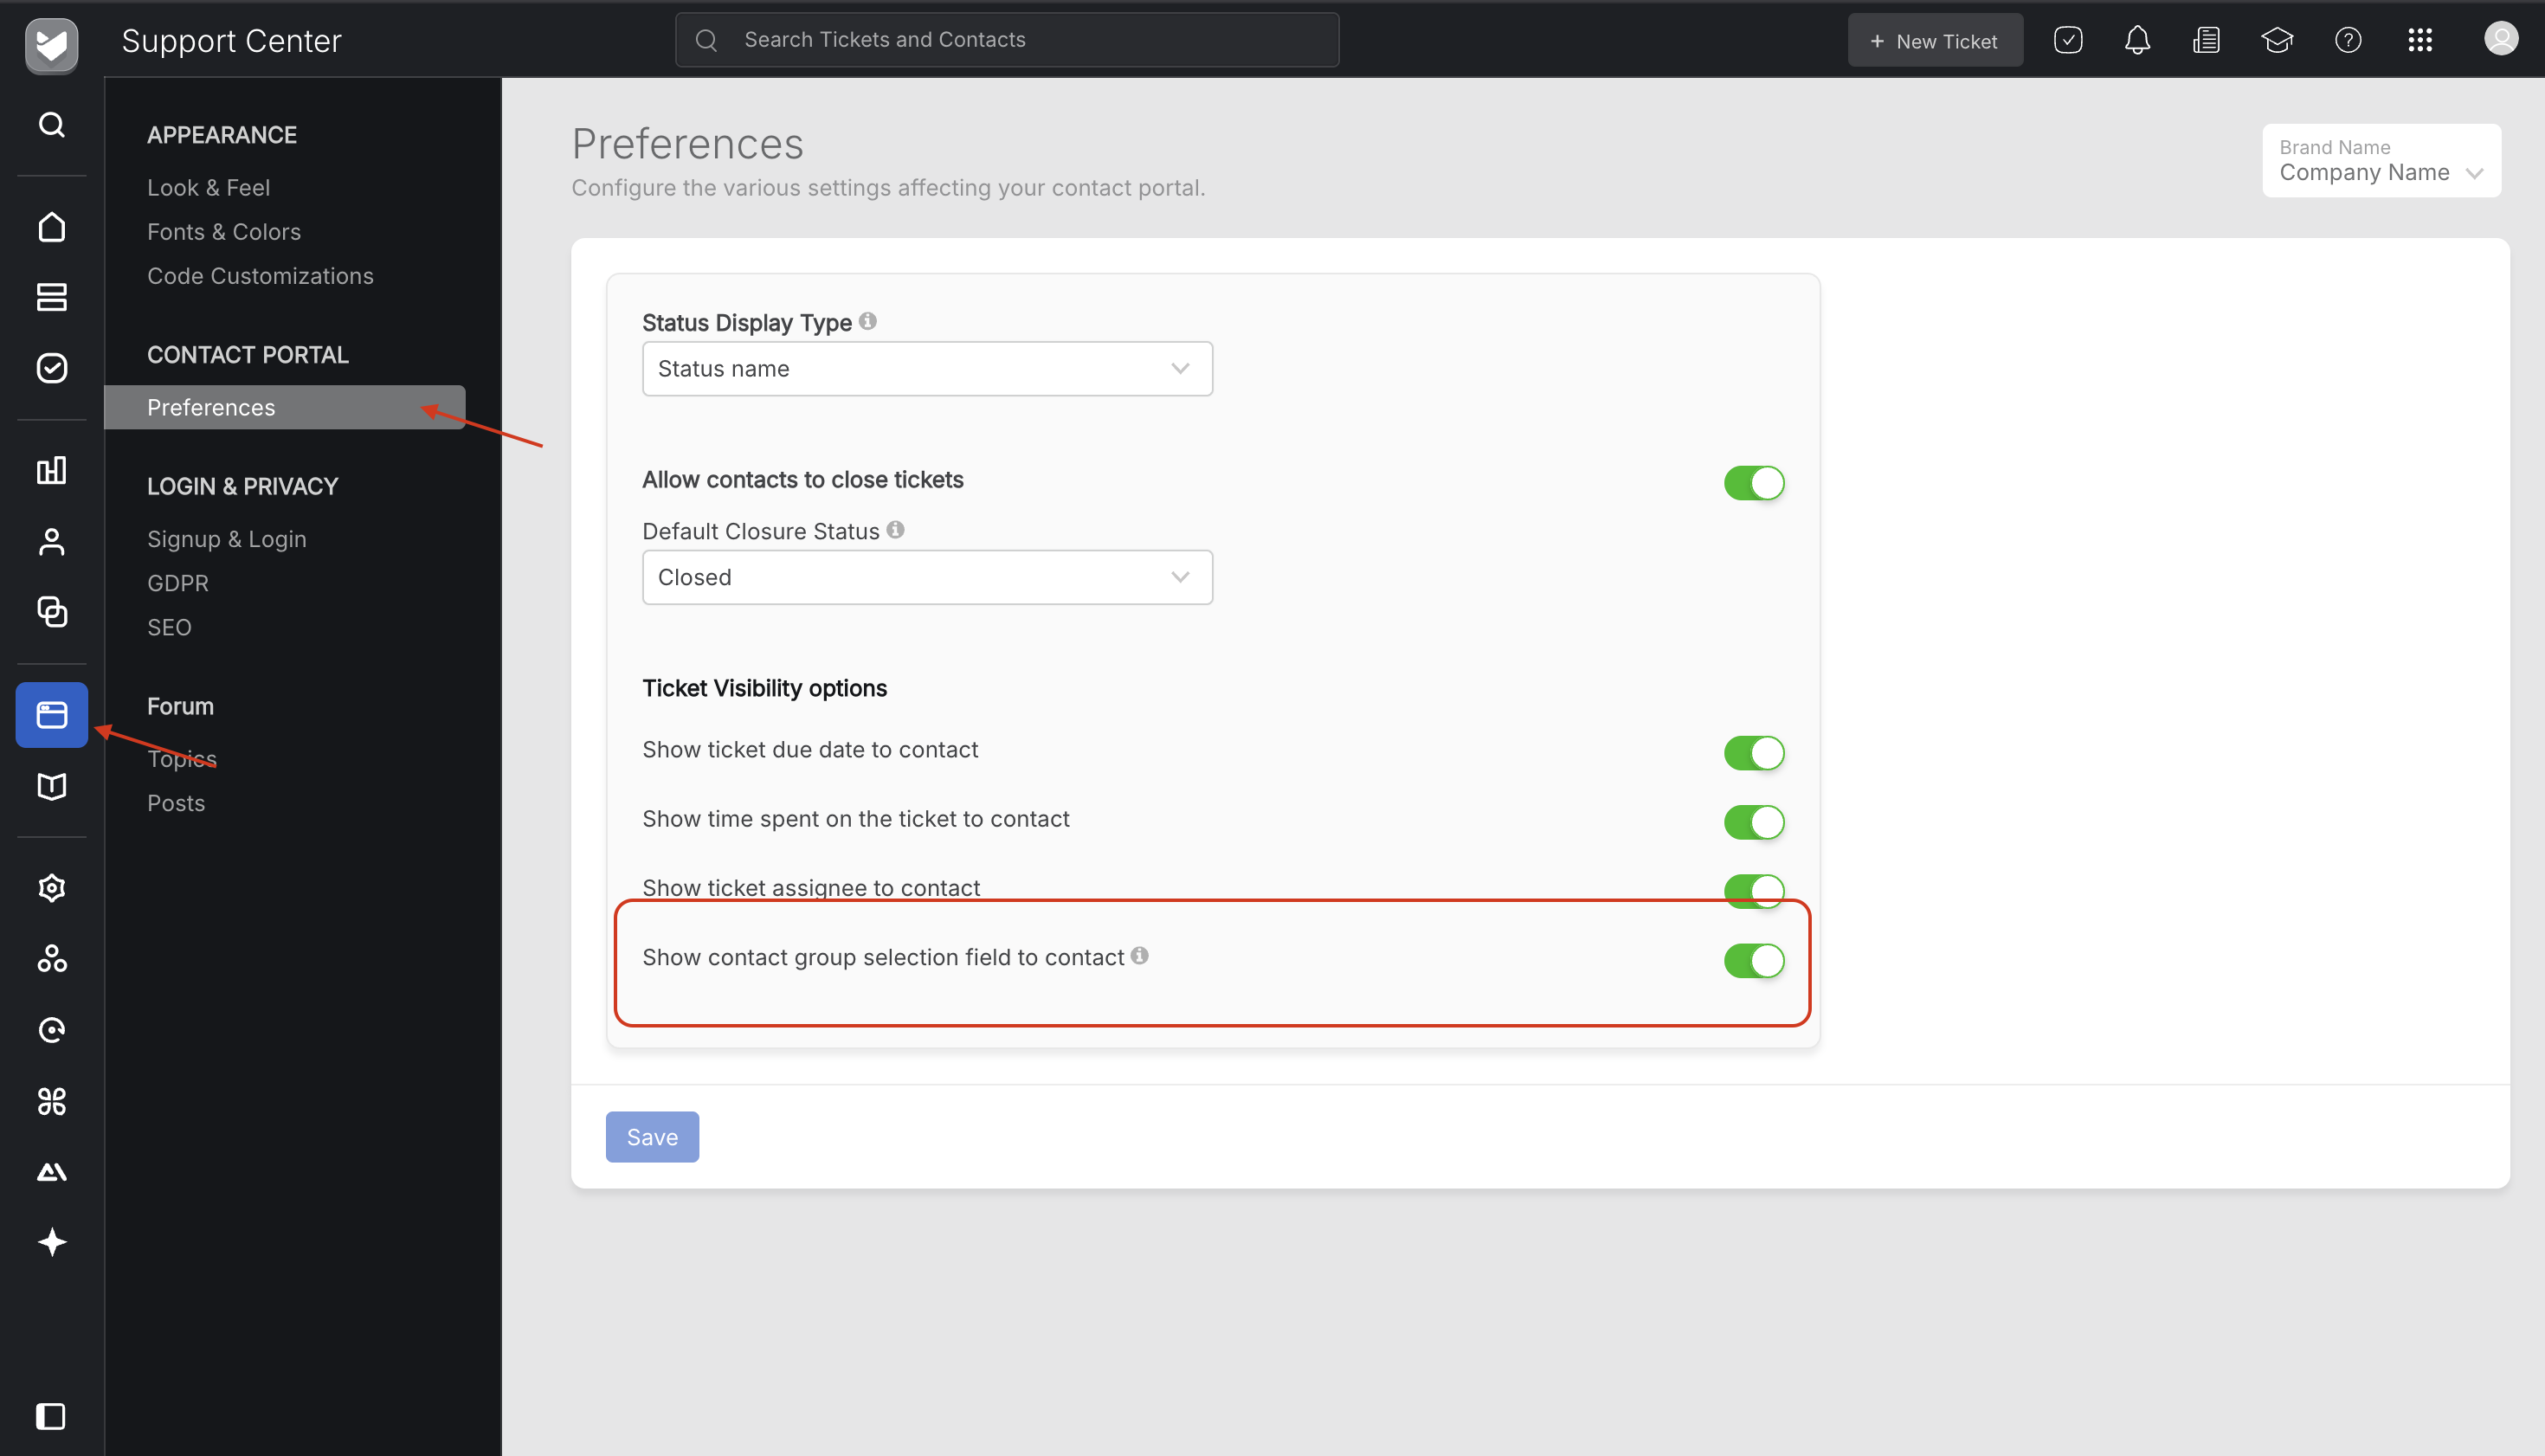
- Show Contact Group Selection Field to Contact - Located under Support Center → Preferences
- View Contact Group Information in Tickets - Located under Account Settings → Feature Settings
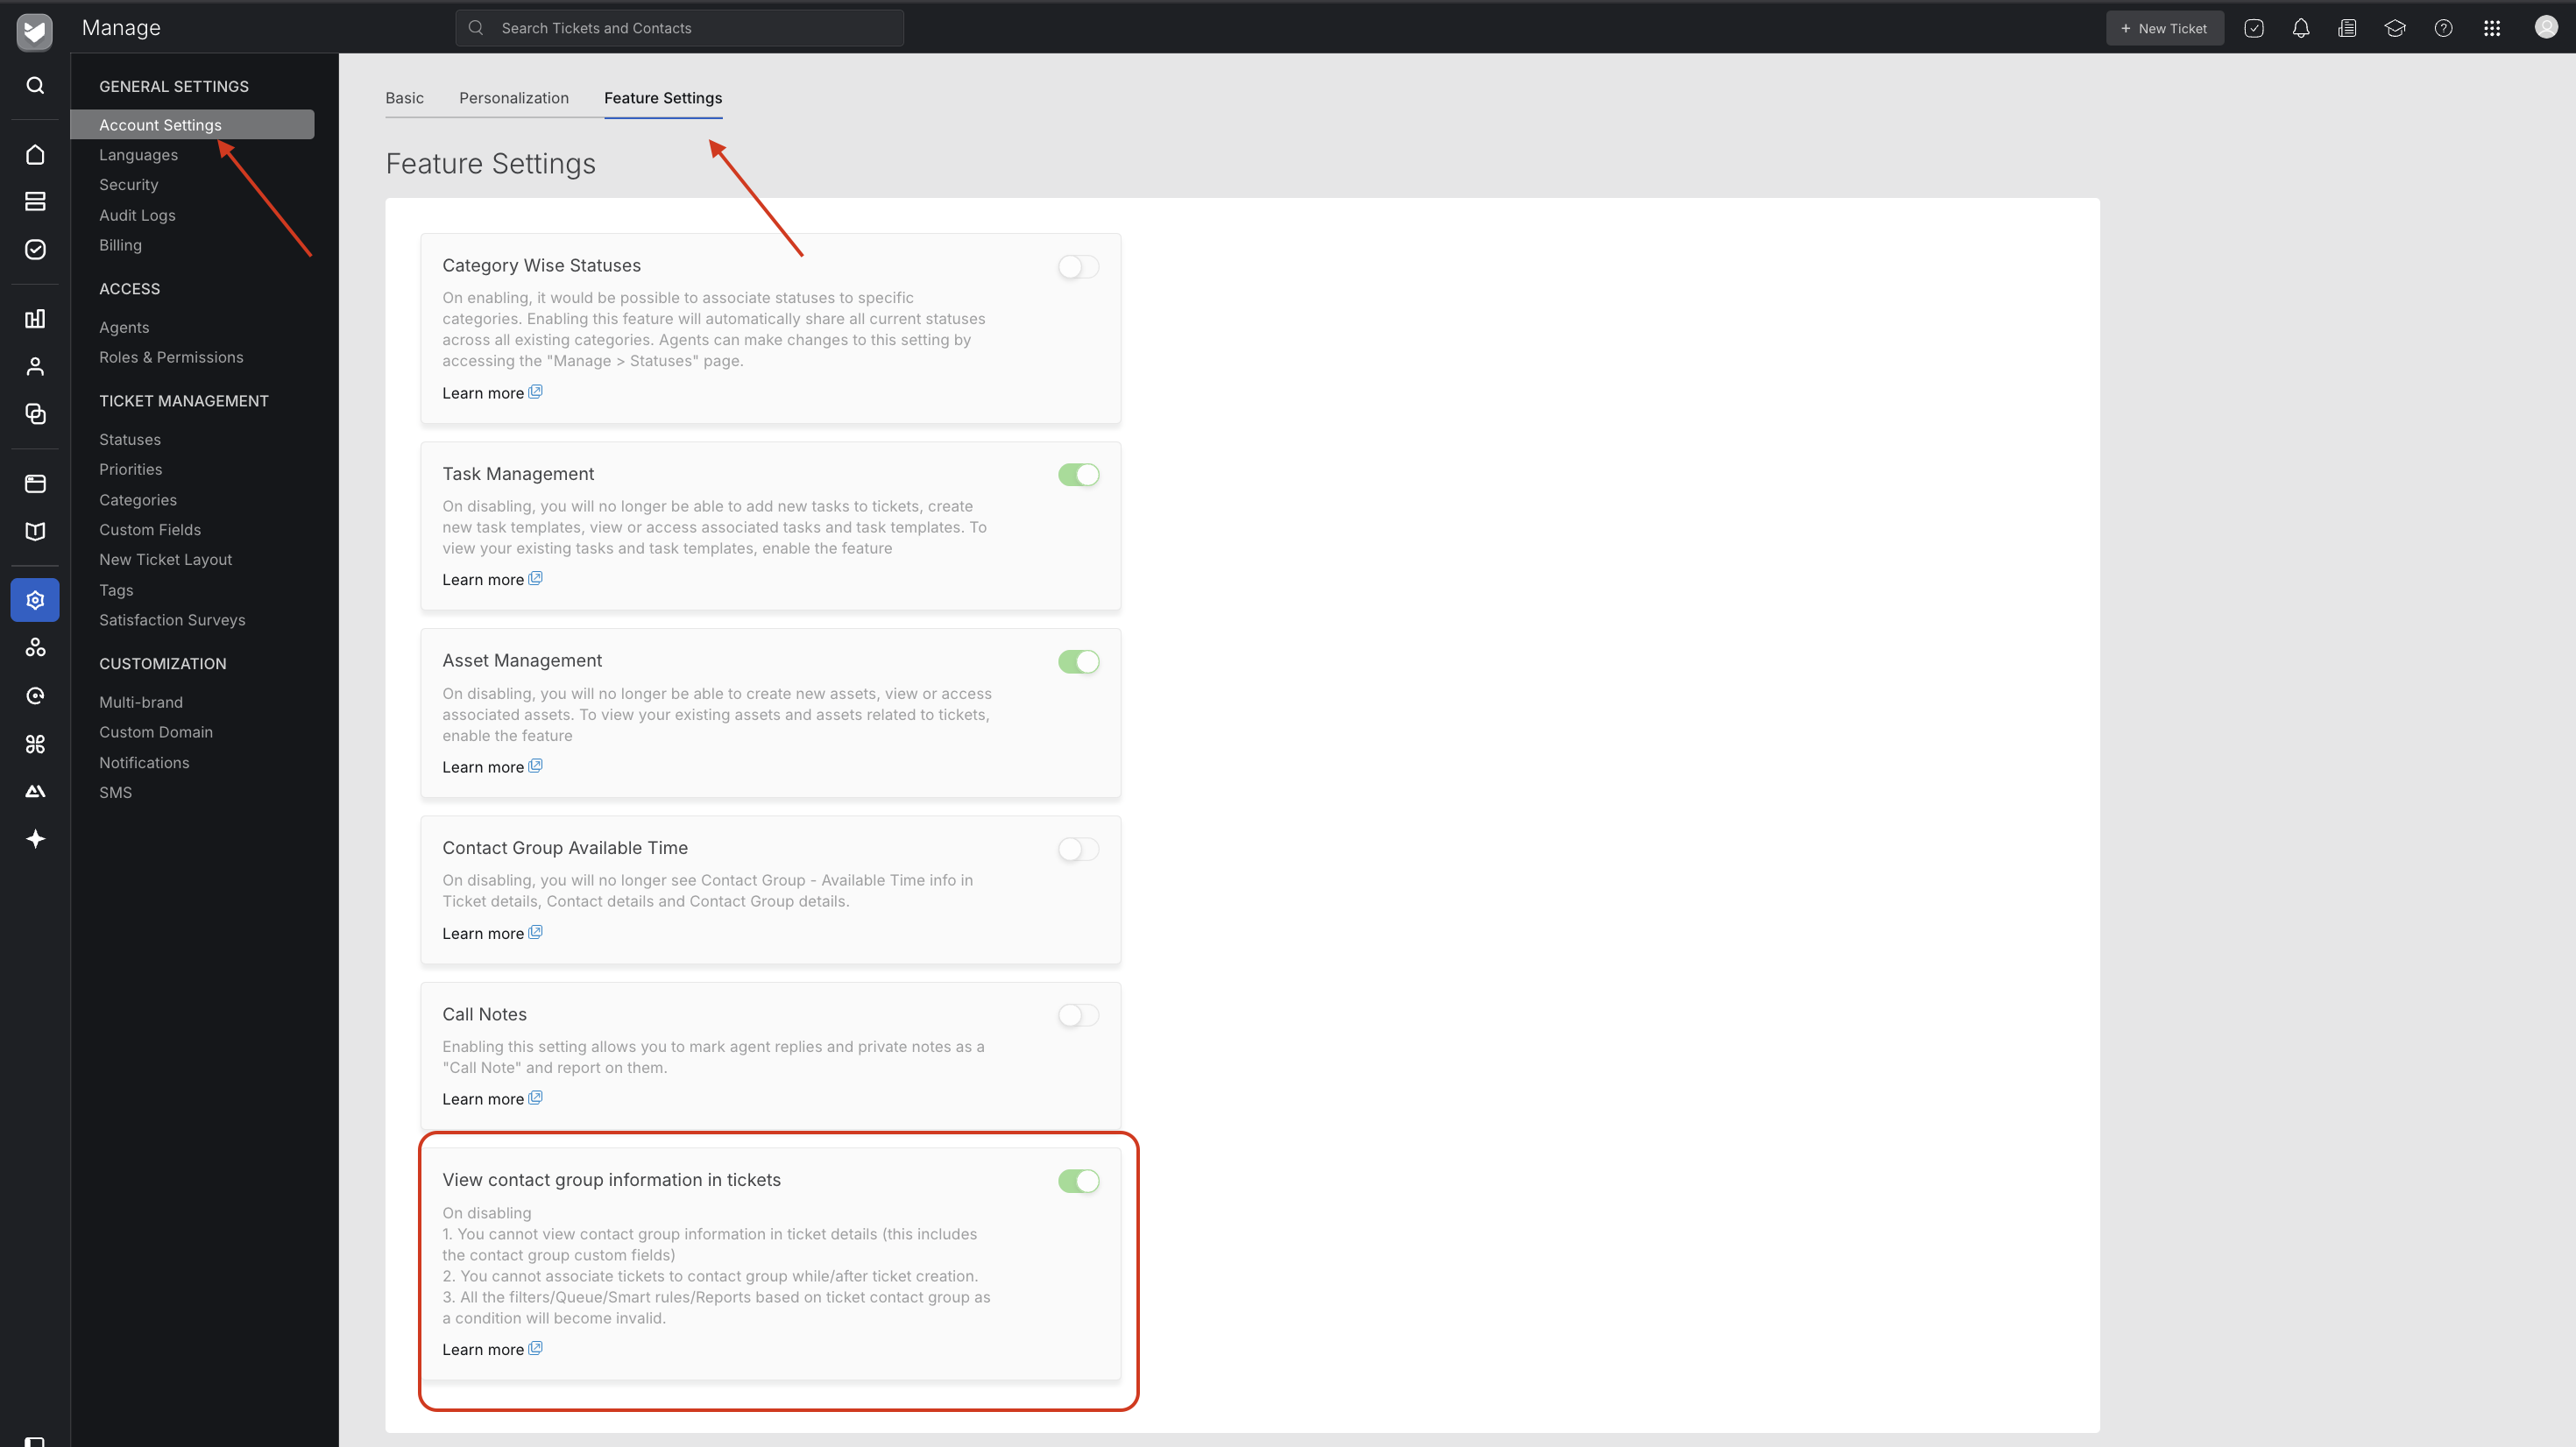
Once both settings are active, designated contacts with View All Assets enabled will be able to see and link all assets associated with their contact group when creating or updating tickets.
Note: These settings are not required for standard contact–asset linking, where a contact can view and link only the assets directly associated with them.
New Ticket Layout
The ticket-creation form now includes Asset as a configurable field.
Administrators can decide whether this field appears to agents, contacts, or both, in the ticket creation form and they can reorder it alongside other fields in the Contact Portal Preferences.
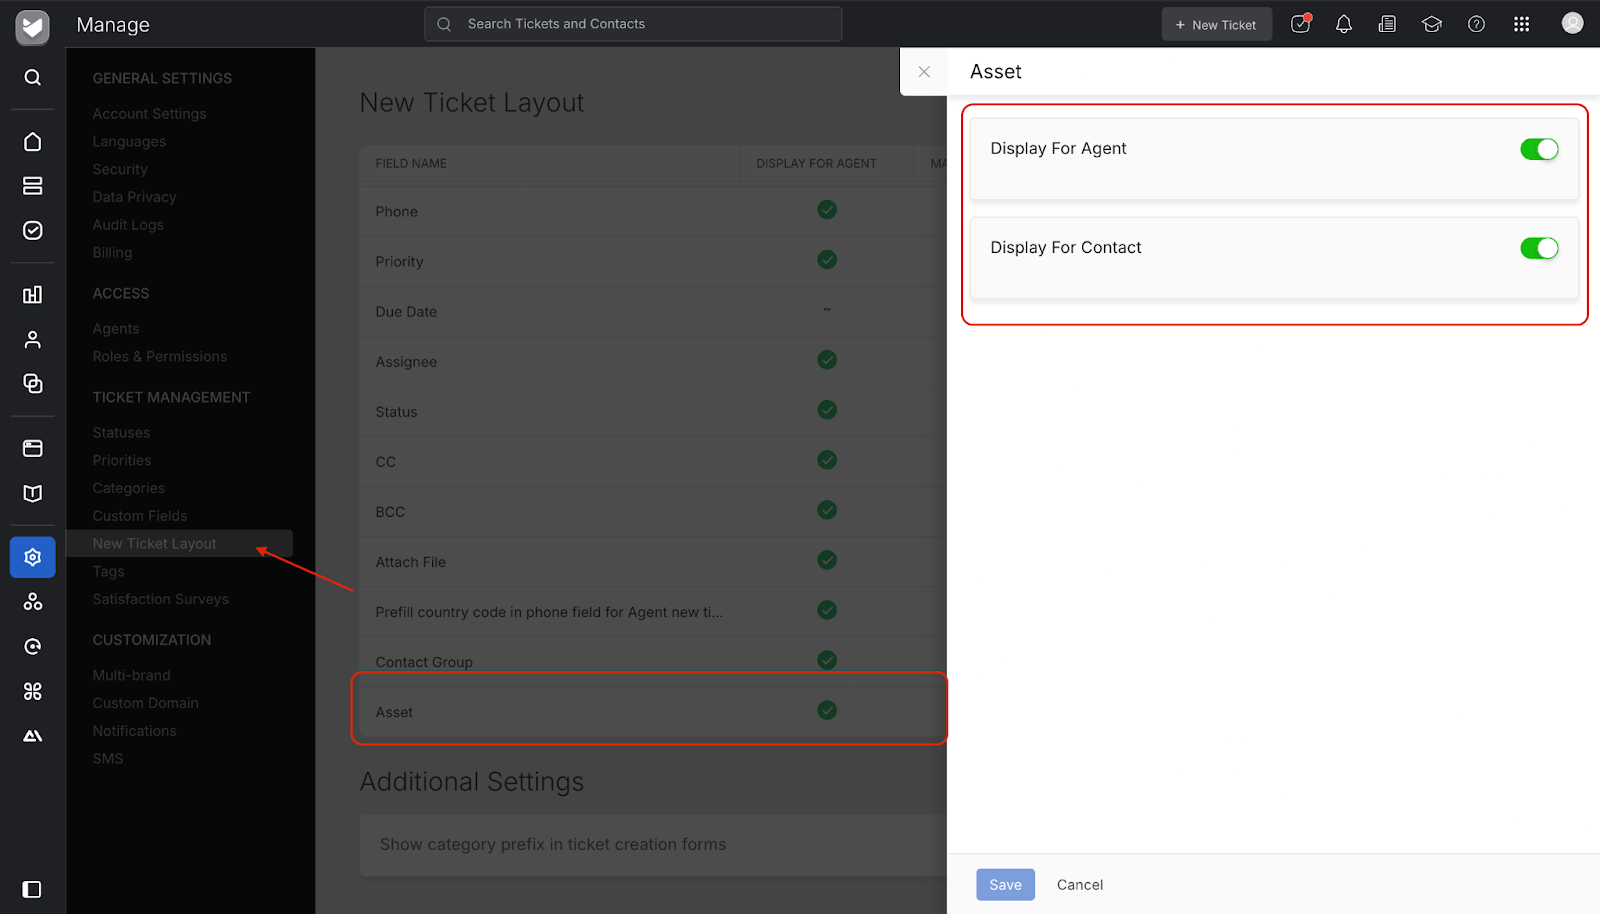
By default, the field is disabled and, when enabled, remains optional—its mandatory status cannot be changed.
Which Assets a Contact Can See
Only contacts who are signed in to the portal can link an asset to a ticket.
For an asset to appear in the selection list, three conditions must be met:
- Ticket Association must be enabled for the asset type.
- The asset type itself must be marked Visible to Contacts.
- The asset is linked either:
- Directly to the logged-in contact, or
- To a Contact Group where this contact has View All Assets enabled.
Contact Portal
Ticket Creation
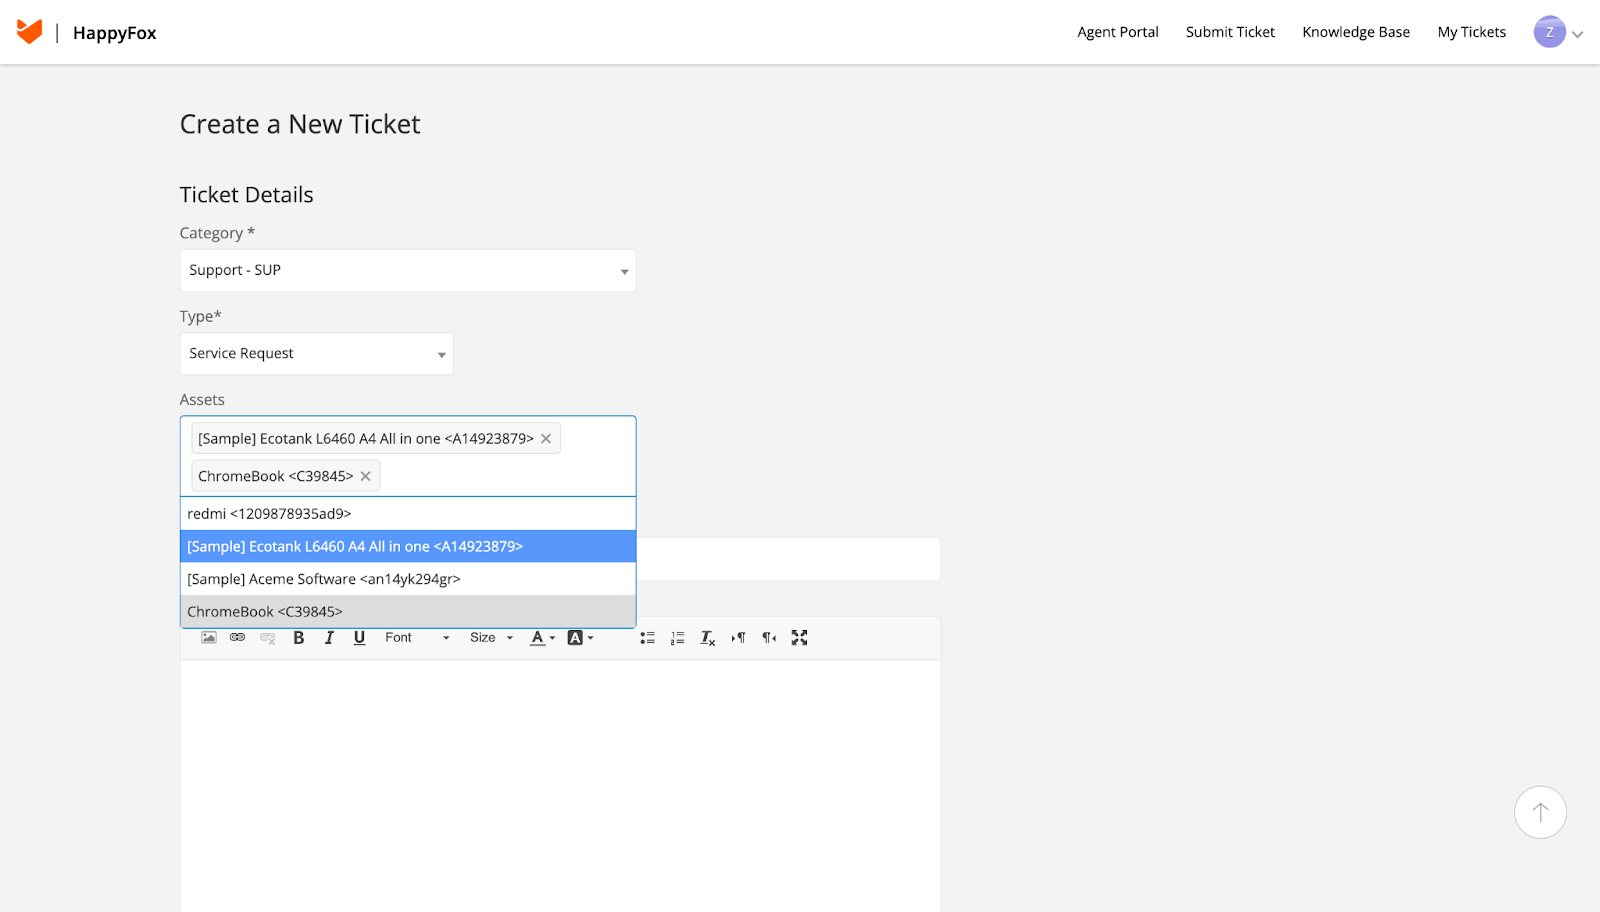
- Signed-in contacts can search assets by Asset Name or Display ID.
- They can select multiple assets.
- Field is optional.
- The drop-down list shows each asset in the format Asset Name <Display ID>.
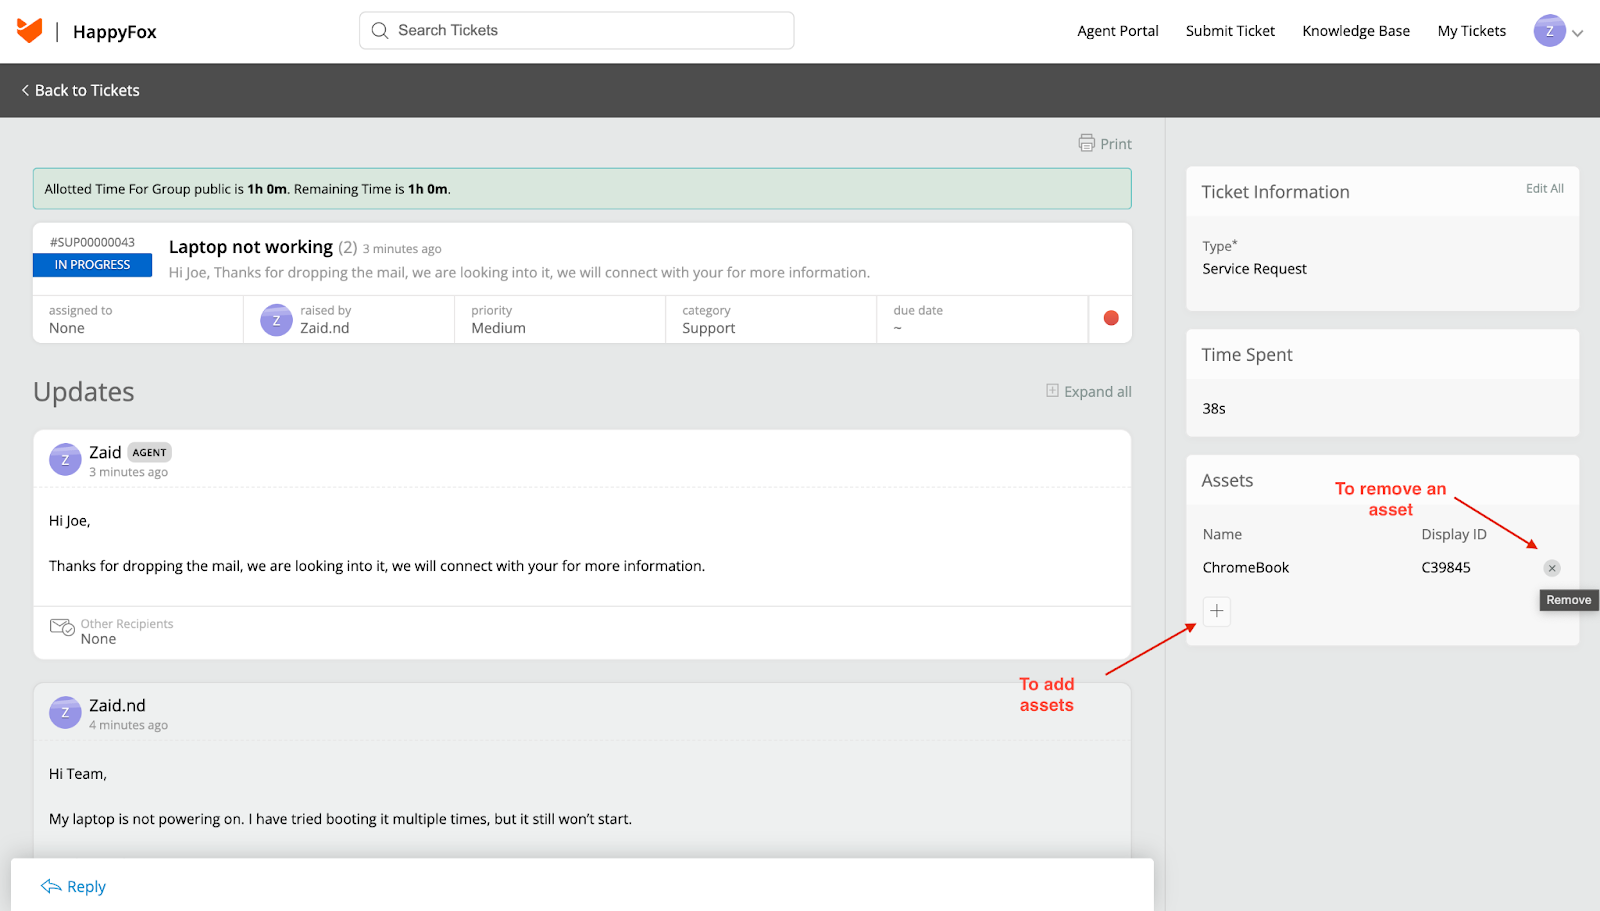
Ticket Details
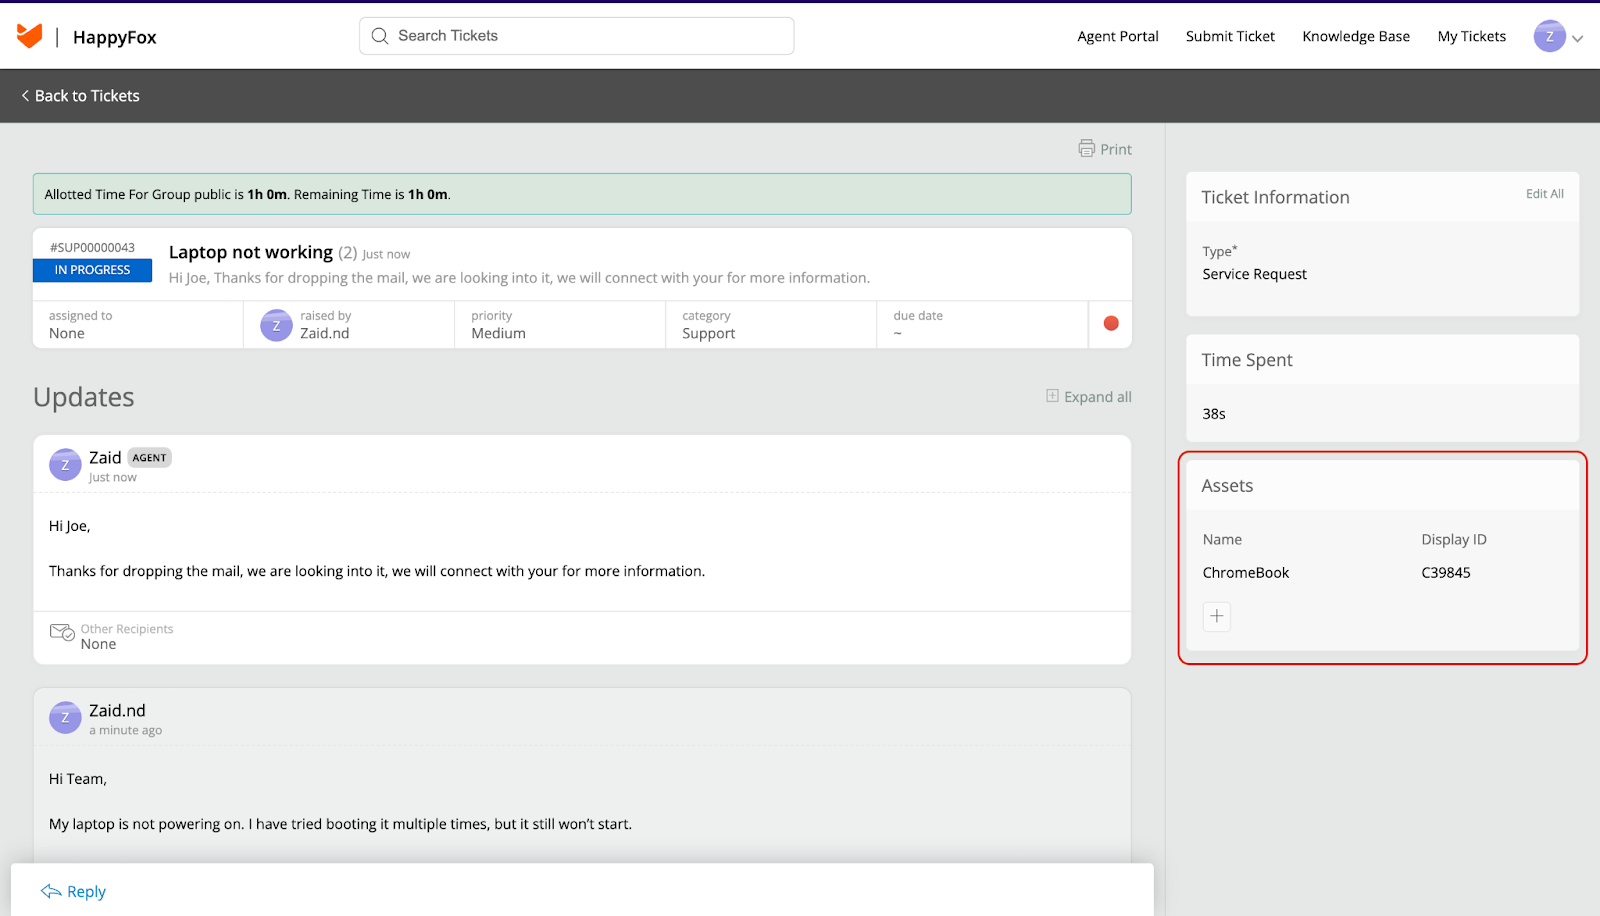
- A new section displays all assets linked to the ticket, showing name and Display ID.
- Contacts can add or remove assets after ticket creation.
- Changes are reflected for agents as well.
Agent Portal
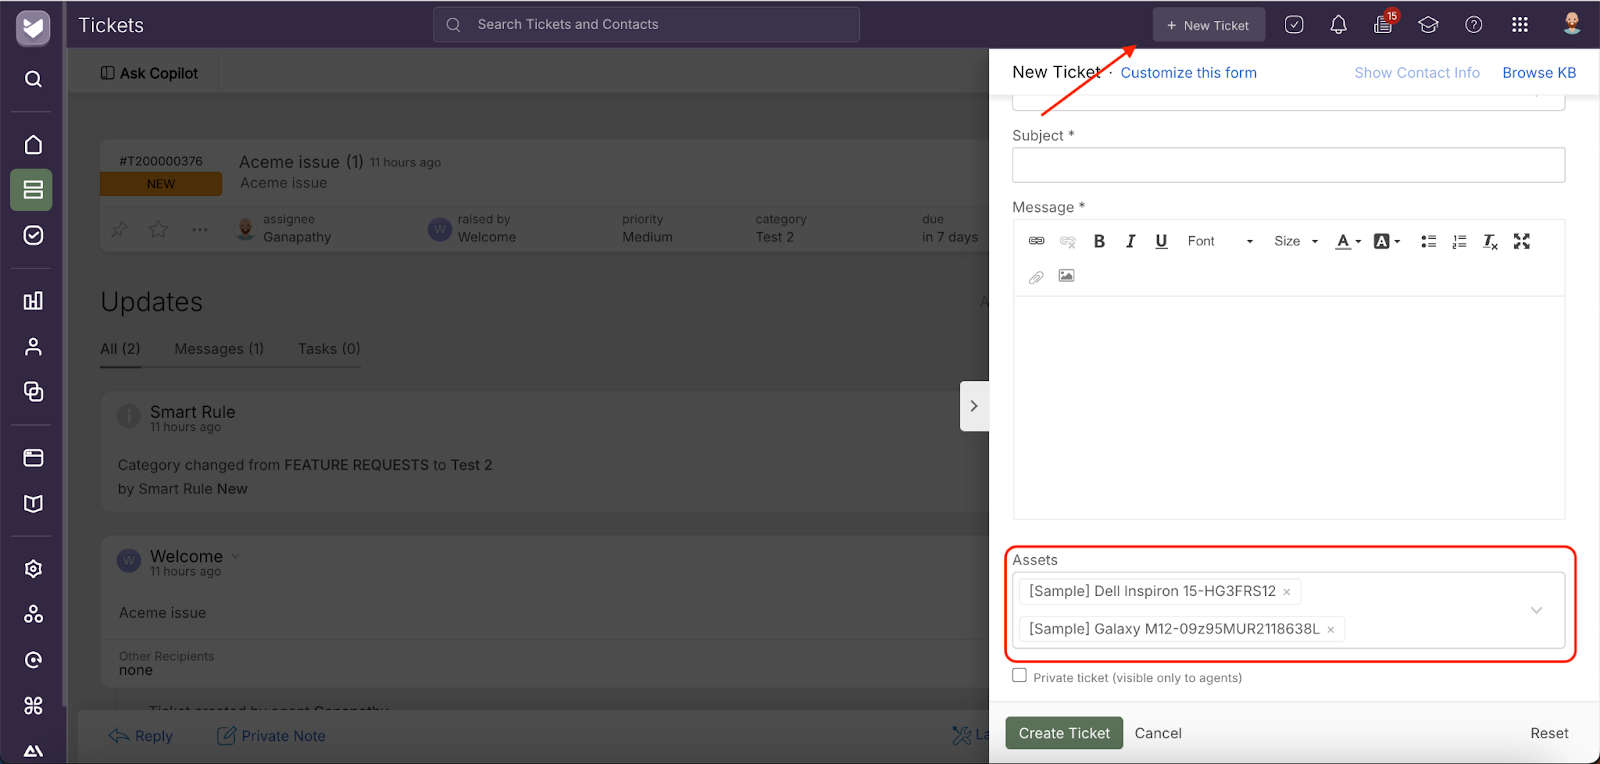
- Agents can add multiple assets when creating or updating tickets.
- They can search by Asset Name or Display ID.
- Agents can also link assets not associated with the ticket’s contact or not visible to contacts.
- Assets hidden from contacts remain visible to agents only.
- Agents see all assets (subject to their role permissions) exactly as before, provided they have the Edit Ticket Asset Info permission.
For a full overview of Asset Management, see our Asset Management Guide.

