 2367
2367
HappyFox Help Desk offers you the ability to seamlessly integrate your support portal with your brand identity by mapping your default HappyFox URL (company.happyfox.com) to a custom domain of your choice, such as support.yourcompanyname.com. This feature not only reinforces your brand but also provides a more professional and trustworthy experience for your customers.
Applicable Plans:
✖️ Basic ✔️ Team ✔️ Pro ✔️ Enterprise PRO
✔️ Growth ✔️ Scale ✔️ Scale Plus ✔️ Ultimate
Prerequisites
Before you begin the process of setting up a custom domain for your HappyFox Help Desk, ensure you have access to your DNS provider's control panel. You'll need to create a CNAME record to properly route traffic to your HappyFox account. Follow these guidelines:
-
Standard Custom Domain Setup
-
Create a CNAME record in your DNS provider's control panel.
-
Point the CNAME to your HappyFox account URL: <accountname>.happyfox.com
-
-
Example:
-
Your desired custom domain: support.yourorg.com
-
Your HappyFox account domain: yourorg.happyfox.com
-
-
Set the following CNAME in your yourorg.com DNS zone:
-
CNAME name: support
-
CNAME target: yourorg.happyfox.com
-
-
Custom Domain for a Specific Brand
-
If setting up a custom domain for a specific brand, create a CNAME record pointing to <brand>.<accountname>.happyfox.com
-
-
Example:
-
Your desired custom domain for a brand: support-brand.yourorg.com
-
Your brand's HappyFox URL: brand.yourorg.happyfox.com
-
-
Set the following CNAME in your yourorg.com DNS zone:
-
CNAME name: support-brand
-
CNAME target: brand.yourorg.happyfox.com
-
Required Permissions for Managing Custom Domains
To create and manage Custom Domains in HappyFox Help Desk, agents need specific permissions. Here's what you need to know:
-
Required Permission:
-
"Manage in-app Custom Domain and SSL"
-
-
Permission Type:
-
This is a Managerial permission
-
-
How to Enable the Permission:
-
Navigate to: Manage → Roles & Permissions
-
Select: Managerial
-
Go to: Others
-
Enable: "Manage in-app Custom Domain and SSL"
-
Note: Only agents with this permission will be able to set up and manage custom domains and SSL configurations. Ensure that the appropriate team members have this permission before proceeding with the custom domain setup.
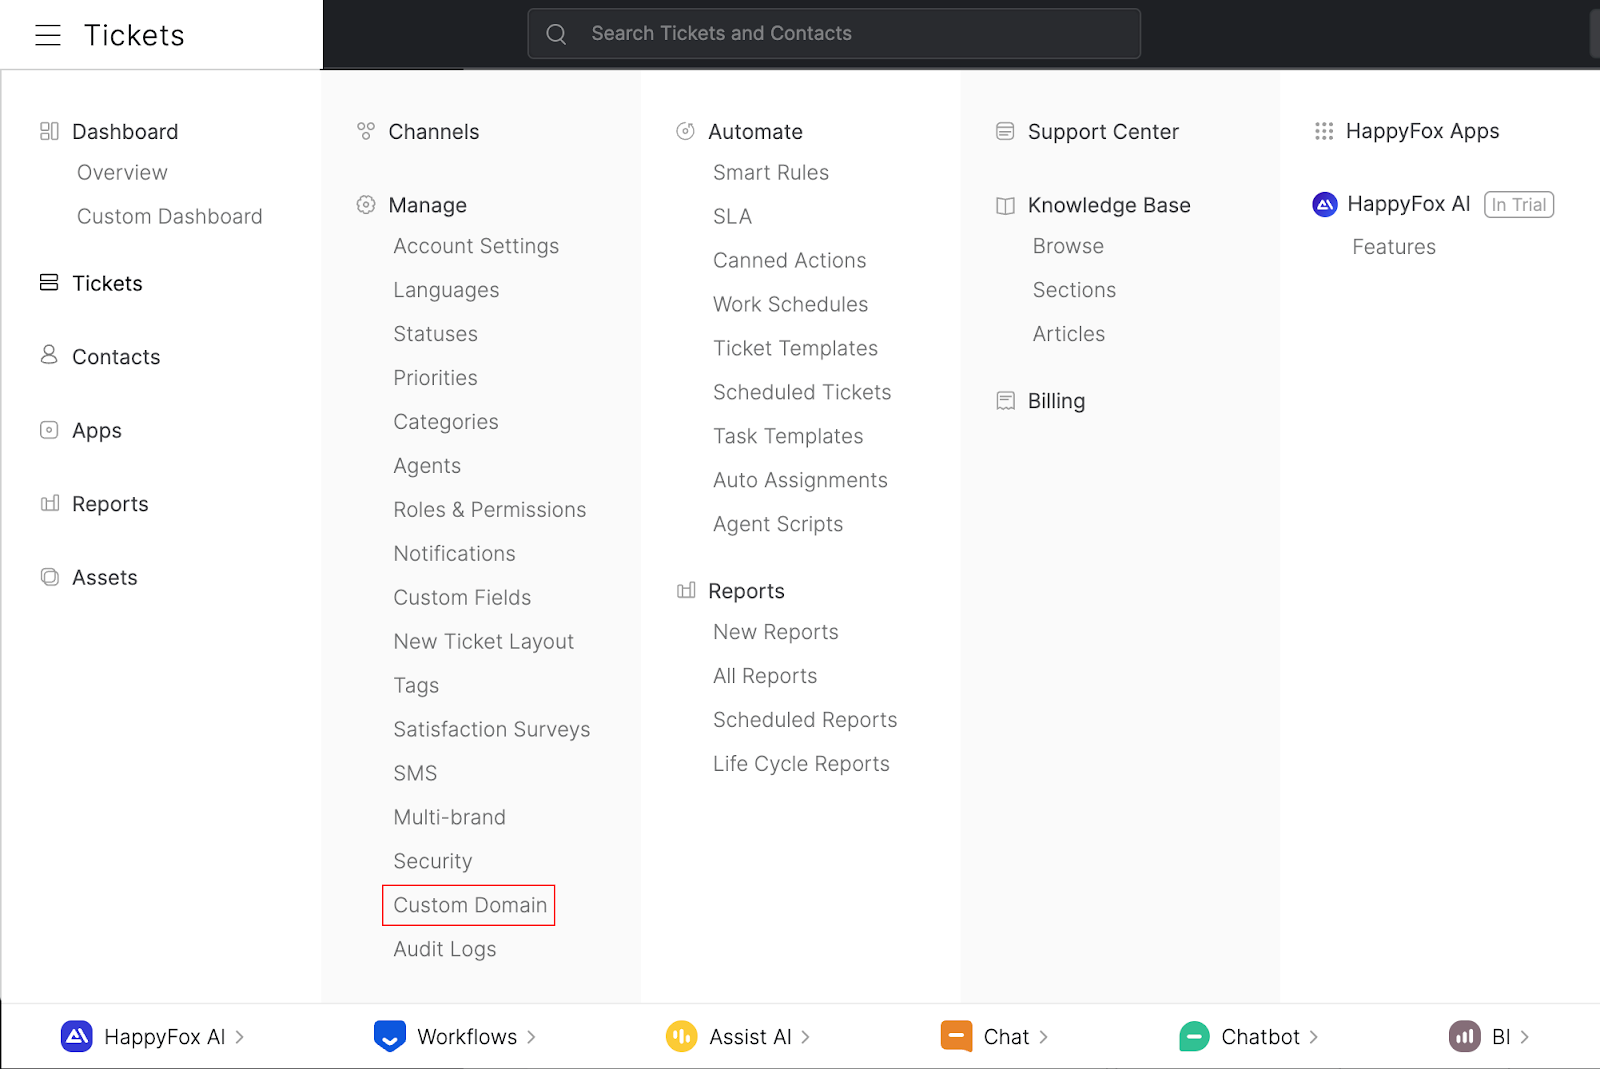
Steps to configure Custom Domain
-
Navigate to Main menu → Manage → Custom Domain
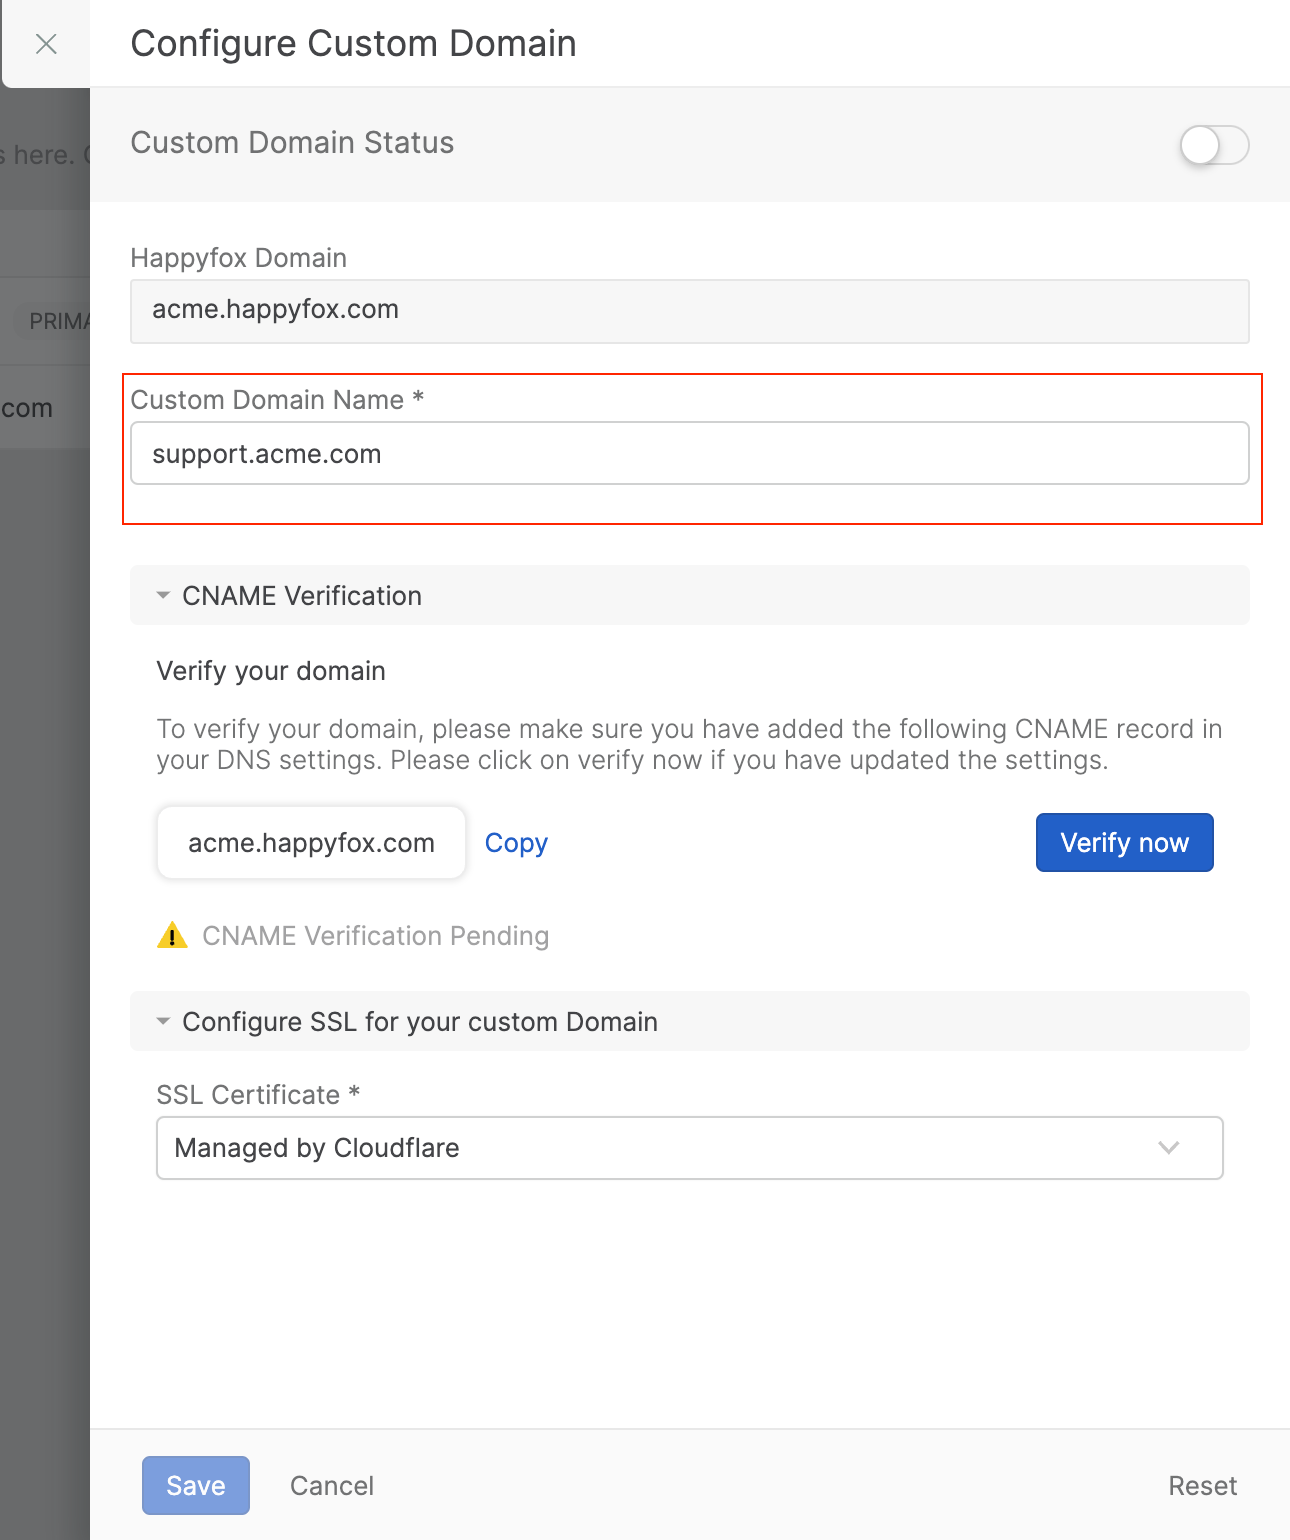
-
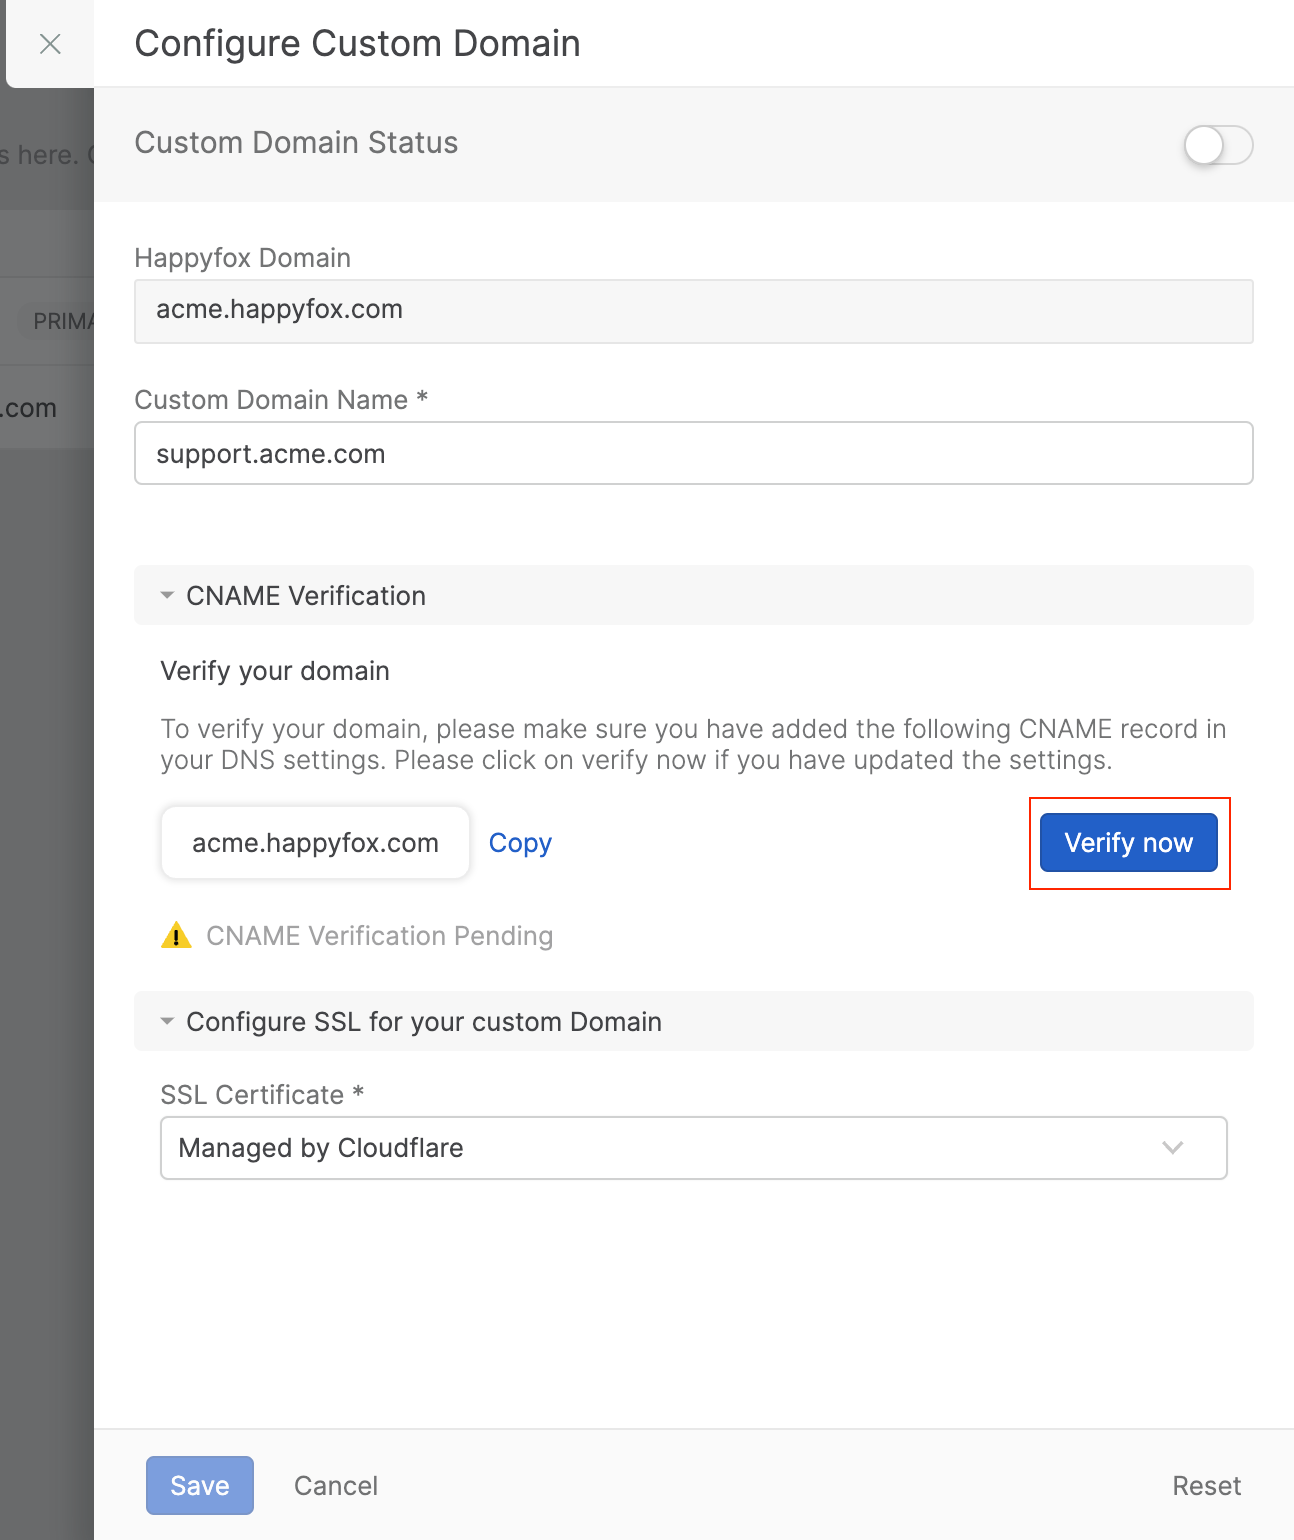
Click on the “Setup Custom Domain” option next to the HappyFox domain for which you want to create a custom domain. This will open the “Configure Custom Domain” form
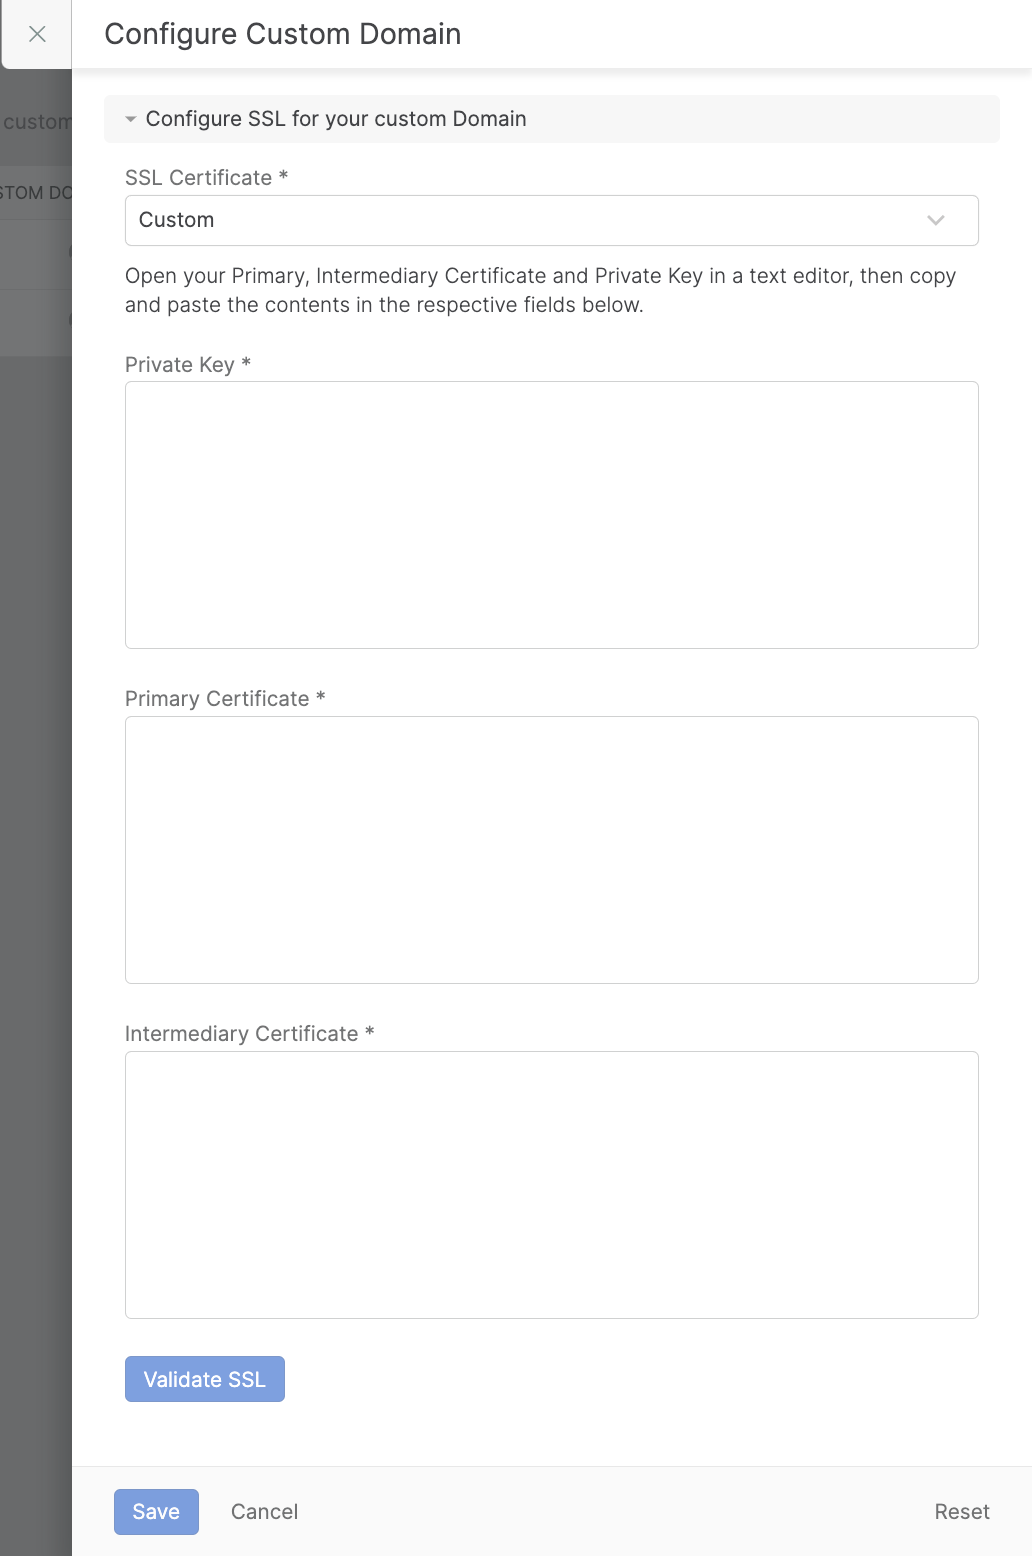
-
In the “Configure Custom Domain” form, enter the Custom Domain Nam
-
Under the CNAME Verification section, click on Verify now to verify the CNAME record configuration for the custom domain you are creating
-
Custom domains will need to be SSL enabled. Using HappyFox, you can now have the SSL certificate for your custom domain managed by CloudFlare. This feature is offered for all plans. Alternatively, you may also use your own SSL certificates as well.
Note: You will not be able to access your account using the mobile app until you install SSL on your custom domain.
-
You can choose the required SSL Certificate by choosing one of the following values

Managed Certificate powered by Cloudflare
For a hassle-free SSL experience, HappyFox offers a Cloudflare-managed certificate option. Here's what you need to know about this feature:
-
Automatic Management
-
SSL certificates are automatically managed by Cloudflare
-
Certificate renewals are handled automatically by HappyFox
-
-
Availability
-
This feature is available on all HappyFox plans
-
It's offered as a standard service by HappyFox
-
-
DNS Considerations
-
If your authoritative DNS has CAA (Certificate Authority Authorization) records, additional configuration may be required
-
In such cases, please contact [email protected] for guidance on necessary DNS changes
-
Key Benefits:
-
Simplified SSL management
-
Automatic certificate renewals
-
Available to all HappyFox users regardless of plan
This option is ideal for users who want a streamlined, low-maintenance approach to SSL certification for their custom domain.
Custom SSL Certificate
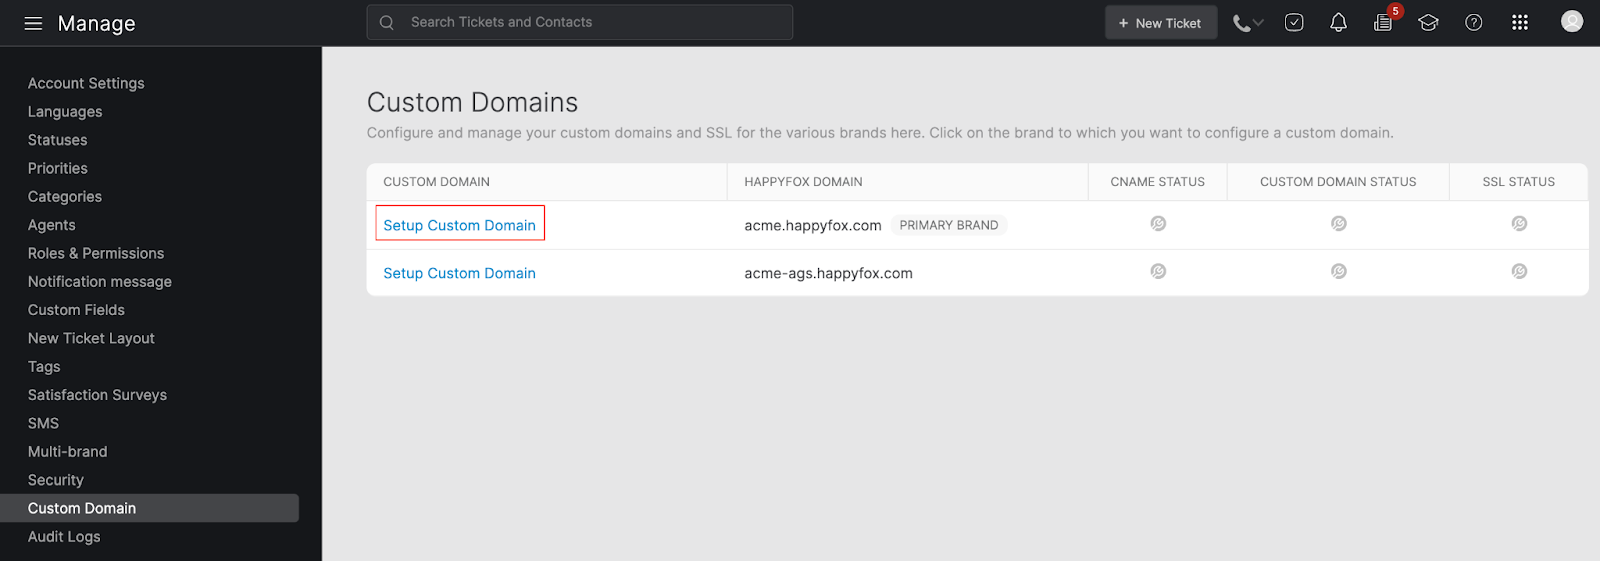
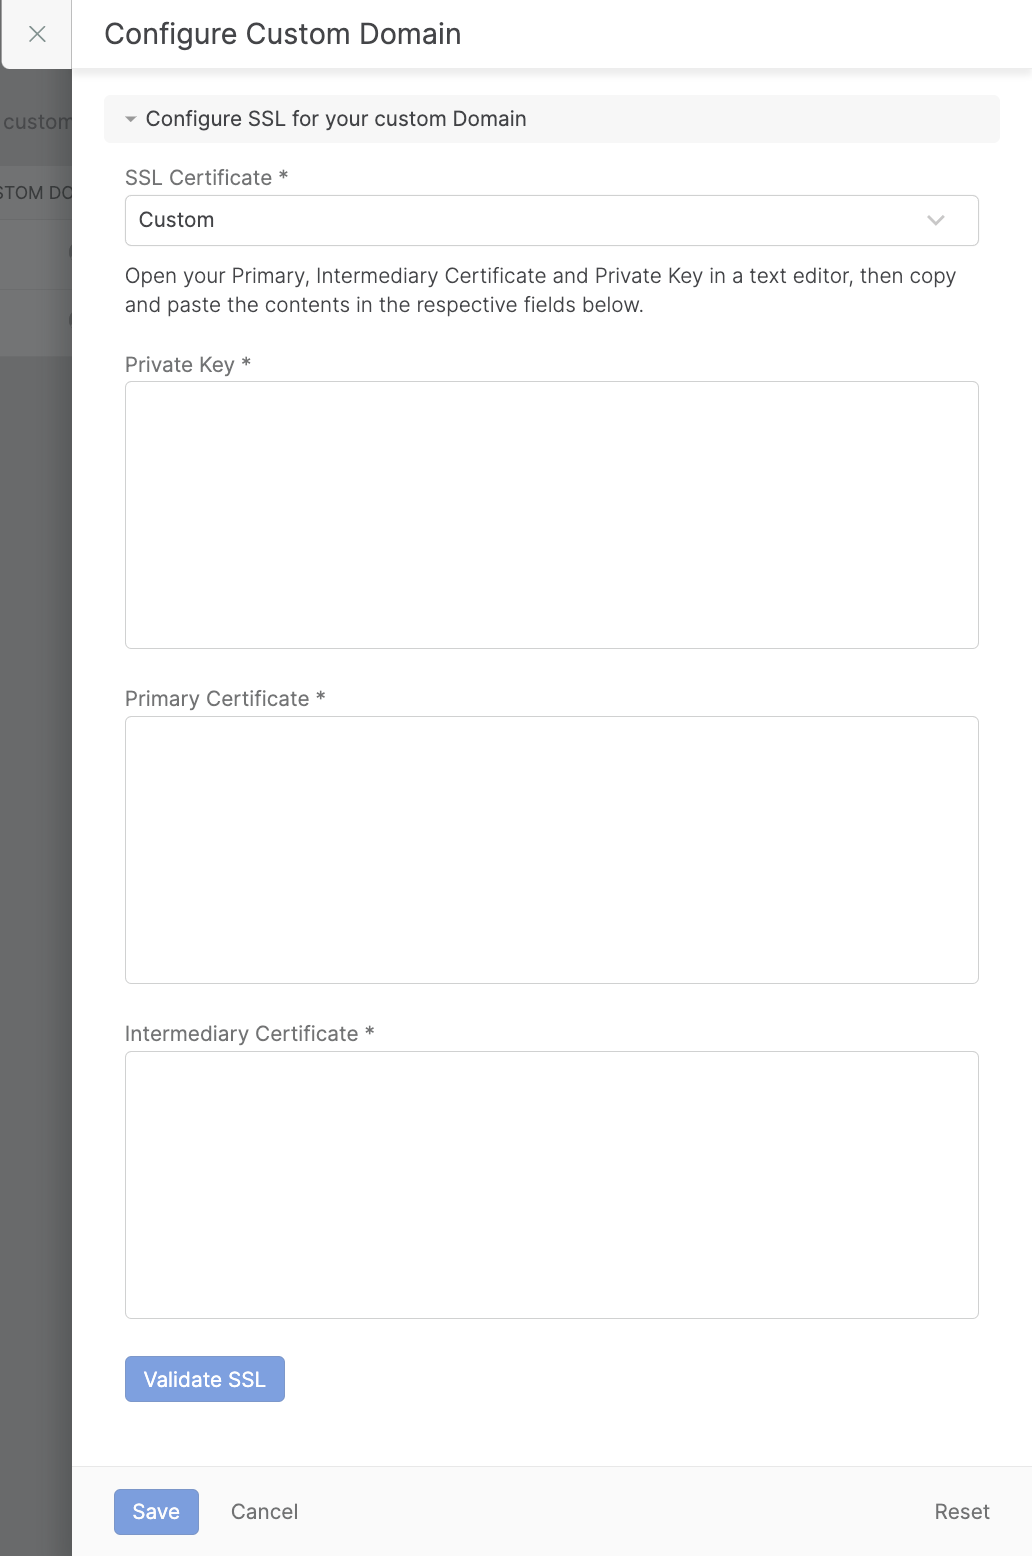
For users who prefer to use their own SSL certificates, HappyFox provides the option to upload custom certificates. Follow these steps to configure your custom SSL:
-
Prepare Your Certificates
-
Ensure your certificates are in .pem format
-
You'll need three components: a. Private Key b. Primary Certificate c. Intermediate Certificate
-
-
Note: The private keys must NOT be encrypted. If you received an encrypted SSL key, decrypt it before pasting.
-
Obtain SSL Certificate
-
You can purchase a certificate from any reputable SSL vendor (e.g., GoDaddy, Verisign, RapidSSL)
-
When prompted during purchase, set the server type as Apache
-
-
Upload Certificates
-
Paste each certificate component into its respective box in the HappyFox interface
-
-
Verify Certificates
-
Click "Validate SSL" to verify your certificates
-
The system will validate your SSL Certificate
-
-
Enable Custom Domain
-
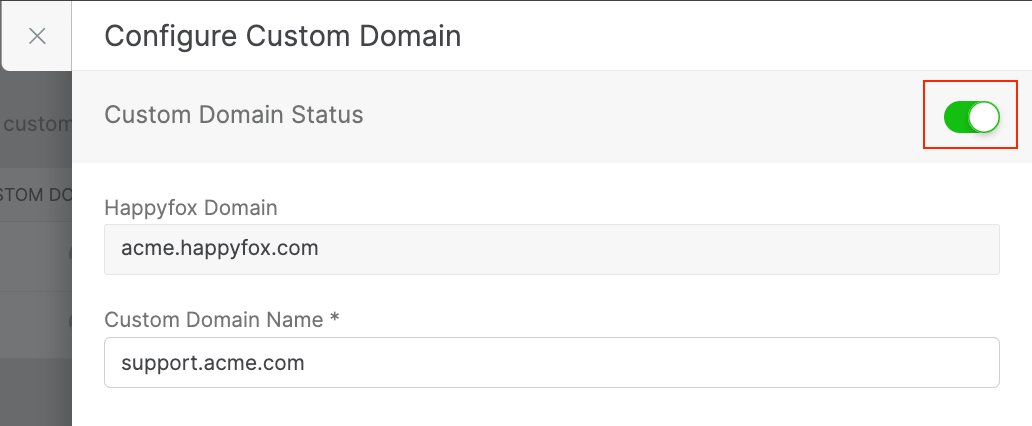
Switch on the toggle below to enable the Custom Domain
-
-
Save Configuration
-
Click "Save" to complete the custom domain configuration
-
-
Important: The "Save" button will only become active after:
-
Successful CNAME verification
-
SSL Certificate validation (for custom SSL certificates)
-
Troubleshooting and FAQs
- I am getting errors while doing CNAME verification. What should I do?
If you haven't setup CNAME record on your DNS provider's control panel to point to the happyfox domain (<accountname>.happyfox.com.
- Validation fails for custom SSL Validation. How can I fix this?
Here are some possible reasons for SSL failure.
-
Certificates not in .pem format
-
Private key is not valid
-
Primary Certificate doesn’t match with private key
-
Intermediary Certificate doesn’t match with primary certificate
-
Primary Certificate doesn’t match with custom domain
-
Primary Certificate has expired
- Is SSL certificate mandatory for custom domains?
Yes, SSL certificates are mandatory for all websites. The browsers – led by Google and Mozilla – have mandated all sites be served with encryption via HTTPS. To accomplish this transition the browsers have created new security warnings. A Secure/Not Secure binary that labels sites based on their SSL implementation.


