
 511
511
The SignNow integration with HappyFox Workflows allows you to automate and streamline your document workflows by connecting eSignature capabilities to your business processes. Whether it’s sending documents for signature, tracking completion, or managing document metadata, this integration helps you build end-to-end automations involving contracts, HR documents, approvals, and more — all from within your workflow builder.
Applicable Plans: ✔️ Basic ✔️ Team ✔️ Pro ✔️ Enterprise
Triggers:
-
User Document Signed
-
User Document Group Signed
Actions:
|
|
|
|
|
|
|
|
|
|
|
|
Prerequisites:
Plan:
-
Supported on all HappyFox plans.
-
API access must be purchased separately from SignNow, unless your subscription includes it.
Permissions:
- Your SignNow user must be an Admin with Access Token’s access.
Use Case:
- Sales Operations: Automatically send proposals or agreements for signature when a CRM status changes or a deal is closed.
- HR Onboarding: Trigger employee contract or NDA documents to be sent when a new hire is added to the system
- Multi-Signer Coordination: Group documents and send for bulk or sequential signatures based on approval flows across multiple apps.
- Document Tracking: Get notified and trigger follow-up tasks or Slack messages once documents are signed.
Setting Up the Integration:
Step 1: Get Your SignNow Client ID and Auth token
-
Go to your SignNow account.
-
In the left sidebar, click the plug icon (Integrations), then click Add Application.
-
Provide a name, select Live Mode (avoid Development Mode unless you're testing – it adds a watermark).
-
Copy the Client ID and Basic Authorization Token
Step 2: Add SignNow to HappyFox Workflows
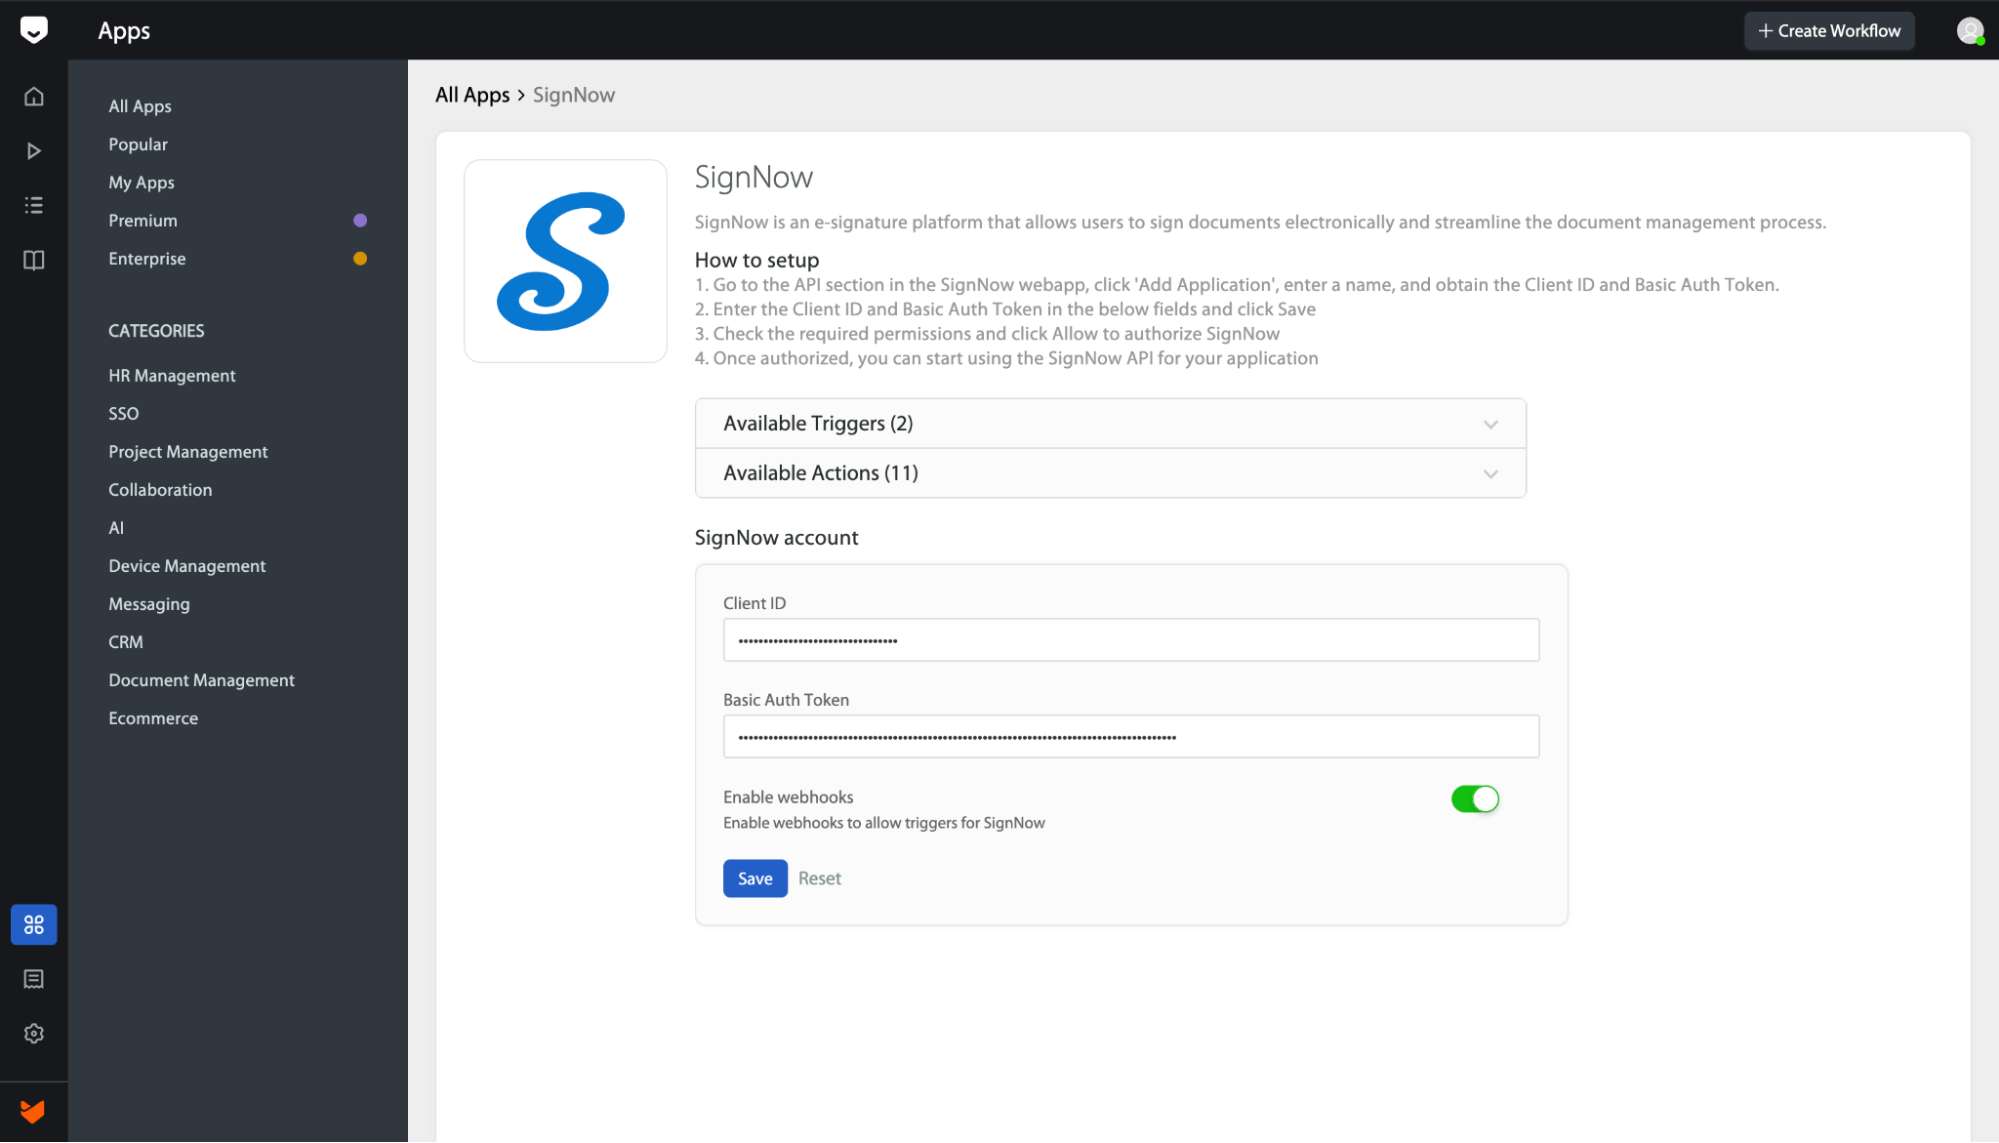
-
Ensure both Signnow and HappyFox Workflows are logged in using the same browser session.
-
Navigate to the Apps section in HappyFox Workflows, Search for SignNow and select it.
-
Enter your SignNow Client ID and Basic Auth token.
-
Enable the webhook now if you want to receive triggers from SignNow. (Note: This option cannot be enabled later. If you skip it now, you'll need to repeat the entire setup process.)
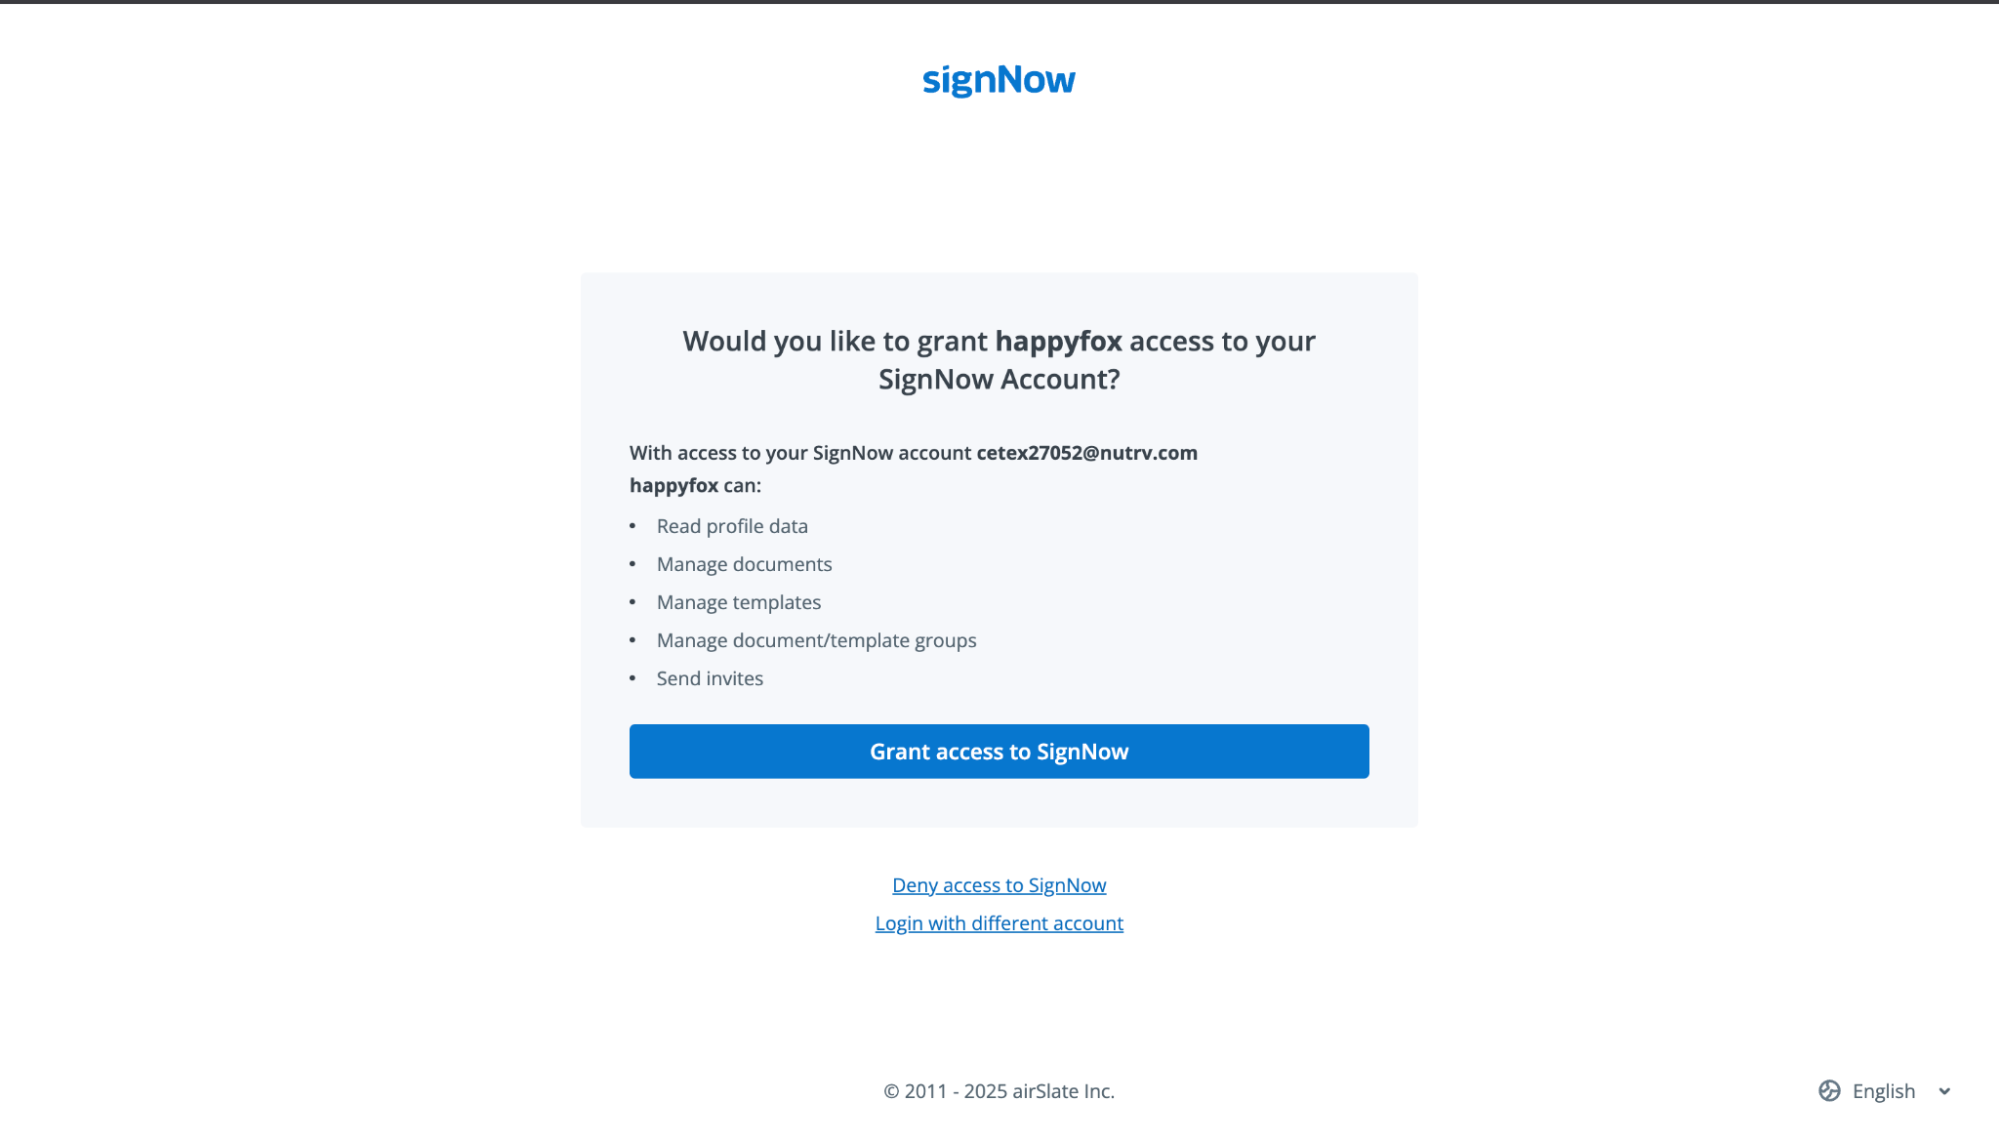
-
Grant access when redirected to the SignNow authorization page.
Frequently Asked Questions:
- I forgot to enable webhook. How do I fix it?
Unfortunately, webhook activation must be done during the initial setup. To enable it, you’ll need to remove the integration and repeat the setup process with the webhook option enabled.

