Using filters, agents can drill down the incidents in a specific queue to match certain conditions based on their need and use cases.
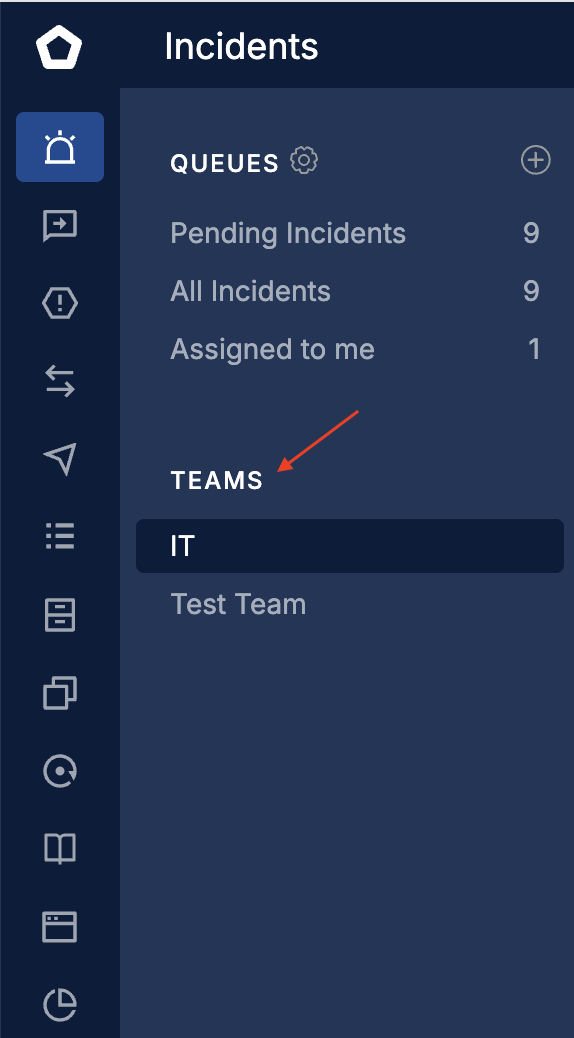
Team filter in the Left Panel
-
Team filters will be available in the left panel of the incident listing page below the Queues.
-
This will help the agents to quickly navigate between the various teams' incidents easily and quickly.
-
The teams to which the agent is part of will be displayed here.
-
Clicking on a team in the left panel, will display ONLY the incidents assigned to the respective team.
-
When a team filter is selected in the left panel, the Team name will be the Title of the Listing page at the top.
-
Team filters are built in with the listing pages and cannot be customized or disabled.
Set up Custom Filters
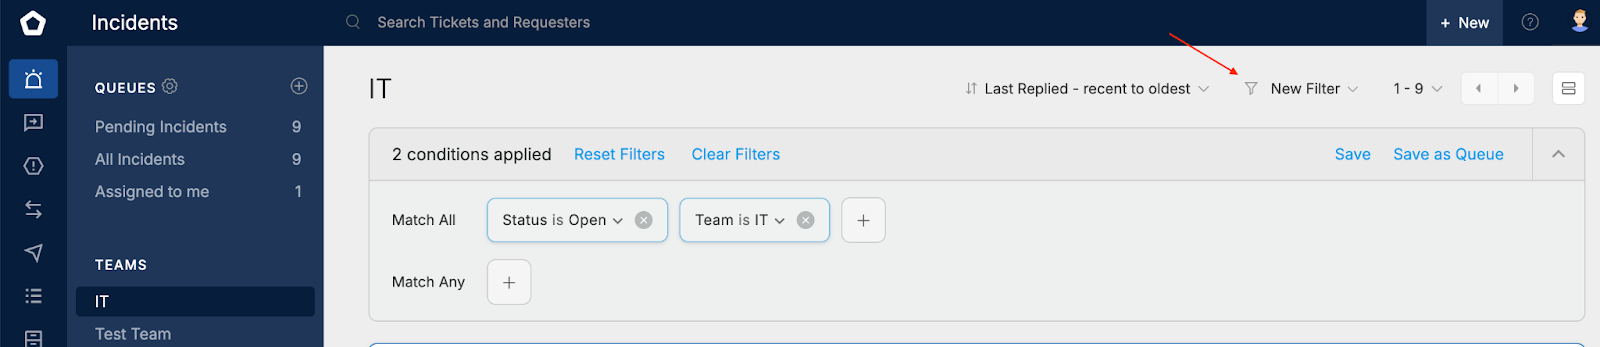
This will allow you to filter the incidents in a specific queue, based on a certain condition or a combination of conditions depending upon the agent's needs.
-
Navigate to the Incidents module this will load the Incidents Listing Page (default queue).
-
Click on the New Filter drop component on the top right.
-
This will expand a a filter section below where you can specify the filtering conditions under Match All or Many Any
- Define the conditions on how the incidents should be filtered
- When you click on the + button, attributes for defining the conditions will be available in the dropdown.
- For Match All, ALL of the conditions specified need to be TRUE to filter the incidents
- For Match Any, at least ANY ONE of the conditions specified need to be TRUE to filter the incidents.
-
Once the conditions are specified click on Add
-
The incidents will be filtered and displayed in the listing page.
Save frequently used filters
Support Agents work on incidents day in and day out and there may be a number of occasions in which the agent may use the same filters frequently. In order to perform this effectively service desk offers a easy way to save the filters.

-
You can save a filter by clicking on the Save button once the filtering conditions are specified.
-
This will prompt you to specify a name for the filter.
-
Once saved, you will be able to find the saved filter under the New Filter dropdown.
-
You can now use the saved filter anytime to filter through the incidents queue.
-
You can also combine it with other filters if required.
Reset Filter - Will remove the filter conditions specified (in both Match All and Match Any) and reset the incident ticket listing to the latest queue.
Clear Filter - Will remove the filter conditions as well as hide or clear the filtering area.
Filtrering Conditions
You can filter the incidents using conditions based on,
-
Standard incident field properties
-
Custom fields
-
Time based properties