

 245315
HappyFox allows sending outgoing emails through your own mail server's SMTP. However, when using Office 365, you may have to configure an SMTP relay on your mail server's end for it work correctly.
Follow the below steps to set this up:
Step 1: Log in to your Office 365 tenant, open the Exchange Admin center and click Mail flow, and click Connectors.
Step 2: Click the “+” symbol to create a new connector.
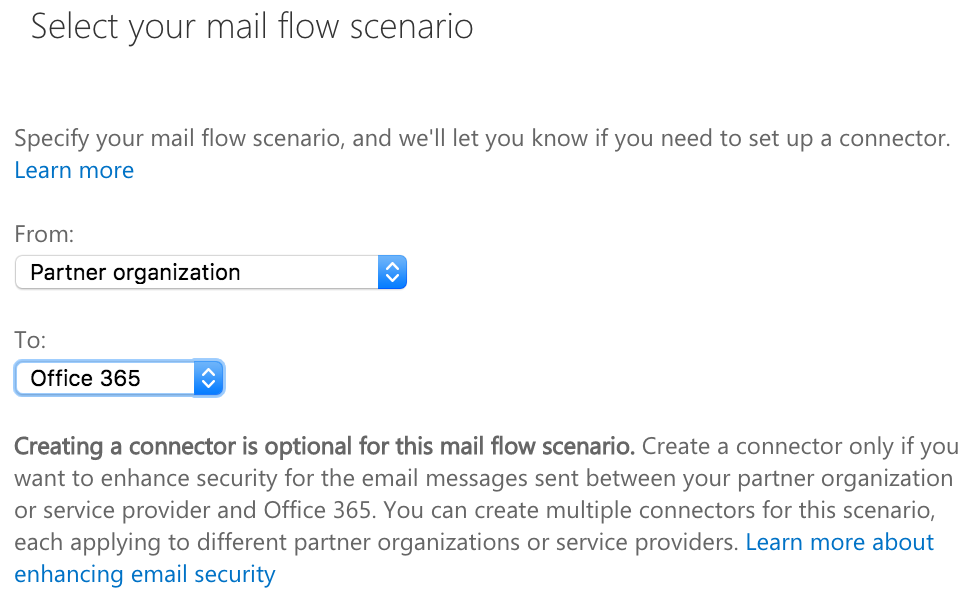
Step 3: Under Select your Mail Flow Scenario, set the "From" field as Partner Organization, and the "To" field as Office 365. Click "Next" to proceed.
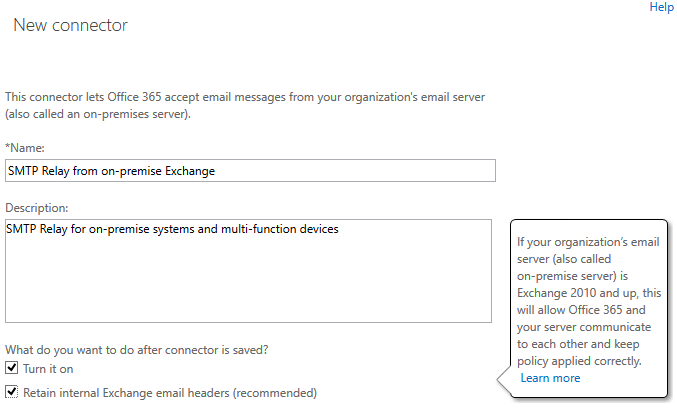
Step 4: Give your relay connector a Name and a Description as required. Let the Turn it on and Retain internal Exchange email headers options remain enabled, and click "Next".
Step 5: Under "How should Office 365 identify email from your email server", select the second option, and click the “+” symbol to add the HappyFox NAT IP address.

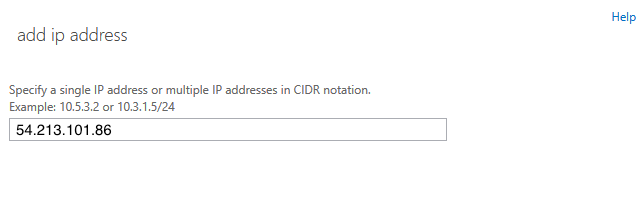
Step 6: Under "add ip address", enter the HappyFox IP addresses -
54.213.101.86, 54.213.101.90, 54.218.238.220,
54.187.103.206, 54.200.182.110, 52.40.203.205,
54.200.5.133, 52.89.177.132, 52.39.127.104,
34.223.183.171, 54.185.198.195, 54.185.51.55,
54.214.75.131
, and then click "OK" to add it.
Once all the IP addresses are added, click "Next" to proceed.
Step 7: A summary for the relay connector will then be displayed; click "Save" to create it.

